Making It Pop in Aperture with the Mid Contrast Slider

I’ll bet many users don’t even know this adjustment slider exists, and if they do, they may not appreciate it’s powerful capabilities.
The Mid Contrast slider is buried in the Advanced drop down menu inside the Highlights and Shadows adjustment brick. Moreover, it’s one of five seldom used sliders. I think it’s fair so to say this a “hidden” feature of Aperture. Well folks, you get it here first for the low low price of free!
Okay, you’re not really hearing it here first because Joseph talks about it in his Live Training videos [Session 009] and I’ve written about it elsewhere… but it is free!
The best I can describe what it does is to say it adds contrast back into an image while still maintaining a degree of shadow detail that lost contrast after the Shadows slider was applied. Essentially, it makes an otherwise flat image pop while still retaining shadow detail.
In typical user manual fashion, the only thing it says about Mid Contrast is this: “Sets the amount of contrast in the midtones”. That’s not very descriptive and is one of the reasons it’s not well known. That’s also one of the reasons this site exists!
Using the Mid Contrast slider
First make sure you have an appropriate image. It’s not going be something you want to apply to every photo in your library, but it does help many different kinds of images.
Make sure you can see your Highlights and Shadows adjustment brick, then click the drop-down arrow that says Advanced. That reveals five more adjustment sliders; Radius, Color Correction, High Tonal Width, Mid Contrast and Low Tonal Width. We are going to concern ourselves with the Mid Contrast slider — the others don’t make much of a difference.
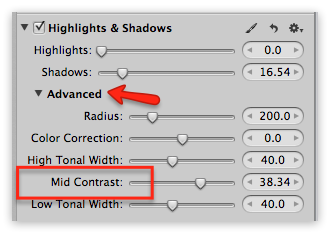 Highlights & Shadows adjustment brick with Advanced adjustment sliders exposedFirst, slide the Shadow slider to the right. Don’t go too far; just enough to open up the shadows a bit. You don’t want them turning “chalky”.
Then, carefully move the Mid Contrast slider to the right until the blacks are black but you can still see into the shadow. You don’t want to go so far to the right that it blocks up the shadows completely. This part takes a little finesse; you may have to back off the Shadows slider a touch to get it right.
What you’ll notice is the shadows will still have detail, but also look dense without the chalky-flat look.
Also, it acts in a similar fashion to the Definition slider with regard to the edges. For this reason, you might want to be careful with the Definition adjustment. If taken too far in conjunction with Mid Contrast, it’ll look like a really bad HDR image.
Don’t forget that you can also brush in the Highlights and Shadow adjustments like I did below.
Here’s the before photo right out of the camera:
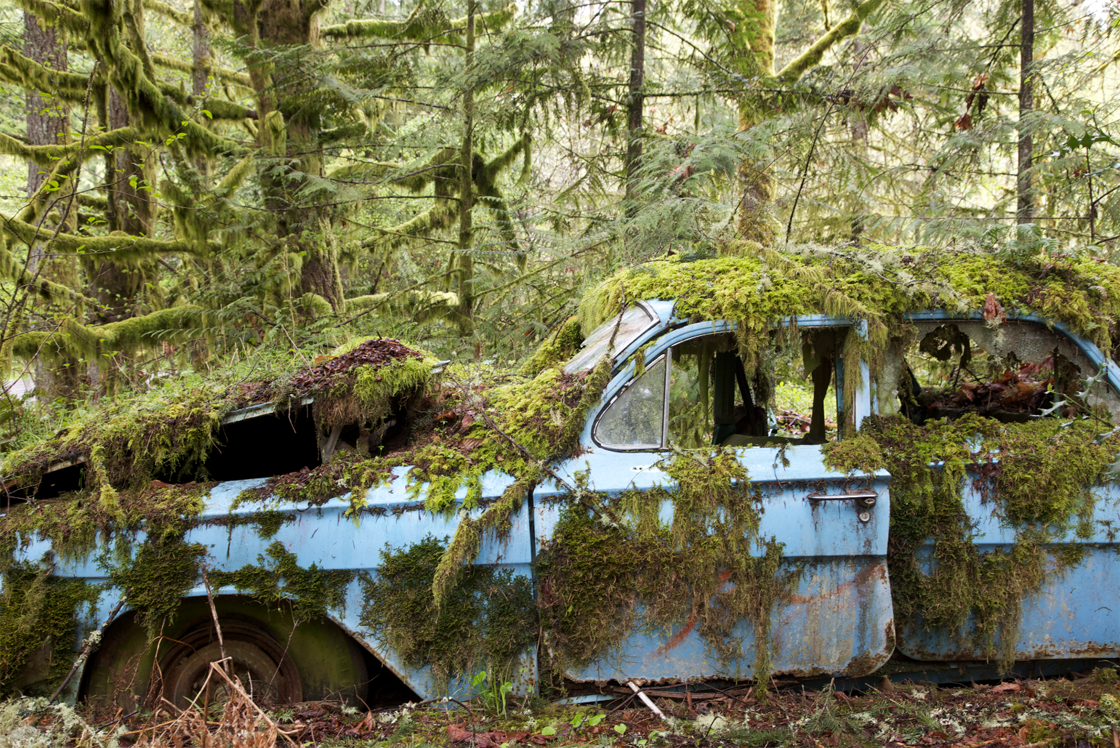 Original photo with no adjustments
 Photo with minor Curves and Color adjustments
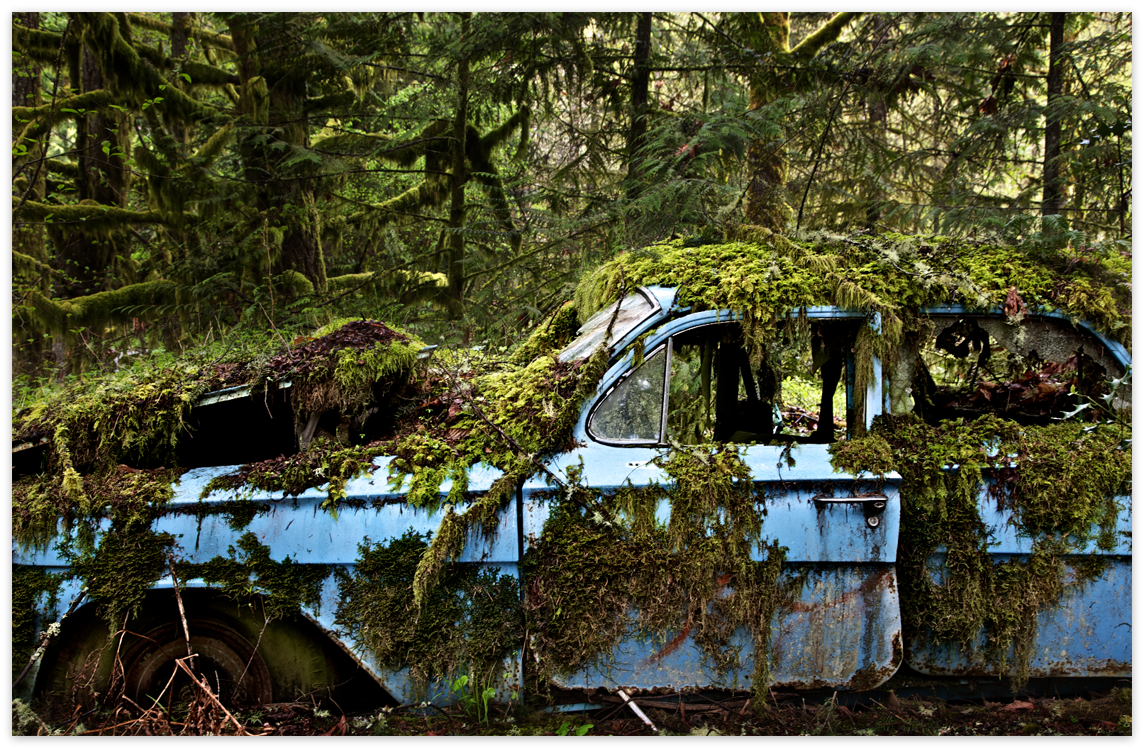 Photo with brushed-in Curves, global Color adjustments, and brushed-in Mid Contrast adjustmentThat’s all there is to it. Mid Contrast has the power to make a dramatic difference.
More like this
- Tip
- Forum
- Forum
- Tip
- Forum
Comments
on April 30, 2012 - 6:44am
Had no idea this slider existed. I’m sure I could have used it many times and will definitely keep it in mind during future edits! Awesome!
on April 30, 2012 - 7:33am
Do you think this slider might be the analog to Lightroom’s Clarity slider? Everytime I see a Lightroom demo online, it seems it’s “Clarity this” and “Clarity that”, and from what I could tell it’s just a specialized mid-tone contrast tool.
on May 1, 2012 - 5:29pm
Just tried the Mid Contrast slider and applied carefully. I think we can “overuse” its easily, so I apply moderately. I remember it form the past, but did not use it.
No idea, if this is similar to the Clarity slider in Lightroom, bit that reminds me on the Clarity filter at Camera+ (iPhone app), which I like a lot.
Thanks for the reminder, Thomas!
on May 2, 2012 - 4:28pm
@John Burridge: The clarity slider in Lightroom is similar to the definition Slider in Aperture. This one is different, and similar to the Highlights/Shadow function found in Photoshop.
on May 12, 2012 - 11:52pm
I discovered this slider some time ago, and it is one of the most important parts of my workflow. It is possible to overuse it, but used with discretion I’ve found it to be perhaps the single most useful way to improve an otherwise bland-toned image.
Frank Kurzawa
on August 20, 2012 - 11:05am
what version are you using? I have 3.3.2 and when I look at highlight and shadows sliders, it looks different. First the eye dropper on top line not present.
Second, i have only three sliders, highlights, shadows and mid contrast but I DO NOT HAVE the advanced drop down with all the other sliders… Please advise
thanks
on August 20, 2012 - 12:22pm
The newest version of Aperture updated the “Highlight/Shadow” adjustment brick combining the older version into 3 sliders.