A Quick Tour Of ON1 Photo RAW
Straight Outta Portland
ON1 has released their long anticipated photo editor, ON1 Photo RAW [more info]. It's very capable and wicked fast. Really… it's crazy fast. Let's have a quick look at the main modules used to manage and develop photos.
The Browse Module
The Browse module does what its name suggests – browses photos on your hard disk. Unlike cataloging software like Lightroom, Capture One or Photos, there is no import process in Photo RAW. You browse to a folder of images and start working. In the background, Photo RAW scans photos in the selected folder, reads metadata and generates previews. I've thrown folders with hundreds of ~36MB RAW files at it and the thumbnails are rendered in a second or two.
 ON1 Photo RAW - Browse
The left panel is where you browse for your photos. You can also apply basic Filters to the currently selected folder to zero in on a subset of images. A folder of photos can be named an “Indexed Folder”. Photo RAW continually watches your Indexed Folders for changes and updates its internal database as the contents change. Browse also supports Albums and Smart Albums. Albums are curated collections of photos. Smart Albums are rule driven collections of photos. Smart Albums only work on Indexed Folders.
It's in Browse that you manage your photo metadata, too. Photos can be rated, color labeled, keyworded and so on. The keyboard shortcuts are very Lightroom-like. On the right side, you can modify all the standard IPTC fields, as well as read EXIF data.
The Develop Module is for RAW
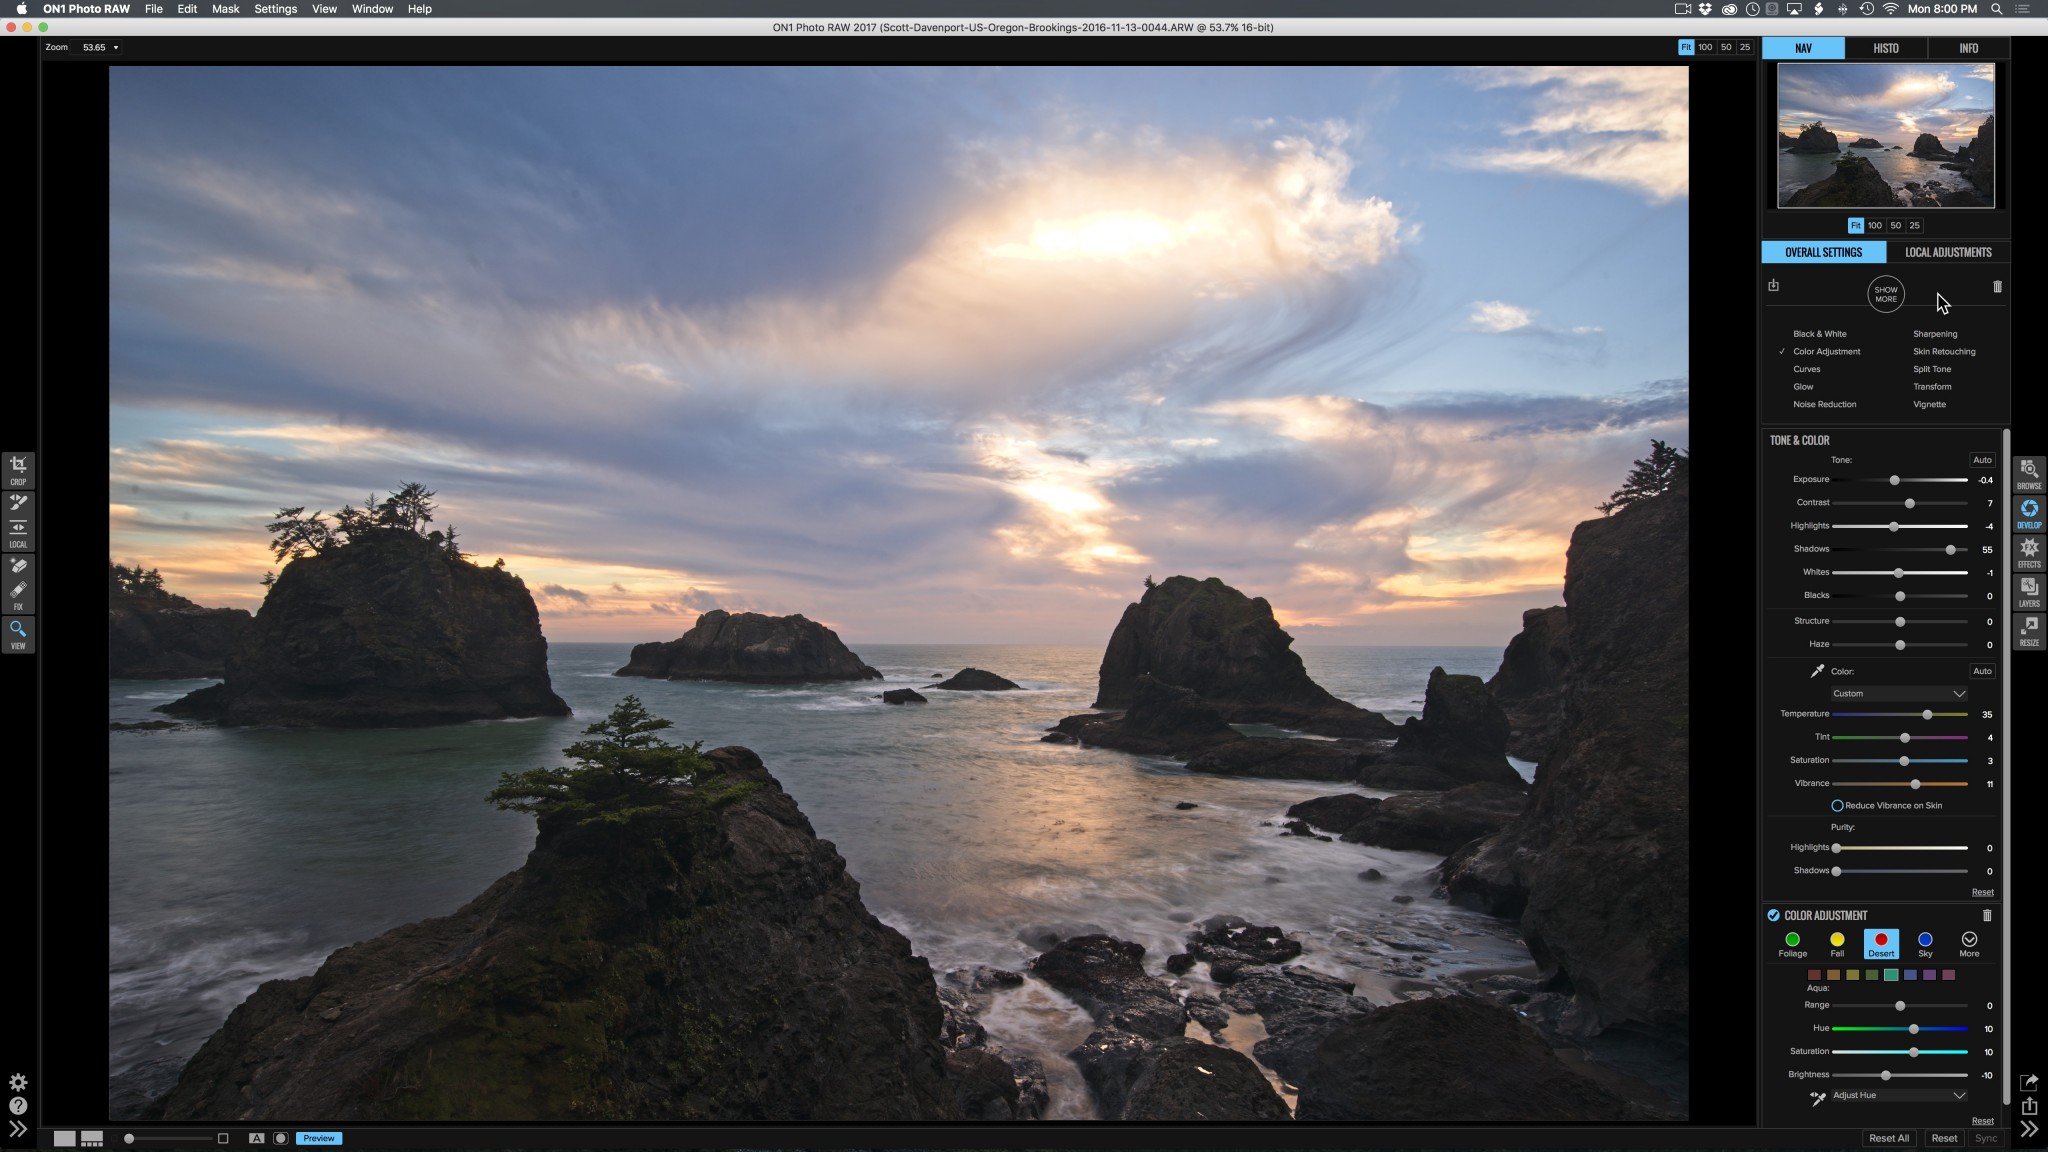
The Develop Module is new in Photo RAW. All your basic adjustments to a RAW file are done here. The Tone & Color panel has the fundamental adjustments such as Exposure, Contrast, Highlights & Shadows, Black & White Points and White Balance.
 ON1 Photo RAW - Develop
This module also has 10 other panels to process and style your photo: Black & White, Color Adjustment, Curves, Glow, Noise Reduction, Sharpening, Skin Retouching, Split Tone, Transform and Vignette.
The Effects Module
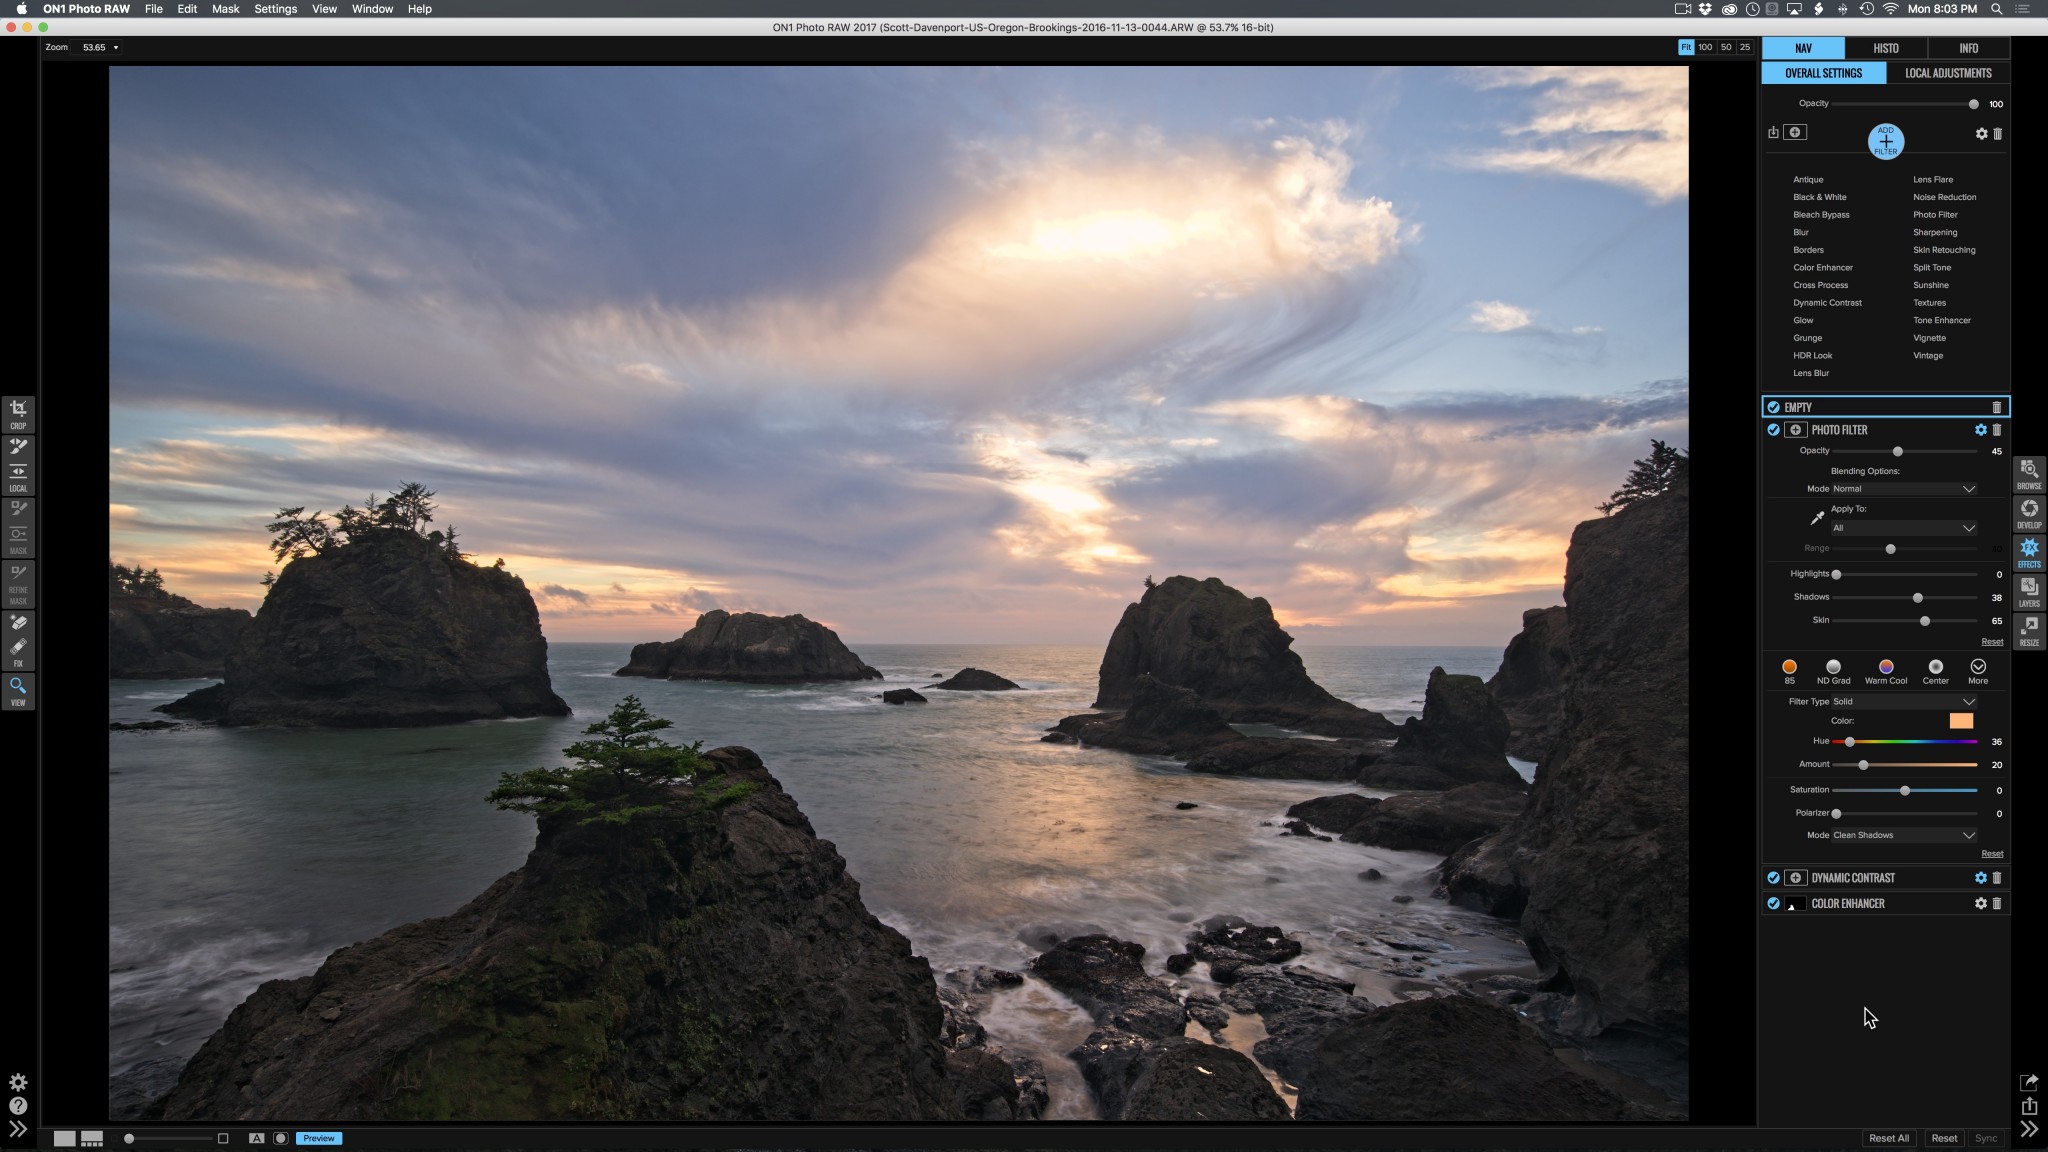
The Effects Module is where you can creatively stylize your photo. You can fine tune what you've done in Develop, or take your image in a wholly creative image with the 23 different filters available.
 ON1 Photo RAW - Effects
How is the Effects module different from Develop? Effects offers more creative filters. Also, you can apply masks and blending options to each Effects filter uniquely. Develop adjustments are global.
And More
You'll have noticed the Local Adjustment tab in both Develop and Effects. This tab allows any number of local adjustments to be applied to your photo. You can use gradient, radial or brushed masks to selectively touch up specific areas of a photo.
ON1 Photo RAW also includes Layers for composite and blending work and the Resize module which works wonders for preparing and upscaling photos for print. The package also works as a plug-in to Lightroom & Photoshop, and as a Photos extension.
ON1 has also published a list of upcoming Photo RAW features. A slew of new goodies is coming in free updates over the next several months.
If you are in the market for a new RAW processor, take a serious look at ON1Photo RAW.
