Cityscapes and the Lighten Blending Mode
Overview
The best time to shoot a cityscape is at dawn or dusk. A compelling cityscape photo has a blend of ambient and artificial light. It's those “civil twilight” hours that deliver the best conditions. However, there are times when the city lights aren't lit up when the colors in the sky are best. With a little planning during the shoot and some a bit of work in a layering tool, you can craft a photo that really pops.
Planning the Shoot
When you're on location, plan to be in a fixed place for at least an hour. If shooting at dawn, get to your location well before sunrise. If shooting at dusk, plan to stay well after sunset. For a great cityscape, you need patience. Patience and a tripod. Find your spot, set up your tripod, fix your composition and they stay put!
You want to capture at least two frames of the same composition. A sturdy tripod is a must. One frame is for great ambient light, usually just before sunrise or just after sunset. The other frame is for the city lights. The lights of the city tend to dim as the sun rises, so capture a frame well before sunrise when shooting at dawn. It's the opposite for a dusk shoot. The city lights don't come on in full force until well after sunset.
Here's an example of a recent shoot I did in San Diego. I was shooting at dawn and the first photo I took has a very dark sky. Quite uninteresting, actually. However, the illuminated bridge and the city lights look great. There are some nice traffic trails, also. I'll call this the “City Lights” frame.
 City Lights: A “dark” frame with just the city lights
Keeping my tripod fixed in place, I waited until the sky began to turn a deep, inky blue. Once the tones in the sky were to my liking, I took a second photo. I'll call this the “Base Image” since it has most of what I want, a good mix of ambient and artificial light.
 Base Image: A frame with a good mix of ambient and artificial light
With these images in the can, a very simple bit of post processing will fuse together the best of both worlds.
The Lighten Blending Mode
The ultimate image is a blend of the pre-dawn artificial lights of the city with the richer colors of the blue hour. Software that supports layering such as on1 Perfect Layers or Adobe Photoshop makes accomplishing this a breeze. In this article, I'm using Perfect Layers. However, the technique applies to any software package that includes a “Lighten” blending mode.
A blending mode is a way for you the photographer to instruct the software how you want one layer to interact with another. The Lighten blending mode is one of these modes. When the Lighten blending mode it set on a layer, it tells the software to display only those pixels that are brighter than the layer beneath it.
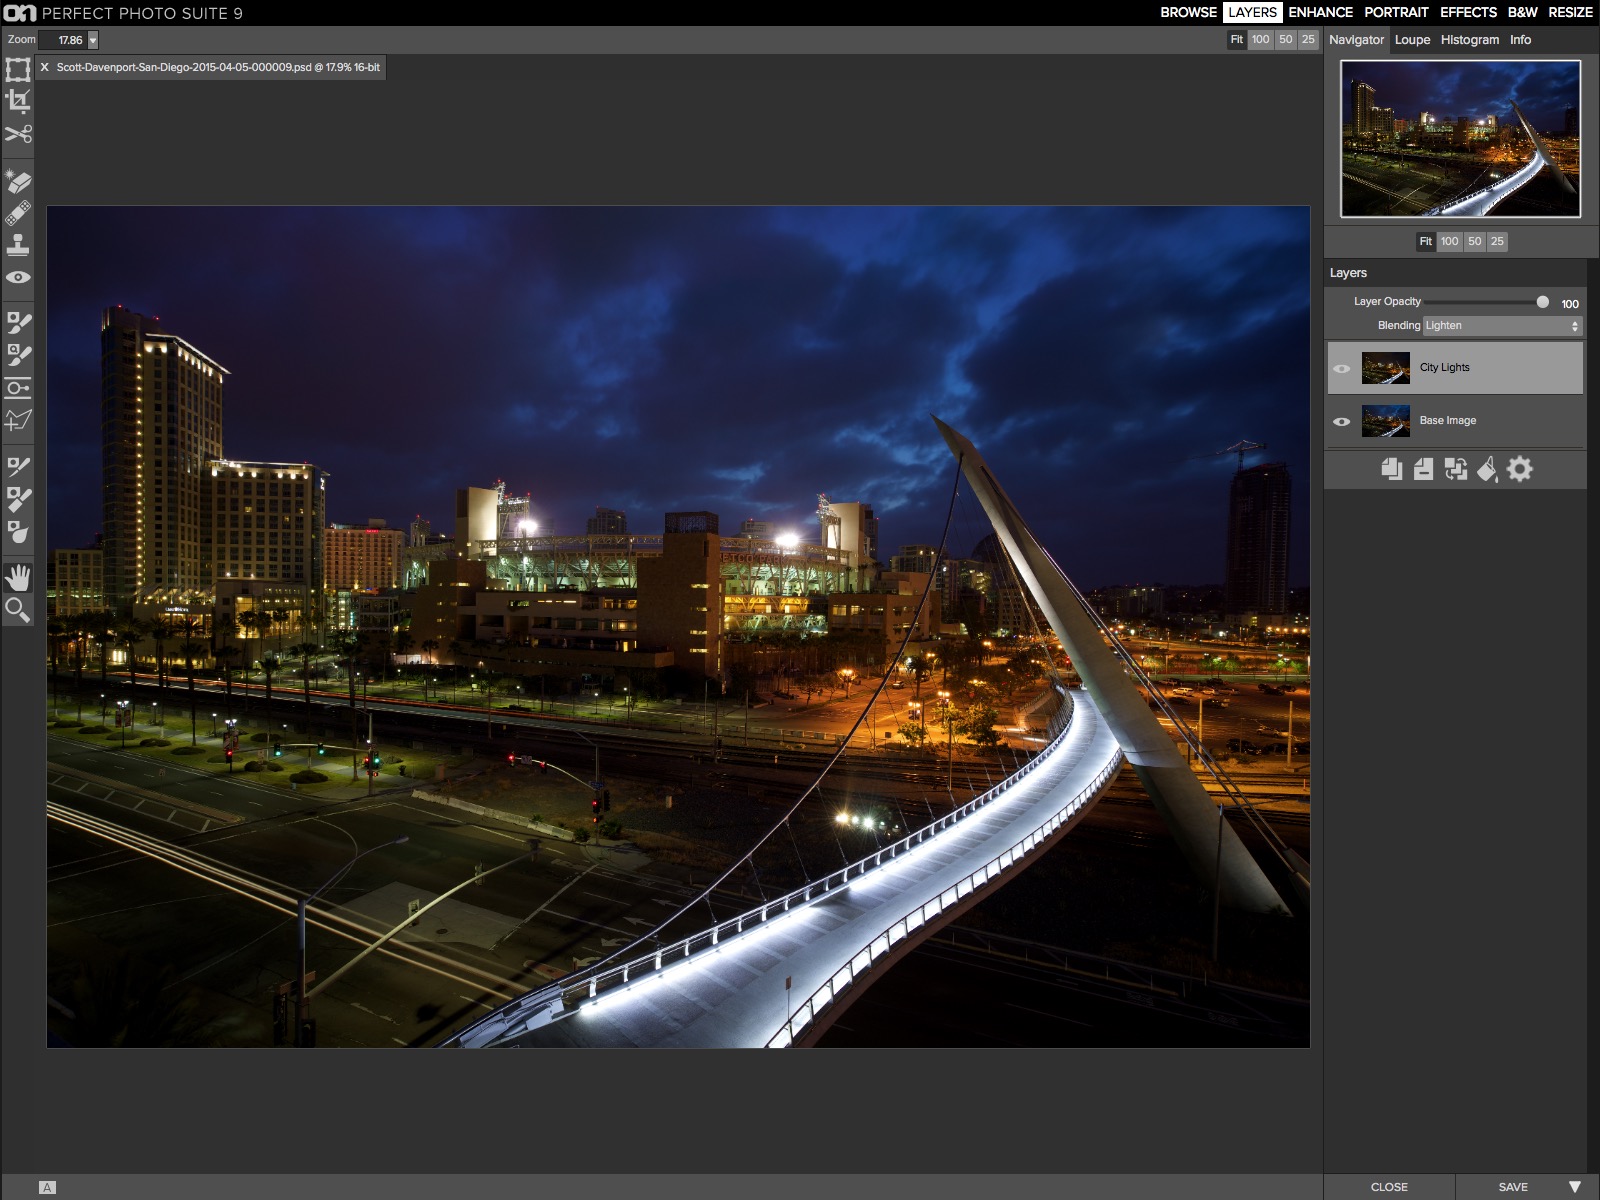
In Perfect Layers (or Photoshop, or your layering software of choice), I load these two images and place the “City Lights” frame as the top layer. Select the top layer and choose the Lighten blending mode. Note I have the City Lights frame invisible in the first screen capture.
 Place the “City Lights” layer on top and set its blending mode to Lighten
Now, when I make the “City Lights” layer visible, the Lighten blending mode means only the brighter pixels in this layer are displayed.
 The “City Lights” layer blended in the Lighten mode with the “Base Image”
Notice the buildings have more illumination, the traffic trails are shown, however the sky remains a nice, inky blue.
Final Image
I took several other images that morning, capturing other traffic trails. Using the same Lighten blending mode technique, I incorporated more traffic trails into the final image.
 Final Image: Several other traffic trails blended with the Lighten blending mode
Consider taking multiple photos on your next cityscape photo adventure and use the Lighten blending mode to bring them all together.
More like this
- Tip
- Tip
- Tip
- Tip
- Tip

Comments
on May 13, 2015 - 2:44pm
Cool!
If you shot at sunrise, could you vary the exposure, shoot multiple pictures and then HDR, or blend together?
on May 13, 2015 - 6:38pm
Hi Bert…
Depends on what you're after. You could certainly bracket for HDR and get more range into the base image. In the shot in the article, that might look cool for the buildings.
For the frames to blend in with the Lighten mode, I'd shy away from overexposed images… they will be brighter and the blend mode might pick up more pixels than you want. You could purposely underexpose to capture only city lights and traffic trails, and blend those frames in.
A good experiment to try (ah… the beauty of digital).
Scott
http://scottdavenportphoto.com/
on May 16, 2015 - 4:30pm
Nice review Scott. Thanks for the tip. I’ll need to give this a try next time I find myself in these situations
Florian
Florian Cortese
www.fotosbyflorian.com