Lift & Stamp the Retouch Adjustment to Clear Sensor Dust
Sensor dust is one of those things that have plagued us all. One of my worst examples of it was when I was shooting the Pokot tribe in Kenya for two weeks, out in the bush, surrounded by dust, dust, and more dust. No matter how careful you are, that crud will make its way to your sensor, and show up on every photo you take (especially if shooting at a wide depth of field).
Fortunately, Aperture makes it dead easy to fix once, and apply to many, using Lift & Stamp. But what you may not realize is that even if the photo has been cropped or rotated, stamping the retouching will still work just fine, because like all Aperture adjustments, it's applied to the source, not to the adjusted image.
Sample dusty files
Here's a couple of photos shot at the same time, but clearly different composition. You can see the big dust spots and that they line up from one shot to the next (red circles), and you can see that these are not the same file as the exposure and even composition is totally different (blue box).
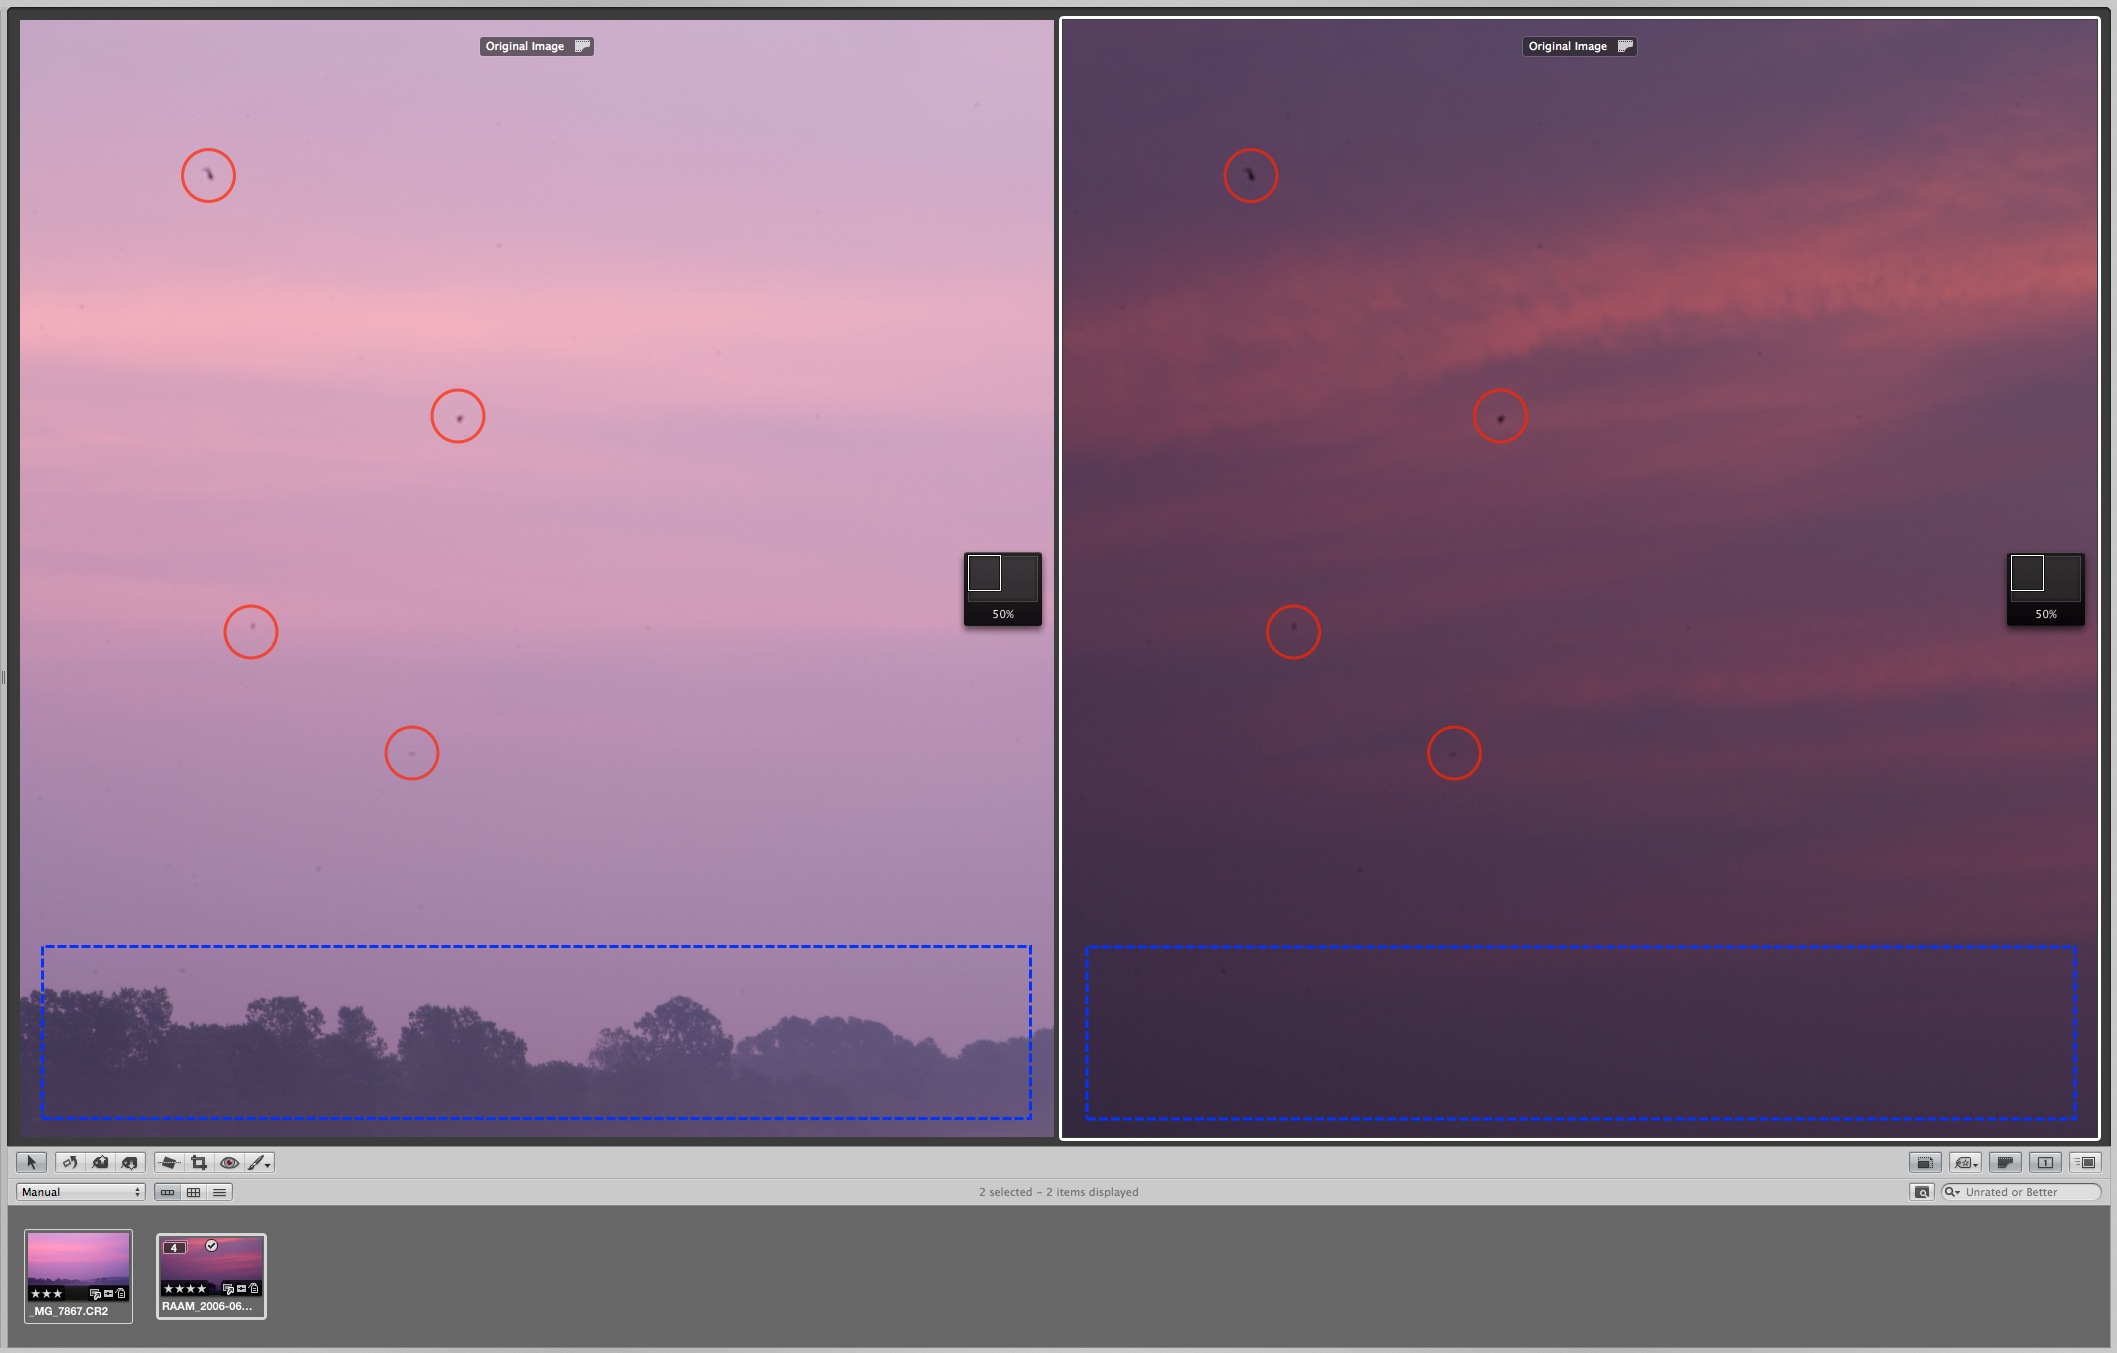 The red circles are showing some of the bigger sensor dust that needs removing, and the blue box just shows that these are in fact different photos
By the way, that's just four of the spots you're seeing above. If you have four spots to fix, then I'm sure it's no big deal to do it individually to images. These photos, however, were in pretty bad shape…
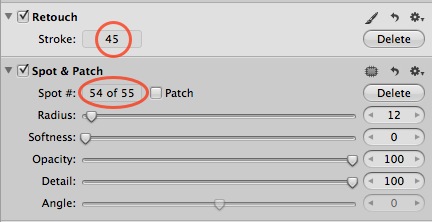 45 Retouch spots and another 55 Spot & Patch—ouch
Yeah… 45+55=100 spots. (I'm not exactly sure why I did some as Retouch and some as Spot & Patch. This image dates back to 2006, so it's likely I revisited it at some point after the Retouch tool was introduced, and did more work the photo). OK, so once retouched, all you have to do to lift and stamp (i.e. copy and paste) these adjustments to another image or series of images. That means with the retouched image selected, you click the Lift button, copying all the adjustments (and rating, IPTC data, etc.) to the Lift & Stamp “clipboard”.
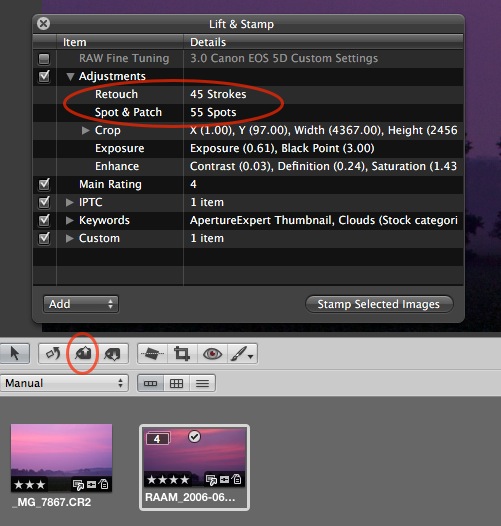 You can lift and stamp any number of adjustments from one image to another, potentially saving loads of retouching time
Then just select the image(s) you want to stamp them too, and click the stamp icon.
It's also worth noting that if you want to not include everything in the stamp, not only can you disable entire categories, but you can delete specific items from a category by just selecting them and tapping the delete key on your keyboard.
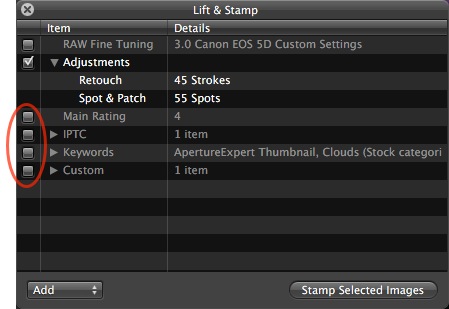 You can disable entire categories (i.e. Rating, IPTC), and select then delete individual components of any category (i.e. Crop, Exposure)
And it works on cropped and rotated images, too
This is quite possibly the coolest part about this. If you have an image that's cropped, rotated, even shot at portrait instead of landscape, this still works!
Here I've cropped the image on the left dramatically, yet as you can see in the before and after, the spots (circled in red) have been removed.
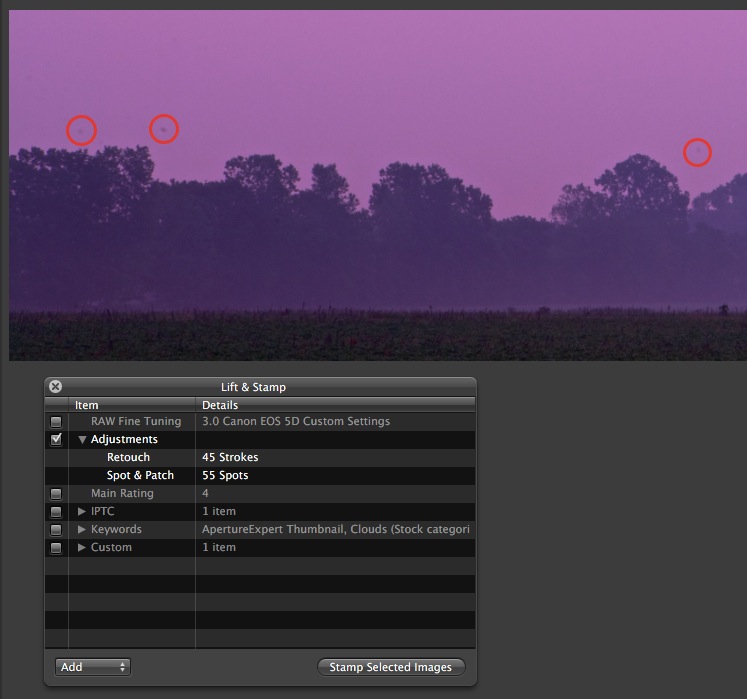 This is an extremely cropped version of the original photo, yet pasting the adjustments onto here will work just fine
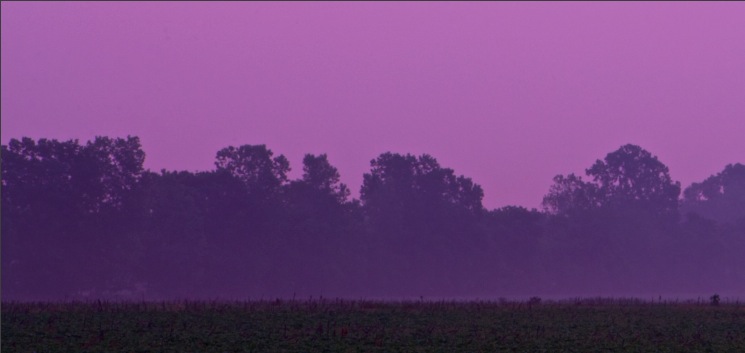 Here’s the image with the retouching stamped into place… nice and clean, as it should be
One thing to watch out for…
In the sample above, with so many spots retouched, or really any time you Lift & Stamp retouching, you will want to take a close look at the stamped files to be sure you haven't stamped out something important. If a sensor spot landed in the sky on one photo, but right on the corner of the subject's eye on another, the retouching may be undesirable. So do pay attention to the result, just in case!
How do you use Lift & Stamp?
Lift & Stamp can be a powerful ally in the war against sensor spots, as well as giving any batch of images the same look you've worked so hard on for one photo.
How do you use the tool?

Comments
on February 19, 2014 - 6:06am
Can you get rid of one bad spot removal or do you need to start over if it lands on someone’s eye?
Thomas
on February 19, 2014 - 11:06pm
Thomas,
Great question. The answer is yes, but it's crappy because you can only delete one at a time starting from the most recent, and there's no indication of what's been removed.
You may find it easier to just start over for that image, or at least to give it a chance, hit delete repeatedly until your offending one goes away, then retouch what's left.
@PhotoJoseph
— Have you signed up for the mailing list?
on June 28, 2015 - 5:13am
Slight variant issue. Have fixed up hundreds of old images scanned but then realised I hadn’t scanned at maximum resolution. So now have to find quick way to apply enhancements to duplicate images that are several times larger. This works fine with stamp for universal enhancements. But is there a way to apply the retouch to the larger image such that it allowed for the size change? Currently the retouch stamp changes a small bottom right section of the larger duplicate. Can I either get Aperture to increase the original scan image to the larger size such that the retouch is in the right place? Or reduce the large image temporarily to capture the retouch changes in the right place? We are talking weeks and weeks of work here. So not relishing manually retouch and cloning. Thanks.