Open in Editor or Plug-in… Again

Scroll to the end for a video version of this tip!
A conversation in the User Forum about a complication with 3rd party plug-ins inspired this post. The reader was having troubles opening a photo into a plug-in a second time, and after some back and forth we resolved the issue and it pointed out what could be argued as a bug or a feature in Aperture 3. Which of course makes it great “tip” fodder ;-)
Editing with a plug-in or external application
Aperture has a fantastic plug-in architecture, with loads of developers making some very cool plug-ins for the app. If you’re short on ideas, head on over to Apple’s Plug-ins page and see what’s on offer.
Since these 3rd party tools can’t make adjustments using Aperture’s own adjustment capabilities (and if they could, we wouldn’t need them!), when you want to edit a photo from Aperture in one of these plug-ins, Aperture has to first render any adjustments you may have already made into a new file, and send that over to the plug-in. The format of the new file is determined in your preferences; you can make it a TIF or PSD, at 8-bit or 16-bit. This new TIF or PSD becomes a new “Master” file (so you can still always, always go back to your original photo). Once you are done doing whatever you’re going to do to the photo and it’s sent back to Aperture, it will have a little “target” icon on it, denoting that it’s been opened in an external editor (this could be an actual application like Photoshop, or just a plug-in—they are the same thing as far as Aperture is concerned).
In the following screenshot, we see a photo that’s been opened in Photoshop. I added some horrible color treatment to it to make it obvious to differentiate here. Believe me, it gets harder and harder to figure out what to do with Photoshop with every release of Aperture!
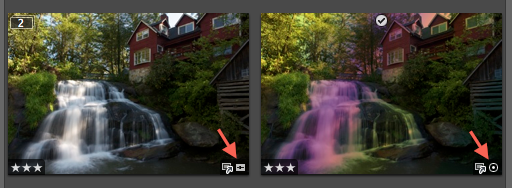 The little “target” logo means the photo has been opened in an external editor
See the slider badge on the bottom right of the first thumbnail? That tells us that some adjustments have been added in Aperture. Then, see the target badge on the second thumbnail—and notice that the slider badge is missing? The target means it’s been externally edited, and the lack of the slider badge means that the adjustments applied in the image on the left were rendered into a new master before being sent to Photoshop.
If you’re confused by what those badges are, check out this earlier post explaining all the icons in Aperture: Badges. Or, “What Are All Those Funny Icons, Anyway?”
Adding more adjustments in Aperture
Now let’s do something else to it in Aperture. Crop is the easiest to see.
 The photo on the right has now been cropped in Aperture
We can clearly see the crop—but look at the badges in the lower right. It has both the target (externally edited badge), and the slider (adjustments-added badge). This tells me that I can still open this file in an external editor—without rendering the Aperture adjustments to it!
Second trip to an external editor
Here’s that photo opened in a second external editor; this time in Silver Efex Pro 2 from Nik Software.
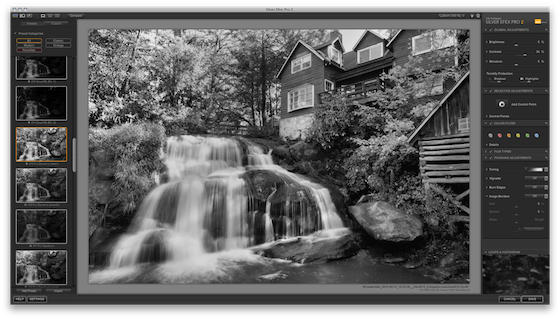 The Aperture-cropped image is opened in Nik’s Silver Efex Pro 2—notice something missing? The crop!
Above we see that second image opened in Nik’s Silver Efex Pro. 2 But wait—what happened to the crop? That’s right, it’s missing. Telling us that Aperture is still sending the master file to the plug-in. So when we hit Save, what are we going to get back into Aperture?
 Hey now… the crop is back!
From the thumbnails above, we see that the crop is back on there. Seems pretty cool, right? Yes and no… there are times when this is very useful. But equally, times when it’s not so great. Imagine if you’d applied a vignette or some kind of edge-based effect on the photo? Now that would be cropped. Let’s see an example.
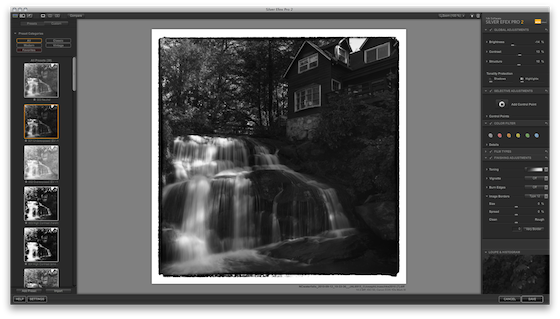
We’ll go back into Silver Efex Pro and add a border to the photo.
 Nice border effect—that’s about to get cropped off!
Above we see the photo with a border added around the (rectangular) edges, applied in Silver Efex Pro 2.
So, we hit Save and send it back to Aperture… the border has been applied around the rectangular photo, but now that it’s back in Aperture and cropped, the border has been cropped, too!
 The border has been cropped because that’s what Aperture’s been told to do.
How do we solve this?
So how do we fix this? Easy. If you want the image that’s already been treated in an external app, and then treated again in Aperture, to be handed off to the next app as a new Master (i.e., with ALL the effects rendered back into it), simply create a new version in Aperture first. I need to go back a few steps here and start over again from the edited-in-photoshop version. Then, it’s option-V… that’s all it takes! Select the image that’s been edited in Aperture, then edited in an external editor, then edited in Aperture again, and make a New Version.
 Option-V is your friend. Make another version!Check out the badges. The third version, on the right, still has the Aperture “slider” badge on it—in fact, you can turn off the adjustment (crop), and you’ll see the un-cropped last version. But the key is… now when we open in that external editor, Aperture no longer sees it as an “externally edited file” (the missing target badge), and will render a new Master to send off—crop and all.
 There we go! The cropped square version is sent to the plug-in, as expected.
Wrap it up
This may seem like a fringe concept, but really it isn’t. One of the first steps in your workflow may be to open the photo in a de-noising plug-in, or a sharpening plug-in, or any other number of tools. From there you’ll want to edit and crop, and finally send it to another plug-in for finishing. Just remember… if you’re not getting the file you expect in that final plug-in, just make a new version in Aperture, and send that to the tool. You’ll be all set.
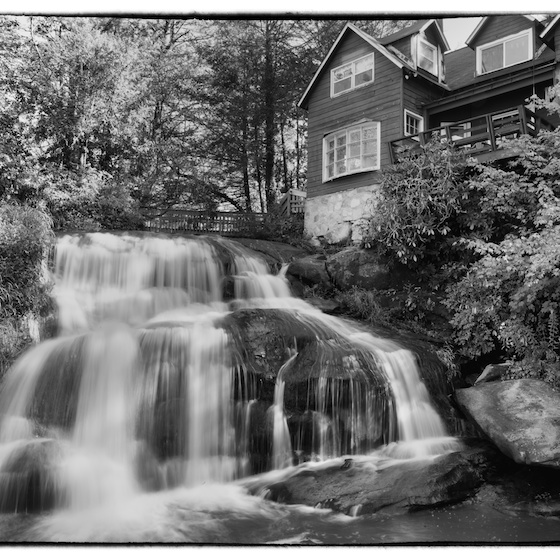
Let’s see something pretty
I feel like I’ve done Nik Software’s brand new Silver Efex Pro 2 plug-in some injustice here by sending some horribly photoshopped image to it, so let’s have a peek at something a bit more nicely treated. It truly is a remarkable plug-in. If you like B&W effects… go get this one now. Click the photo to view larger.
") Pisgah National Forest, Living Waters in North Carolina (click to view larger)
Pisgah National Forest, Living Waters in North Carolina (click to view larger)
Here’s a video version of this tip. Enjoy!
More like this
- Tip
- Forum
- Tip
- Tip
- Tip
Comments
on March 6, 2011 - 12:52pm
One question, I notice that whenever I go to an external editor or plug-in and save it, the file arrives back in Aperture as the original file name and not the new Master name I set. And yes, I did check box, to re-name masters when I did the batch re-name. Help. A work-around?
Steve.
on March 6, 2011 - 7:15pm
Rockin post. I’ll add that what I do now is create an album for the image and put all the versions in it as I’m working. I find that making a new master after every plugin I send the image to helps me revert back t changes or quickly create new versions. Once I’m satisfied with the image, I’ll delete some of the in between steps.
Hope that helps
R
on March 7, 2011 - 4:21am
Steve,
If you did a batch rename, and renamed masters, but didn’t move them at the same time, they may not have been renamed. I’ve seen that happen.
It’s easy to check… go to the Metadata pane, and select the General preset, and look at both the Version Name and the File Name (“file” is the master on the hard drive). Do they match? [screenshot]
-Joseph @ApertureExpert
@PhotoJoseph
— Have you signed up for the mailing list?
on March 7, 2011 - 4:23am
Robert,
Good call. If you end up with loads of versions, it can be easy to lose track.
There’s a preference setting to Automatically stack new versions which used to be the default operation, but at some point (may have been Aperture 3 actually) that option was added and I believe the default is OFF [screenshot]. If it’s not on and you find yourself with lots of loose versions, this can be a great help.
-Joseph @ApertureExpert
@PhotoJoseph
— Have you signed up for the mailing list?
on March 10, 2011 - 10:50pm
One thing I have not been able to figure out, since I switched to Aperture 3 from Lightroom is kinda what you talk about here, but in reverse:
I have a massive back catalogue that I imported into Aperture as referenced files. There are also many .psd files. When I want to open them into photoshop, is there a way to directly open that file (layers and all intact) and not create a new master file according to my Aperture preferences? In other words, how can I add that target badge to an existing master file?