Luminosity Masking for Photoshop (Über Advanced Editing Techniques)

I'm going to kick off the “non-Aperture, non-Photos” posts with something crazy advanced. Luminosity masks are not for the faint of heart, but once you get your head around them, WOW you can do amazing things. I'm not going to try to teach you this stuff — I barely get it myself! — but I am going to point you in the right direction.
What are Luminosity Masks?
You know what a mask is, right? If not, please google it and come back. (This is an advanced post.) A luminosity mask is a mask created not by brush nor by marquee, but by the luminosity of the original image. Basically, using some very clever techniques, you can create a mask that (for example) only selects the darkest dark parts of your image, so you can manipulate those and only those areas. When you create a series of luminosity masks, you end up with something like this in your channels list:
 These luminosity masks in Photoshop can be tedious to create… unless you have the right tools
Once created, you command-click on one of those to load it as a selection, and do any number of things to the image.
What can you do?
You know when you look at a landscape image that has that HDR depth without that HDR feel? An impossible dynamic range that just makes you reach for a tissue to wipe the drool off your chin? That's what you can do with luminosity masks.
It just takes time, and patience. Oh, and a killer photo to start with certainly doesn't hurt!
How do you make them?
You can make luminosity masks by hand. But it's super crazy tedious. The better way is to buy a set of actions called “TKActions”; that TK is for Tony Kuyper. You can buy them from his website directly. The set you want to buy is the $30 “Complete Catalog of all tutorials and actions”. Don't be cheap and buy the one without the custom panel. That thing makes all the difference in using these. But before you buy, read on.
 Here’s just a portion of the TKAction button panel
How do you learn how to use them?
My friend Sean Bagshaw is an epic landscape photographer (anyone who can make a living doing it must be doing something right) and has a series of tutorials on how to use the TKActions for editing images using luminosity masks. You can view Sean's work at OutdoorExposurePhoto.com, and that'll either inspire you or make you want to sell your gear. He's one of “those guys”. He just updated some of his videos using the newest techniques, the latest Photoshop, and a lot of new know-how, and his tutorials sell for just $59. You can get that collection on his site, here. Those videos will utilize the presets, but just to learn the presets, you can get a bundle of both the TKActions and Sean's tutorials here. That's your best deal. You'll want it all, really.
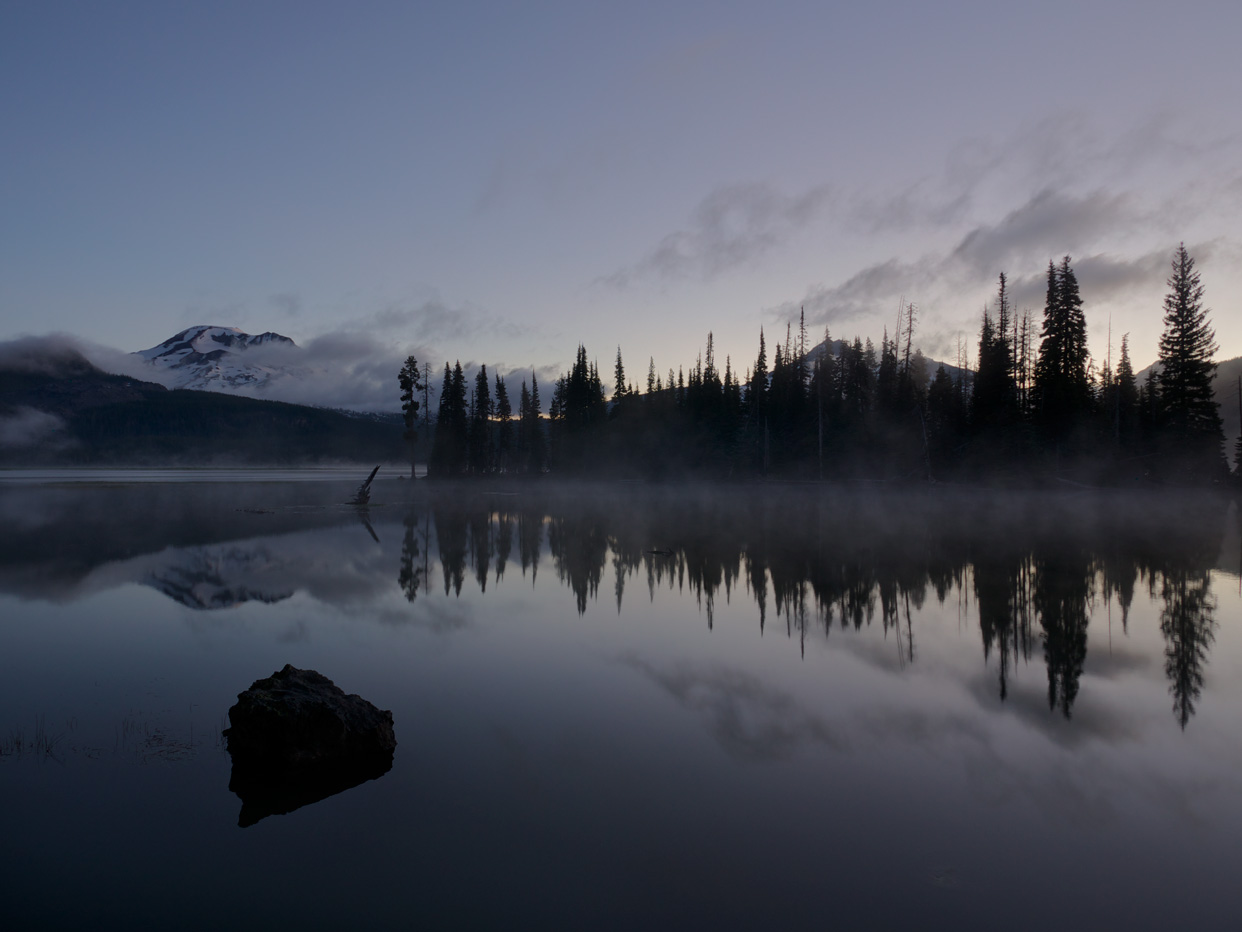
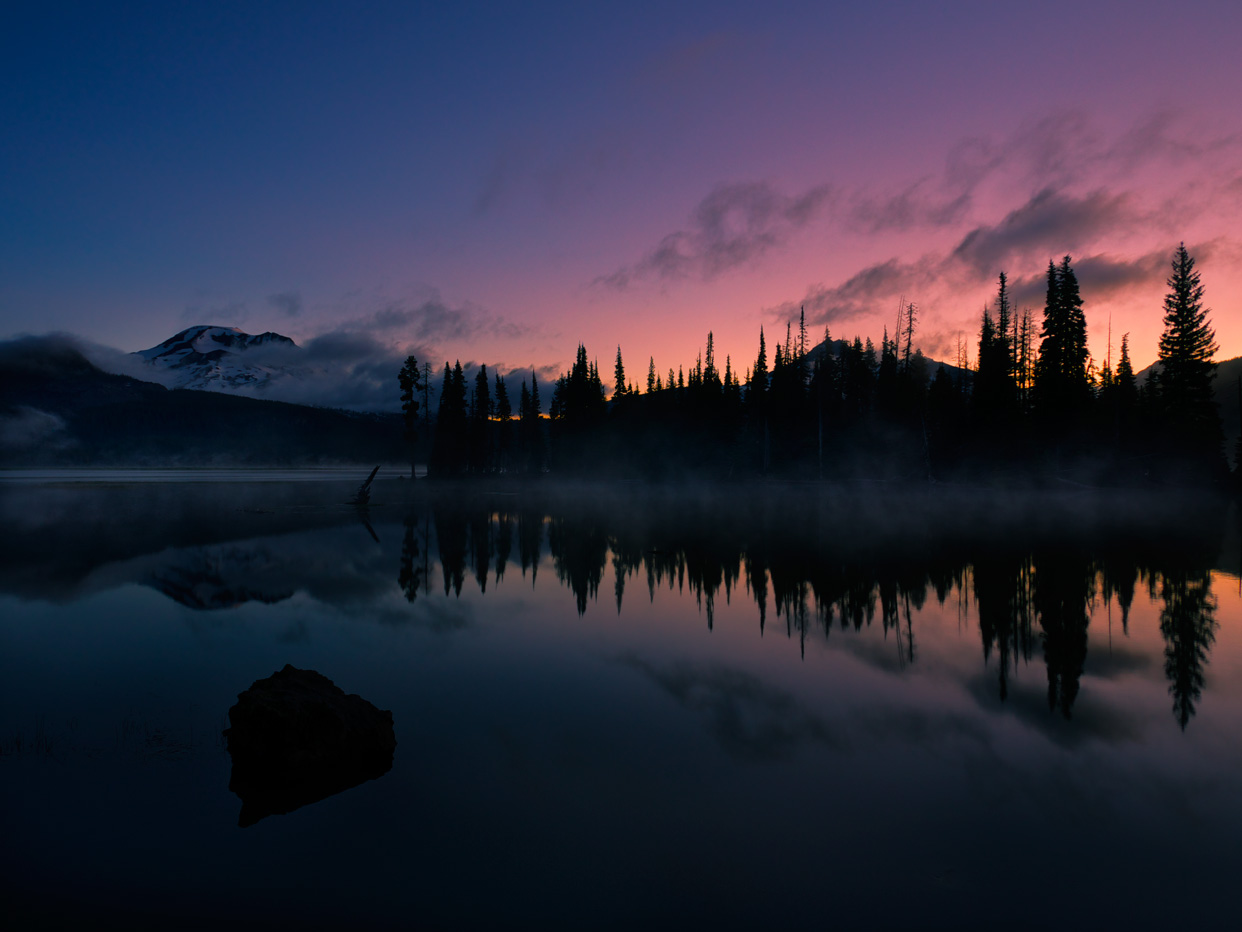
Example, please!
Here's an example of what you can do.
Comments
on February 15, 2015 - 12:48am
Glad you posted this. After seeing it at the Lumix Shoot Anything tour I was wondering about it.
Thomas
on February 15, 2015 - 3:54pm
It’s a lot easier to do this in Darktable. Each adjustment brick allows user to create a parametric mask. What’s a parametric mask? Parametric mask allow users to mask based on conditions such as hue, saturation, RGB channels, LAB channels (awesome for outdoor shoot where you have a lot green leaves and need seperation), etc.
Robert Ke
twitter: rke21
also at:
instagram: rke21
facebook: outdoorphotographynow
on February 15, 2015 - 4:19pm
@PhotoJoseph
— Have you signed up for the mailing list?
on February 15, 2015 - 4:01pm
i’m thinking of migration from OS X and Aperture to Ubuntu and Darktable when I leave Yosemite and Aperture behind. No Lightroom or Capture One Pro for me. I am not getting trapped by any company especially Adobe.
Robert Ke
twitter: rke21
also at:
instagram: rke21
facebook: outdoorphotographynow
on February 15, 2015 - 7:18pm
I’m primarily an Aperture user because that’s where my master library is located. As you know, moving from one workflow to another is rather difficult. With a large library, i’m still wondering the best approach to move forward. When i Apple announced the death of Aperture, I started trying a lot of options out there. I have long experience with unix and unix-like OS’s so the open-source Darktable is an option for me. The good news is Darktable is available for the OS X.
Compared to Aperture and Lightroom, it’s more like Lightroom in the sense that it is modal based Lightroom. For example, there’s a mode for development, for importing, tethering and maps. This would be a somewhat strange setup for Aperture users.
There are some quarks. The folders don’t sync like they do in Lightroom when the references change. For Aperture users, the concept of folder is different so they will not understand what I’m talking about.
I also want to mention, Darktable has an insane numbers of setting. is that good or bad? whether, that depends on the user. Some users like set every possible option like how Open CL is rendering images in real-time. For others, that be really confusing.
I found Darktable to have a relatively refine UI for an open-source software. Here’s what I found that’s most amazing about Darktable.
It’s easy to do frequency domain editing!! Can’t do that in Aperture. Can’t do that in Lightroom. You can do a high and low frequency separation in Photoshop but it’s a multi-step process. The beta of Affinity Photo (i’ve been using it) can do it in one filter step. Gimp is can breakdown more than high and low frequency. It can breakdown as many mid-band passes as the user sets. Darktable’s Equalizer adjustment brick has a continuous spectrum from low frequency to high frequency. Sweet!!!!
The masking features are a learning curve for sure. it also maintains a history of masks and users can create pre-sets of the masks. Cannot do that with Aperture. I couldn’t even do lift and stamp on a selection in Aperture.
I personally think you’ll like Darktable because you like digging around into the minute details of everything!!!
It works on unix and unix-like OS’s. No Windows support. OS X, Solaris, BSD, Ubuntu, Mint OS and other gnu/linux distros.
To answer your questions, I’ve used Darketable but it’s not my main workflow since I’m an Aperture user and that’s why I read your content which i find to be excellent. Let me know how I how can contribute. I’ll have to see if I can schedule for it.
Thanks.
Robert Ke
twitter: rke21
also at:
instagram: rke21
facebook: outdoorphotographynow
on February 16, 2015 - 5:39pm
Actually, Aperture’s Vibrancy is a special case of this and mask out skin tones (instead of luminosity). we can adjust the saturation and with skin colors masked out. i often use this when i want to adjust the saturation on everything but red (such de-saturate everything but the red rose).
Robert Ke
twitter: rke21
also at:
instagram: rke21
facebook: outdoorphotographynow