Selective Noise Reduction Using an Auto Mask in Lightroom

As a wildlife photographer, I often end up in situations where I am shooting in low light conditions while using a fast shutter speed to capture the action. Sometimes the only way to achieve a fast shutter speed in low light this is to up my ISO, thereby introducing noise.
The global noise reduction in Lightroom is great, but unfortunately, noise reduction does not look great on fine details like feathers or hair. The solution is to apply noise reduction selectively to the background or areas where you won’t lose detail. The problem with this method is that you need a very accurate mask to apply noise reduction around complex shapes like animals with horns or hair. Painting such a mask manually just doesn’t work. In this situation, most people would head straight to Photoshop or something like Google’s Nik Collection, in spite of what you can achieve with Lightroom.
Lightroom has a great tool called the Adjustment Brush that lets you apply selective local adjustments to your photos. Using the Auto Mask function with the adjustment brush allows you to quickly create a detailed mask without having to leave Lightroom. This method works very well with fairly uniform backgrounds that contrast with the main subject, which is what I normally try to achieve.
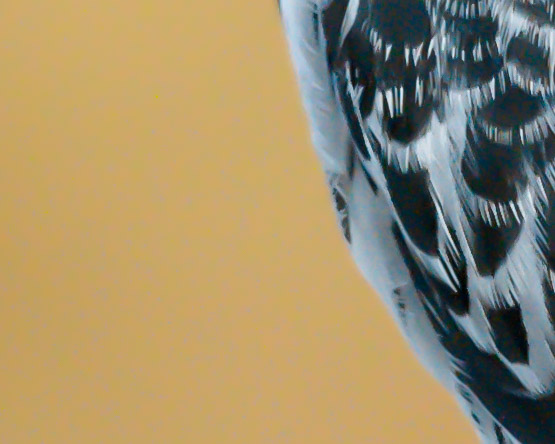
Take this photo of a Pied Kingfisher as an example. It was taken at ISO 1600 on a Canon 7D Mk II with the EF600 f/4L IS II lens in fairly bad light while trying to photograph the birds as they came in to land on a perch. The photo looks great after processing, but there was considerable noise without noise reduction.
 High ISO photo of a pied kingfisher with selective noise reduction applied to the background using the auto mask feature in Lightroom
The problems with global noise reduction
What I wanted to achieve was a noise-free background while retaining the intricate detail in the feathers. If I applied noise reduction (NR) globally to the point where I would be happy with the background, the detail in the feathers would be lost:

On the other hand, if I applied global noise reduction to the point where I was ok with the detail retained in the feathers, there would still be too much noise in the background:

The solution is to apply selective noise reduction to the background using the auto mask feature of the adjustment brush, after applying an acceptable level of global noise reduction:

The result is a perfectly clean background while retaining the detail of the bird and the branch. Obviously, this can all be done in Photoshop or Nik Tools as well, but being able to apply a decent mask quickly in Lightroom saves the time and hassle of leaving Lightroom to make relatively small adjustments, and then ending up with an extra file as well.
So how do you do it? Follow the step-by-step process on the next page!