Selective Noise Reduction Using an Auto Mask in Lightroom : Page 2 of 2
By Johan Kok
August 3, 2016 - 9:00pm
Applying selective noise reduction
This is how you selectively apply noise reduction, and in this case, apply two different levels of noise reduction — one globally, and one locally.
- Finish processing your photo as normal in Lightroom including sharpening, but do not apply any noise reduction yet.
Tip — you can also use this masking feature to limit the sharpening to only the detail areas.
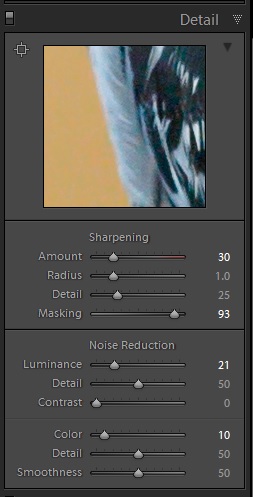
- Once you are happy with the overall look of your photo, apply noise reduction globally with the slider until you are satisfied with the areas where you would like to retain detail.
 Apply global noise reduction and sharpening until you are happy with the noise and detail levels of your subject.
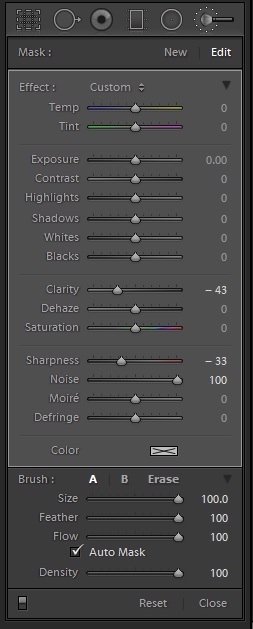
- Open the selective adjustment brush and make sure all the sliders are reset. Below the sliders there is a smaller box with controls for the brush; e.g. size, type, flow, etc.
 Use the Auto Mask function of the adjustment brush to create a detailed mask around your subject.
- Tick the box that says Auto Mask
- Max out the Size slider as well as Flow and Feather
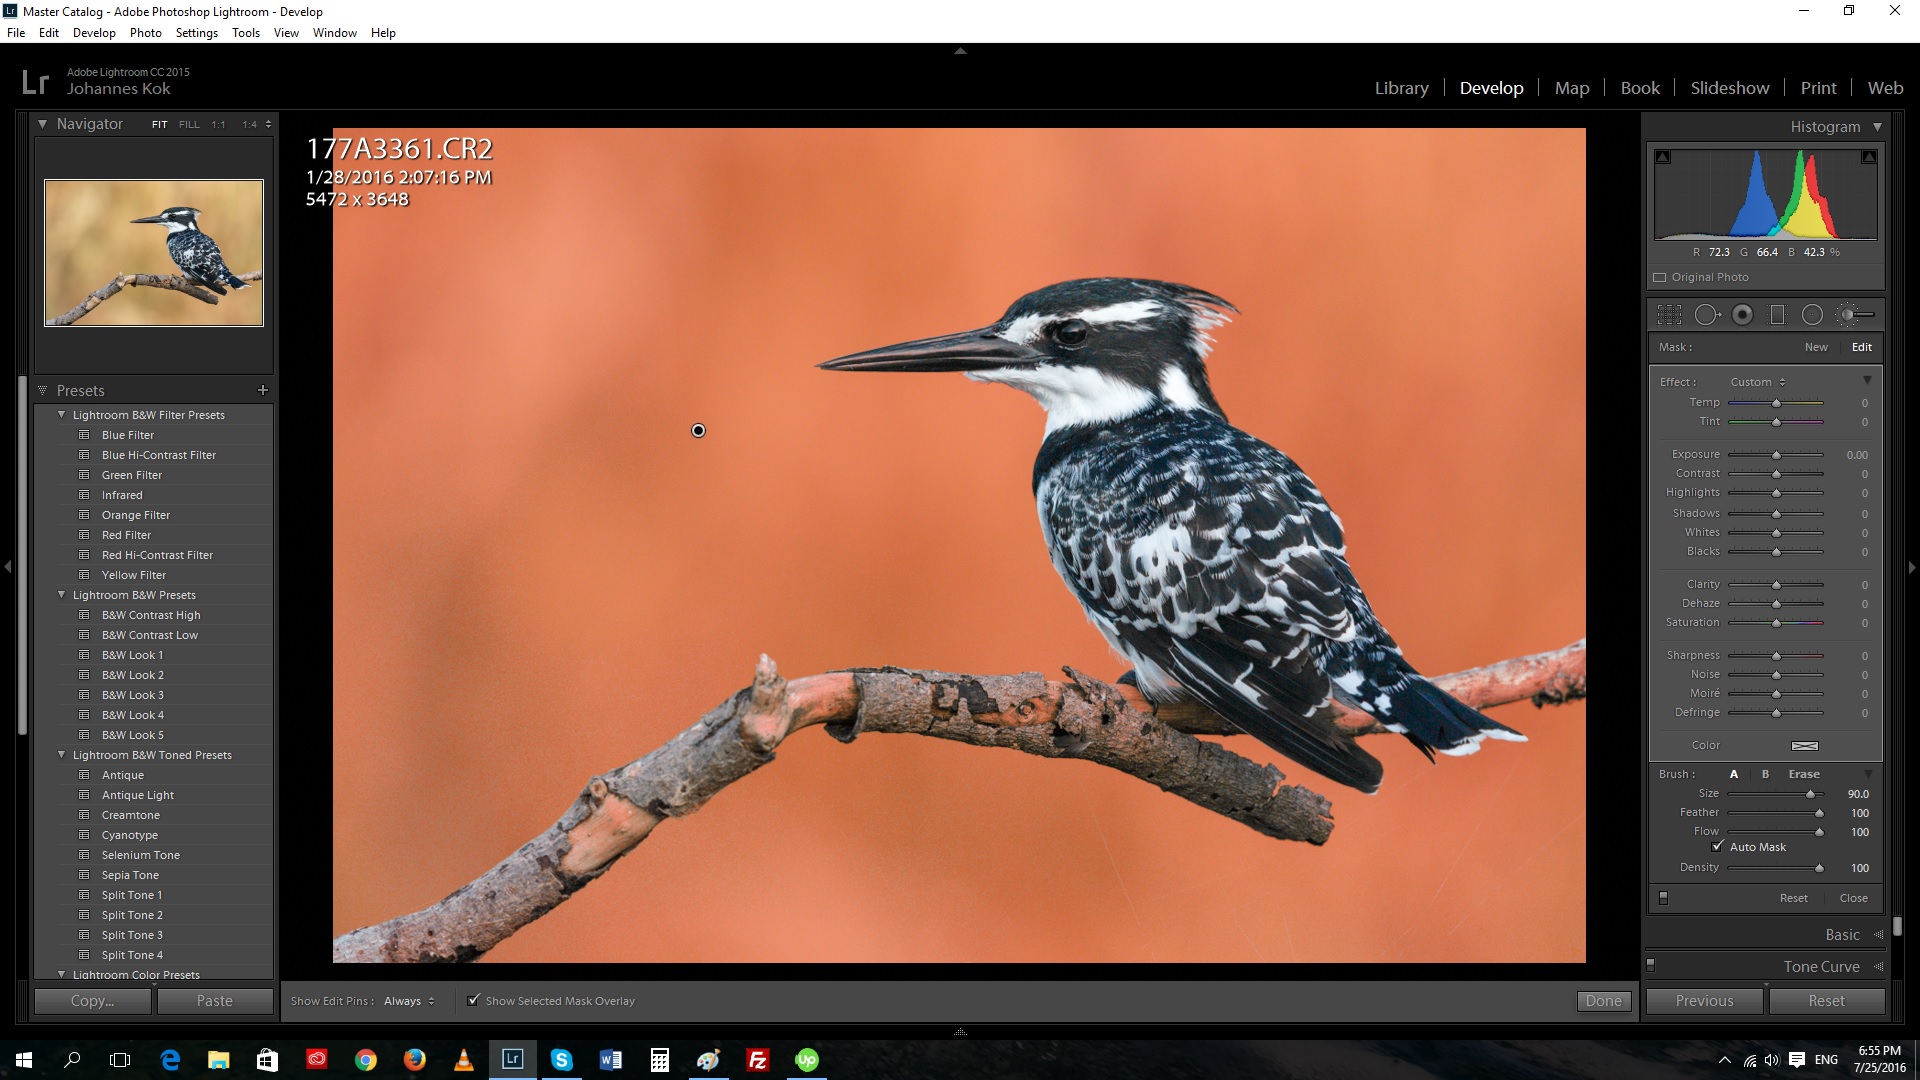
- Press the O key on the keyboard, this shortcut will display a red overlay indicating the area affected by the mask so you can see what you are doing.
- Click on the background and you will see large areas of the background will be selected automatically. Continue to click on unselected areas until the entire background is selected without affecting the detail areas.
 Initial auto mask with some unwanted areas of the branch also selected
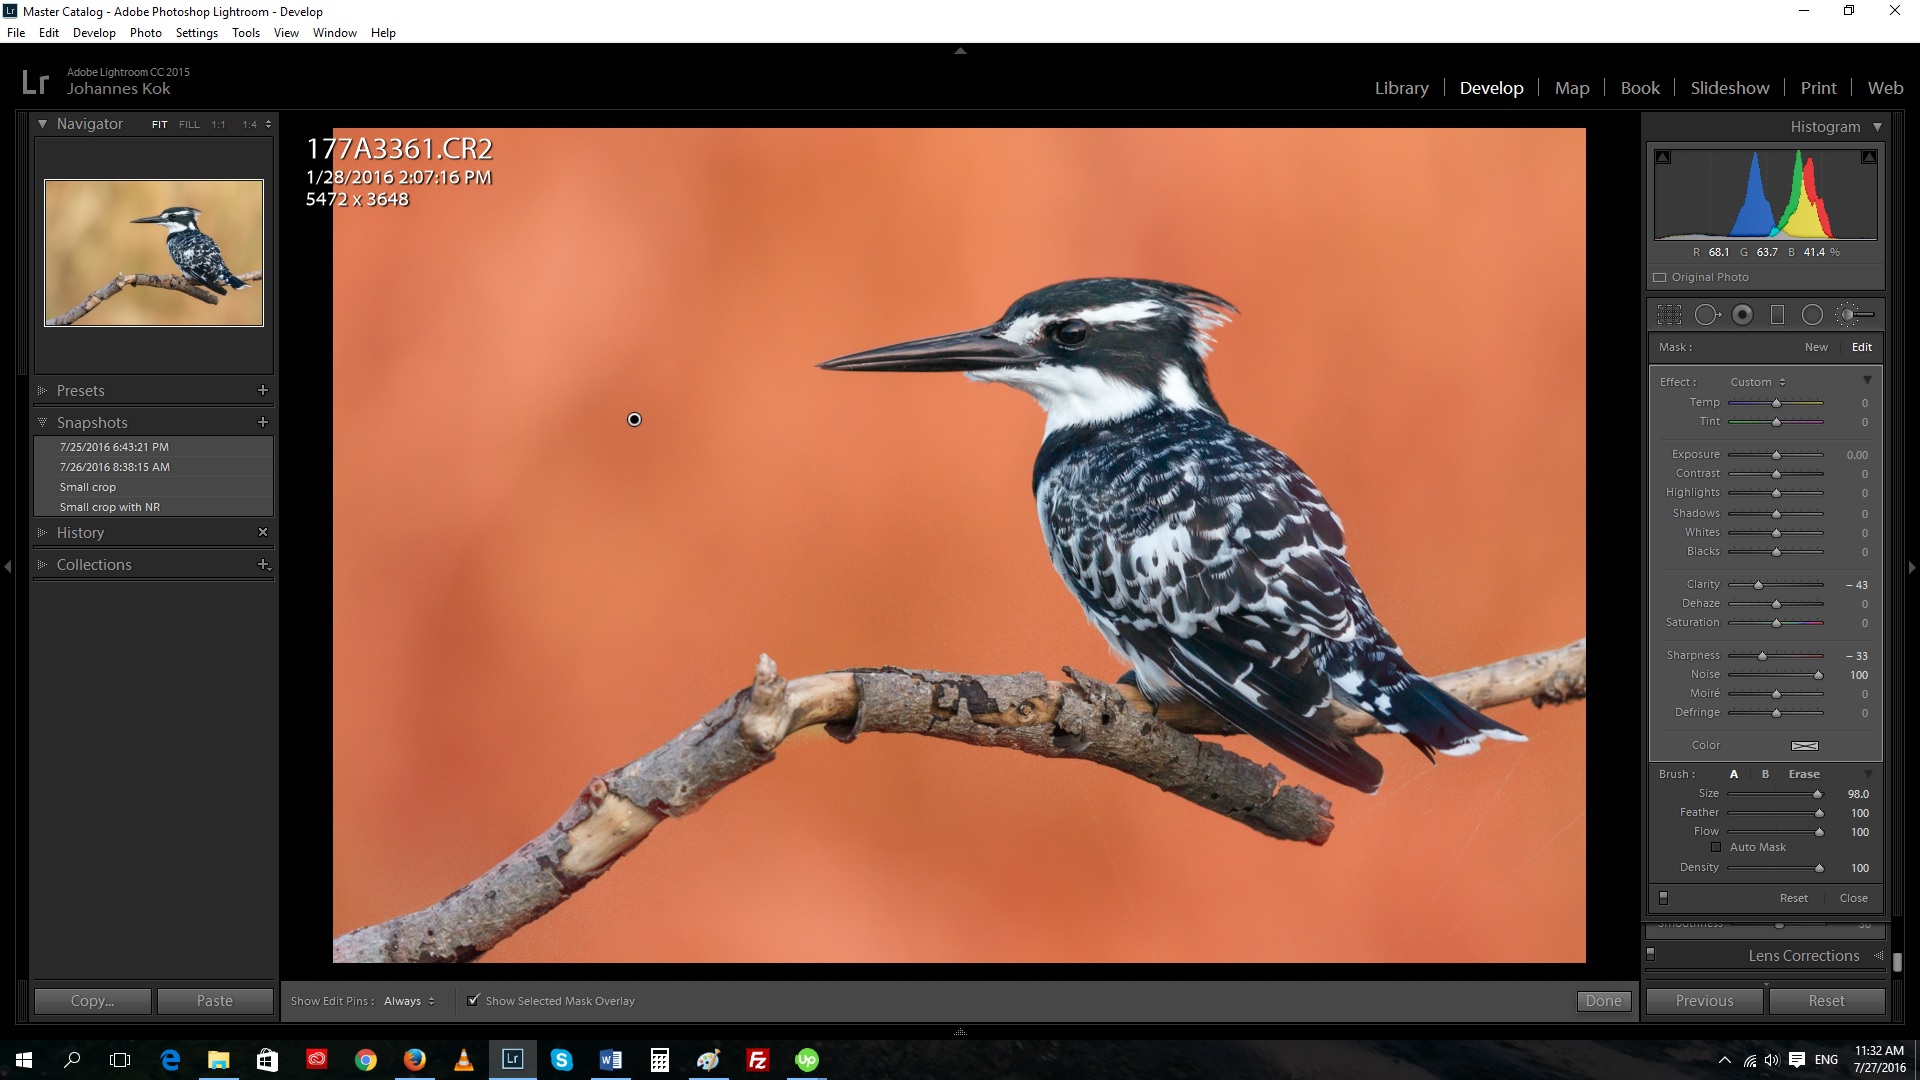
- If there are any areas selected that you do not want to be selected (like the branch), hold the Alt key (Option on Mac) down while clicking. This will remove those areas from the selection. If this method removes too much you can untick Auto Mask and manually paint some areas out.
 Final overlay of the mask with unwanted areas unselected
- Once you have the desired area masked, press the O key on the keyboard to clear the overlay.
- Zoom up to 1:1 or higher so you can see the amount of noise reduction to apply. Then adjust the Noise slider to the right until you achieve what you would like. I often reduce the Sharpness and Clarity of the background as well to achieve a very smooth background while being careful not to push it too far and end up with edge distortion around my subject.
That's it, you're done! It may sound a bit long-winded with too many steps, but once you get the hang of it, it is actually really quick and effective.
