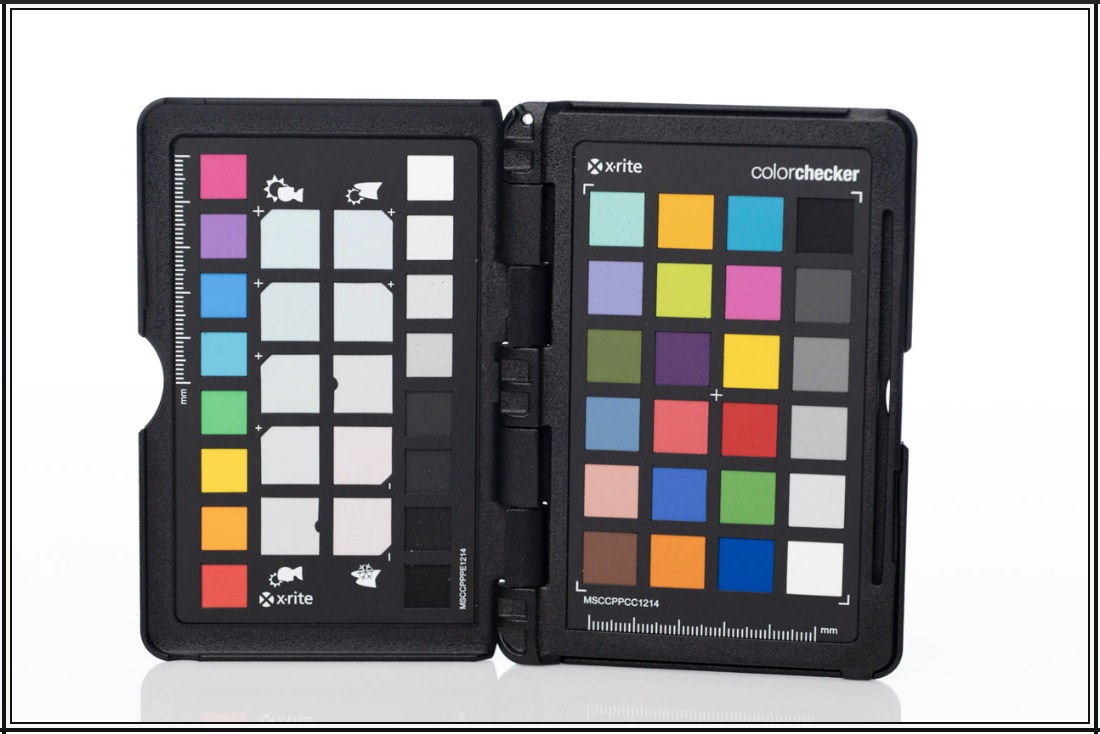
How to Use X-Rite ColorChecker Passport in Lightroom CC
Photo Moment - May 24, 2019
If you're using Lightroom CC (actually… as of last week it's now called just “Lightroom”, but it was called “Lightroom CC”, to separate it from “Lightroom Classic”, which at one point itself was called “Lightroom CC”, but before that it was just called “Lightroom”… um…) and you used to create custom color profiles with the X-Rite ColorChecker Passport using the super-convenient plugin for Lightroom Classic, then you know that since Lightroom still doesn't support plug-ins, so that workflow still isn’t there.
Fortunately, there's a workaround. It does take a few steps, but they're easy enough to complete!
tl;dr
Here's the short version of what you have to do. I'll detail each step below.
- Export a RAW photo of the ColorChecker from Lightroom
- Convert that RAW file to DNG using the Adobe DNG Converter [download here for free]
- Open that DNG in the ColorChecker Camera Calibration app and save the resulting profile [download here for free; click the Training & Support tab]
- Import that profile into Lightroom and apply it to your photos
- Check white balance (if needed)
- Copy profile to all related photos
Why profile in the first place?
If you're wondering what this is all about in the first place, the purpose of this exercise is to normalize the colors in an image so they all match an accurate standard. This is not important to many photographers, but if color accuracy is critical to your workflow (for example in product photography, you usually need the product you're shooting to be accurately represented on screen and in print), then this process is super important. Taking a photograph of a known-accurate color chip chart, in this case the X-Rite ColorChecker Passport, then letting software automatically build a profile to shift the colors your camera captured to the colors that the chip chart is known to be, creates an accurate representation of that product.
Creating the profile in Lightroom used to be a one-click process. But for now, it requires several extra steps.
Need a ColorChecker Passport (Photo Edition)? Get yours here!
Step 1 — Export the RAW photo from Lightroom
The actual step one is to photograph the ColorChecker in the first place. Ideally you've photographed this in the same environment, under the same lighting, with the same lens (and it has to be the same camera or this is pointless) as the photos you want to attach a profile to. This can be done under any lighting conditions, and to be truly accurate about it, as you change environments you should shoot another calibration photo.
 The X-Rite ColorChecker Passport Photo
You do NOT need to do any editing to the photo first. If you do, they will be ignored. Even if you need to adjust your white balance, you'll do that later.
In this tutorial I'm using photos from a recent client shoot for EarthMonkeys, a plush doll sold on Amazon. The client of course wants the photos to represent the real product as accurately as possible. No, we can't control what other people's screens look like, but by providing a photo that's calibrated, we're at least uploading an accurate image to Amazon.
To export the RAW photo(s) from Lightroom, select the image and go to File > Save To… then change the file type to “Original + Settings”, and choose a location. You'll want to put it in a folder because the DNG Converter wants to read the contents of a folder, not a single file. I made a “DNG” folder on the Desktop.
 Export a RAW image from Lightroom to a folder on the Desktop
Next… convert RAW to DNG and create the color profile!
In my opinion, the directivity white balance filter is the most accurate white balance tool in the world.
Joseph
Comments
Hi joseph, nice tutorial. I have problems with my colorchecker. the program creates the wrong color profile, especially the reds and blues. I shot with nikon d850 in nef and lossless compression.
I have the 2019 version of x rite colorchecker and I use lightroom classic cc, latest version 10.1.1
I tried using Adobe DNG_Profile_Editor and it seems to recognize colors well.


Comments from YouTube