You are here

This ATEM (mini) Tips” series of short video tutorials for your Blackmagic ATEM hardware includes tips for all users, from beginner to advanced. Scroll down to see more in the series!

This is a collection of all PhotoJoseph LIVE shows, from the PhotoJoseph YouTube channel. Additional episodes are listed below!

How to Use X-Rite ColorChecker Passport in Lightroom CC

Photo Moment - May 24, 2019

Step 2 — Convert the RAW to DNG

The ColorChecker app will only read DNG files, so you have to convert your RAW to DNG first. Of course if your camera shoots DNG, then you can skip this step. If you don't already have it, download the free Adobe DNG Converter here

Launch the DNG Converter app, and at the top of the window that opens, select the folder with the RAW photo in it. You don't need to change any of the settings; by default it'll create the DNG in the same folder that the RAW is in, and that's fine.
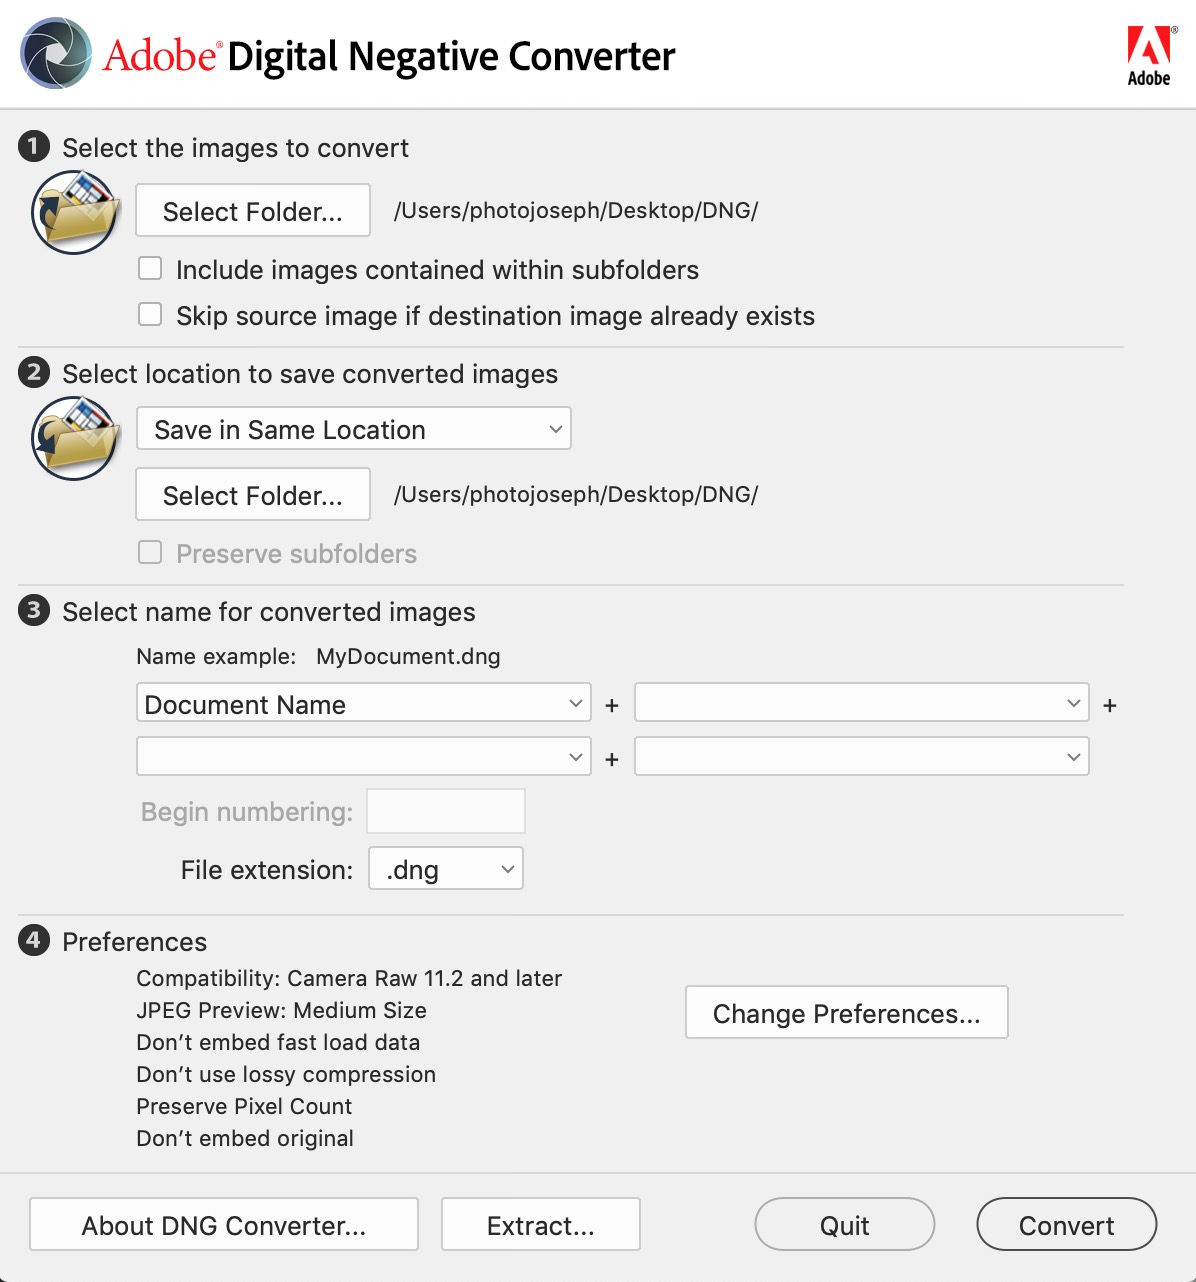
The Adobe DNG (Digital Negative) Converter appThe Adobe DNG (Digital Negative) Converter app

Click Convert, and that's it! Once you see a dialog that it's completed, you can quit the app.

Step 3 — Create the Color Profile

If you haven't already installed the ColorChecker Camera Calibration app, you can get it here (click the Training and Support tab). As of this writing, the version you download is v.1.1.3, however as soon as you launch it for the first time, it'll update to version 2.

Launch the app, and simply drag the DNG file into the main window. The software will attempt to locate the color chip chart and it'll draw a grid over it automatically.

Just drag your DNG photo into the ColorChecker Camera Calibration app and it'll take over from thereJust drag your DNG photo into the ColorChecker Camera Calibration app and it’ll take over from there

I've never seen it not work on any decent photo of the chart, but if it doesn't for you, click the arrow with a + on it in the top right corner of the window, and click each of the four brackets around the color chips. That'll draw a box, and you can align if if necessary with the chips by dragging the corners. It's pretty obvious what you need to do once you start, and it doesn't matter which corner you start with. The app will figure out which color is where.

Once the grid is in place (again, it should be automatic), click the Create Profile button. It will automatically want to save to the CameraProfiles folder, which is a good location if you're also going to use this profile in Photoshop or in Lightroom Classic, because that's where those apps will look for it. If you're not using it anywhere else, then just put it on the Desktop, making it easier to find later.
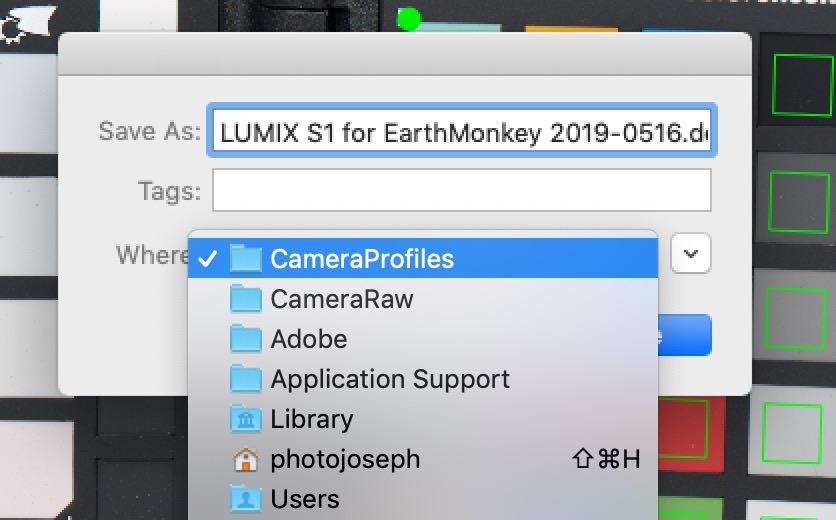
You can save the profile to its default location if you're going to use it in other Adobe apps; otherwise, just put it on the Desktop so it's easier to find laterYou can save the profile to its default location if you’re going to use it in other Adobe apps; otherwise, just put it on the Desktop so it’s easier to find later
Note: Once you import this profile to Lightroom, it's stored inside the Lightroom library package, which is not anywhere that you can save to at this point. I was hoping to find a way to skip a step and just save this profile somewhere that Lightroom would read it automatically on next launch, but you'd have to dig into the package to do that, and since components of the package are synced with the Adobe cloud, this sounds like a bad idea. So I recommend not trying to skip a step, and just doing this as intended.

Next… import the profile to Lightroom, apply it to your photo, and check your white balance.

Share
What is color science? Is ZEISS connected to any photography studio? When using so-called professional gray cards, white paper or color cards for color reproduction of image works, these color samples will be stained by the light pollution of ambient light and lose their original colors. For color restoration purposes?

In my opinion, the directivity white balance filter is the most accurate white balance tool in the world.
You’ve said a lot here and I’m not quite sure if any of these are actual questions or if you’re being hypothetical. Color will always be “tainted” by ambient light, so all you can do is be as accurate as possible in the first place. Control what you can.
ok so im a bit confused here. i don't have the ''save to'' option. i only have export.
@photojoseph  awesome thanks so much :)
The app has changed over the years. Export should do it.
Still relevant and still a fantastic video. Thank you so much!
excellent presentation but would have been better much slower so one could follow with LR open in another monitor. When you brought up the DNG converter would have been nice to know about it. If one has a profile can it not be part of the develop settings on import?
If I slowed it down, everyone else would complain that I went too slow. I recommend pausing the video while you try each step.
Do you need to make a profile for each photoshoot you do, or will one profile work for every picture taken on the same camera?
I do it for every shoot where I want to profile. Keeps things tidy.
Do you think Adobe will ever add it to CC? I’m so frustrated having moved away from Classic to simplify my life, and purchased the checker just assuming it would also be in CC. Adobe add all the lovely AI tools lately but this is even more crucial in my opinion, as it is for my Videos in Davinci. Thanks for a great Video !
@@photojoseph great idea! I was just researching if there was another piece of software I could easily do this with pre importing into Lightroom CC. Your process is great but just wondered if there was a simpler way, nothing yet and I’m doubtful I’ll find another simpler way. I’m not lazy, just really disappointed as this makes such a huge difference to my photos and videos since getting the cards :-) thanks for the quick response
No idea if it’s even on their radar. I would suggest filing feature requests and asking everyone else to. Ask them on twitter too; they are very responsive there.
I understand the DNG process but my Sony exports ARW files to Lightroom. Will the DNG Color Checker file still work or do I need to save as an ARW file like my camera outputs.
DNG is a universal raw format developed by Adobe. The dng converter converts any raw file to DNG.
That's not way to do it, just select file>export with preset>ColorChecker Camera Calibration
You do know this video is four years old now… software changes in that time
Thank you!!
I only use Bridge Camera Raw then photoshop- can i do it with those instead? I can't be arsed to learn and use Lightroom, it pissed me off as it saves files weirdly. Maybe I did it wrong, but i much prefer Bridge for file organization
Brilliant concise and excellent pacing. Thankyou
☺️🙏🏻
Super useful!! I had stopped using my ccp because I prefer LRcc than classic and now I can use it again! Tested the process and worked like a charm!!
Wonderful!
Thank you. I was stuck. I love they added the dang export option to Lightroom cc.
Thank you so much for sharing this. I just bought my colorchecker passport and now I think it's the best investment ever! Saving me so much time on colour and white balance adjustment (and won't be able to do it as good as it does)
there are no degrees Kelvin! it's just kelvin you should know that's the basics
@@photojoseph no degree, easy.
You’re wrong, but that’s ok. It’s an older name but I’m an older guy, so there you go. https://en.wikipedia.org/wiki/Degree_(temperature)
Thank you!
Hey Joseph, great video! Mine has the issue that it gives a slightly green tint over my image… are you familiar with that issue?
I haven’t seen that but to be honest it’s been ages since I’ve done this. I haven’t done any commercial photography necessitating the color card in a long time!
Typical Adobe - always shutting out other companies utilities from their software! I’ll stick with a Raw to DNG converter and LR5 thanks!
Hi I'm Joseph, I'm using Ipaf pro work Lightroom for ipad. And I can't find where the DNG converter is, could you please sent me a link to the converter for iPad please? Or let me know how to do it on ipad x
you are a master of master
☺️ Thank you
May i ask, do you create camera profile everytime you move location or when light changes?
At the basic level, you want to have profile for specific camera a specific lights - so if you have your own atelier, and use the same lights and same camera, you are good off with just one profile. If you want to get as acurate as possible, create profile every time you go for a shoot.
I am be a dummy LR blows my mind
Thanks man!
Great video, thank you so much. It's very easy to follow.
Best explanation ever !! Congrats
Does the camera profile aspect only work/run on Apple computers? I'm a pc / Davinci guy.
How do I get the software/plug in (calibrite passport software) into my lightroom software? I'm so frustrated....
My question is, do I have to do this for every single shoot?
😊
@@photojoseph Thanks so much for that.
every environment (location, light) and lens and camera, yes. That's the point; to calibrate to a common base line no matter the setup. This is most commonly used in a studio environment where color matching is critical, or to balance different cameras.
Excellent Thank you
You’re welcome!
He talked too fast, therefore I had to look for another clip.
🤷🏼‍♂️ or you could have YouTube play back at 0.75 speed
When we import the custom x-rite profile and apply it, does it also correct the white balance, or only the color tones?
Do I have to create a colour profile every photo session (because each session will have a different light), or shoud I do this only once and it will work forever in every future photo session?
Lighting changes colors, so yes, doing it under any new lighting situation is the right way to go.
Great video man. I bought the colorchecker 2 years ago and it about time to start using it.
Amazing. This video is so clear and concise. Thank you.
But the imported profiles cannot be deleted, so soon you will have too many… at least, I couldn’t find a way to delete. Went back to LR Classic.
Thanks a lot man!
Thank you! I have been needing to get better at using this with the pictures I take as a sports photographer. This helped make the process much faster.
Awesome Bruce, thanks for letting me know!
Helpful, well explained tutorial, thanks a lot Joseph.
Thanks, Joseph, for a well explained tutorial. I know this x rite software software only works with a raw or ding file, but could a jpeg that’s been converted to raw/ding also be used?
Joseph
Hi Joseph, for some strange reason after I successfully import the profile, I can't find it under the ''profiles'' menu, its simply not showing there. I run the latest LR 4.3 and I have no clue why is that so, its been couple of days im stuck with this problem, any idea what could be the cause? Many many thanks. Bruno
Do you need to use the color checker every time you shoot a client or do you just shoot it in studio and use that once you integrated it in lightroom?
I cant find the X-Rite software anymore. Is there an updated link for it?
Hello Joseph. I found this extremely helpful! It saved me a ton of time (I hadn't realized that CC didn't support plugins, and would have been lost after that). I followed your procedure a couple of times, then realized you can export as DNG (from Lightroom) and go straight to X-rite's ColorChecker. Does the extra step you follow (export as "Original + Settings", then convert to DNG) yield a better result? I did compare both and the differences were not noticeable to my eye. Thanks!
When I did this video, there was no export to DNG option (you can see in the video that JPEG and ORIGINAL were the only choices). Now that it’s there, this saves a step!
Hope you see this in 2021, can’t get Lightroom to restart
Contact Adobe
I'm a little late to the party but this helped me tremendously. It wasn't easy, though. I have a new Color Checker Passport Video and the squares were all lined up in the color swatches but it could not save it. I tried several times and re-shot the checker again. Fortunately, I have an older Color Checker that I hardly ever used and tried it and it worked perfectly. It seems like the video version should work the same. The color boxes are the same. Anyway, very nice instructional video.
@@photojoseph Yes, I had a Passport that I used for photography that is a couple years old and had not been using. It works, so that's a good thing. Thanks for the reply.
Definitely! By "older" you mean the photo one that you already have, right? Because the design for photo and video passports has not changed, as far as I know. It's just that photo and video are different.
@@photojoseph I’m glad I hung onto the older passport. Thanks.
Ah, but the video one is totally different than the photo one. That’s why it didn’t work. Different layout, and different colors.
bad tutorial
Excuse you?
Is it possible to shot with my fuji xpro 3, create the profile and apply it to the Lumix g80 pictures? Would the picture look the same? Thanks.
Ah ,nope. That’s not how it works :-)
@@photojoseph Thanks Joseph. But only for RAW Files. I had a thinking error. I wanted the JPG-Look/Picture Profile from Fuji on my Lumix-Pictures
That’s the idea. They would at least have the same colors.
So how to add an X rite i1 profile to photoshop 2020 ?
You just helped me so much!!! Thank you tons and tons and tons!
Thank you!

Hi joseph, nice tutorial. I have problems with my colorchecker. the program creates the wrong color profile, especially the reds and blues. I shot with nikon d850 in nef and lossless compression.

Oh no, that's unfortunate. I'd contact X-Rite, as this sounds like a pretty specific issue.

@PhotoJoseph
— Have you signed up for the mailing list?

I have the 2019 version of x rite colorchecker and I use lightroom classic cc, latest version 10.1.1
I tried using Adobe DNG_Profile_Editor and it seems to recognize colors well.

You may login with either your assigned username or your e-mail address.
Passwords are case-sensitive - Forgot your password?
randomness