Lightroom Maintains Selections, and Shared Folder Workflow
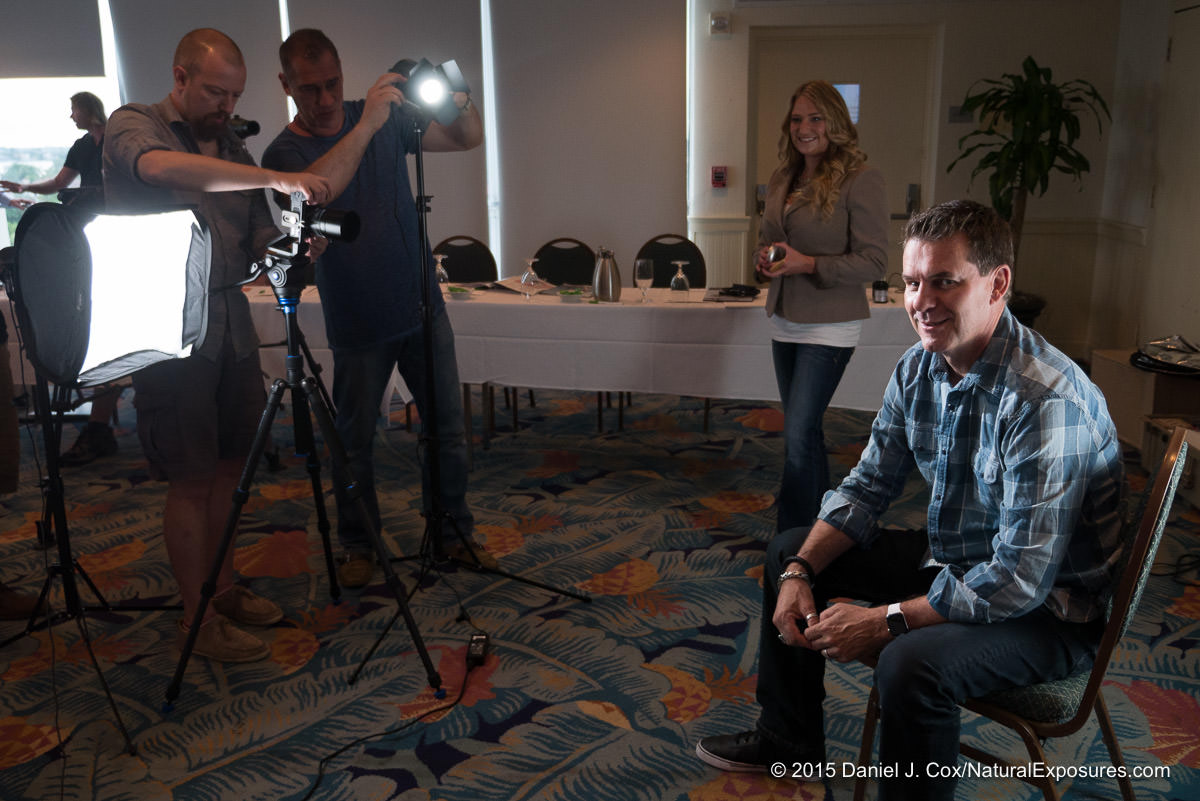
I just came back from the LUMIX Luminary Summit, the annual meeting for the LUMIX Luminary team, where among other things we shot a series of portraits of the Luminary team and the Panasonic crew that was there with us. Fellow Luminary Michael Grecco and I took on the task (nothing like shooting portraits of photographers), and lit and shot 24 portraits in under an hour. We used Fiilex LED lights and a projector screen as the backdrop. Improvisation, baby!
We shot RAW+JPEG, with the JPEG set to a crunchy B&W. We made the lighting dramatic and hard, and wanted a crunchy film look to go along with it. The plan was always to process the RAW files in Lightroom and DxO FilmPack, which we did, but having B&W turned on in-camera allowed us to not only preview the shots in B&W, but even see the live preview in B&W as we were adjusting lighting. Pretty cool way to work.
Once the shooting was done, I did a first pass at basic retouching (on the color RAW file) three photos of each person, and then processed those through DxO FilmPack to give the B&W look that we wanted. Because I had so many to process using the same treatment, I didn't open each image into FilmPack from Lightroom, but instead exported TIF files, then batch processed those through FilmPack, and re-imported the results in Lightroom. (I'll outline that workflow in another post).
From Lightroom I published the 72 versions (24 setups × 3 each) to my ShootProof account, where each person could select their favorite. Once that was done I upgraded each of their selects to five stars in Lightroom, giving me the 24 final selects. (Unfortunately there's no automated way to do this; I had to go through each person's selects in Shootproof and find the match in Lightroom, then mark it there).
Next step was to hand these off to another Luminary for final retouching; things like lightening of the eyes, maybe some additional clean-up. Honestly this was decided later and it may turn out that it'd be better to do that retouching before the B&W conversion, so we'll end up re-doing the FilmPack processing, but we're going to see if we can do this final stage on these files. Regardless, the next steps would apply no matter what.
Sharing the photos from Lightroom via Dropbox
So now we get into the meat of what this post is about. This is a two-step process; the first of which was a simple thing but I found to be quite cool, and interesting enough to share here. The second is something that was certainly possible in Aperture, although I don't know that I would have considered doing it this way.
Imagine if you will… in Lightroom I have a Collection (i.e. an Album) with all 72 photos that were shared. 24 of those have now been marked five stars, and need to be shared with the retoucher. Obviously I could just export these and FTP them or whatever, but I wanted to try to keep this in Lightroom as much as possible. Since Lightroom only works in what we'd call “referenced” coming from the Aperture world (all photos live somewhere in the Finder, not in a Lightroom database), it's an easy enough step to move these photos into a Dropbox folder that I can share with the retoucher. But with Dropbox you share an entire folder, and I didn't want to share all 72 images — just the 24 selects.
That means step one is to separate the 24 from the 72, not just in Lightroom but in the Finder, and step two is to move them to my Dropbox folder where I can share them.
Isolating the photos in the Finder
This first part was what I found quite clever. (Ignore the fact that there's only 22 images, not 24 in the screenshots below… two selects were pending when I did these). As mentioned I had already upgraded the selects to five stars, so it's easy enough to filter by five star images, select them all and create a new Collection, called “Luminary Personal Selects”. That's what you see below.
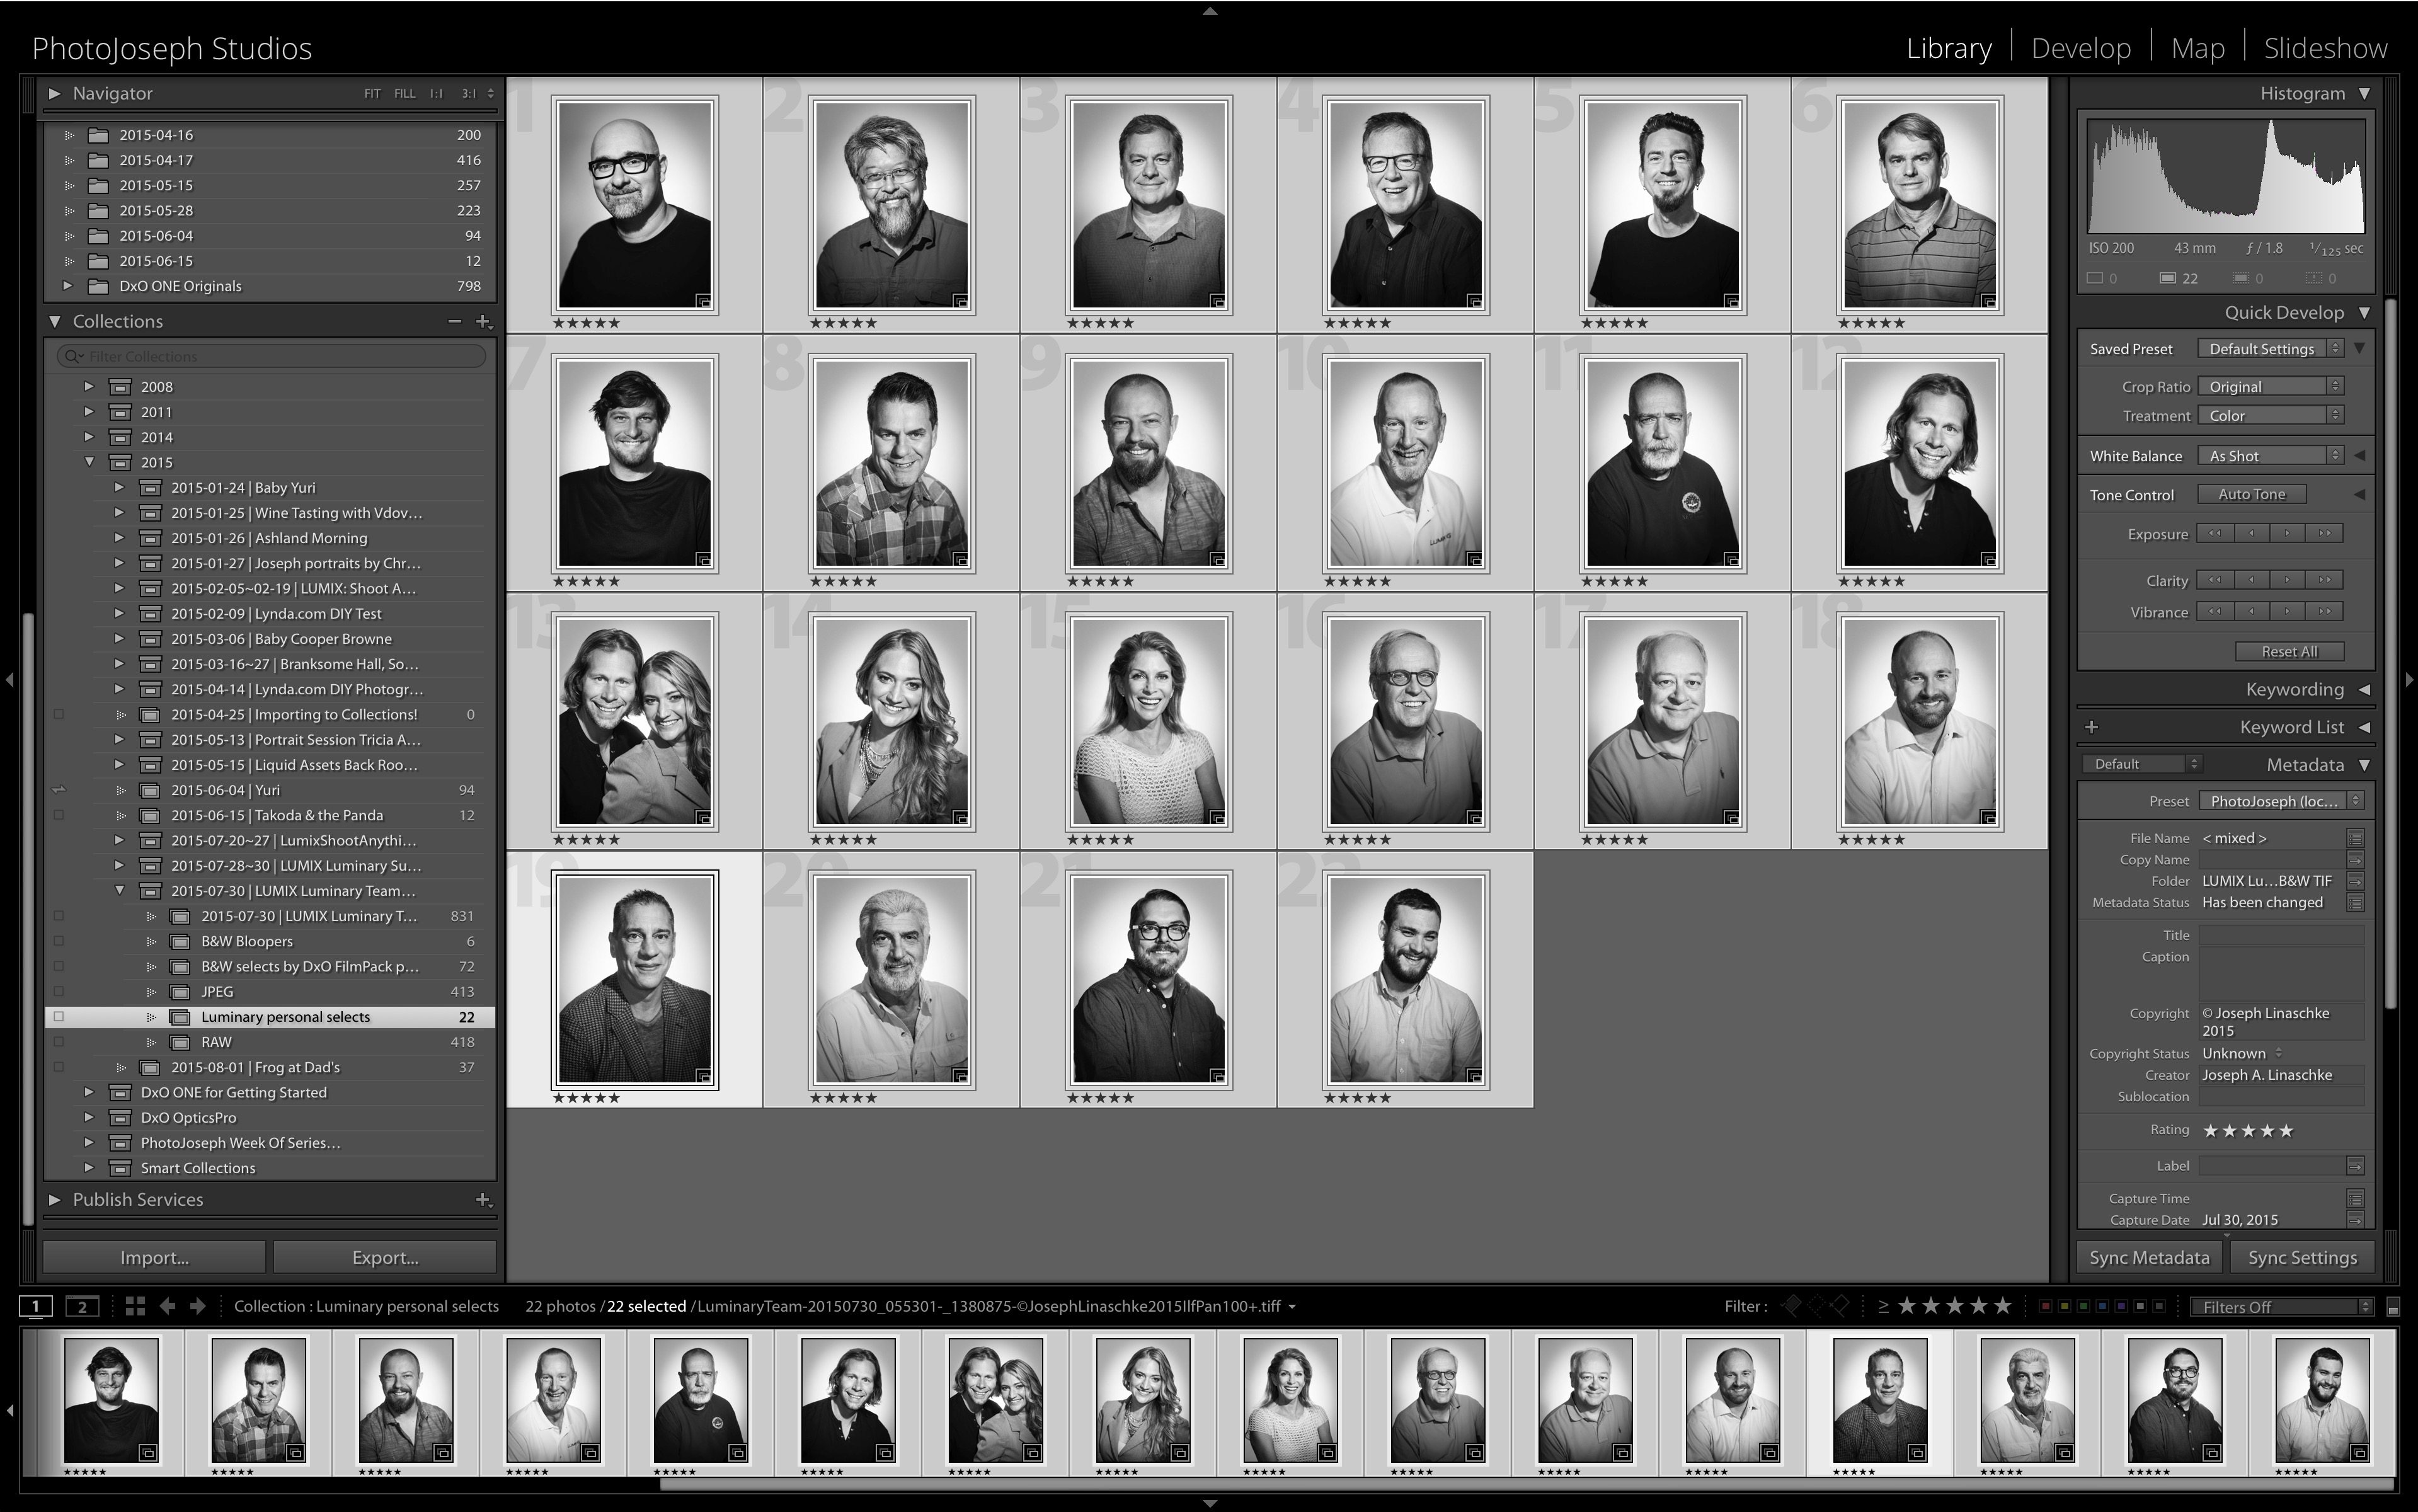 The view is filtered to five star images, and all are selected
Notice that the images in the screenshot above are still selected. This is where it gets clever. If you right click on an image there, one of the options is Go to Folder in Library. In Lightroom, you have two views of your photos (which believe me, coming from Aperture can be very confusing). One view, called “Collections”, is how you've chosen to organize them in Lightroom, while the other view, called “Folders”, is how you've organized them in the Finder. Choosing Go to Folder in Library will load the Folders (i.e. Finder) view.
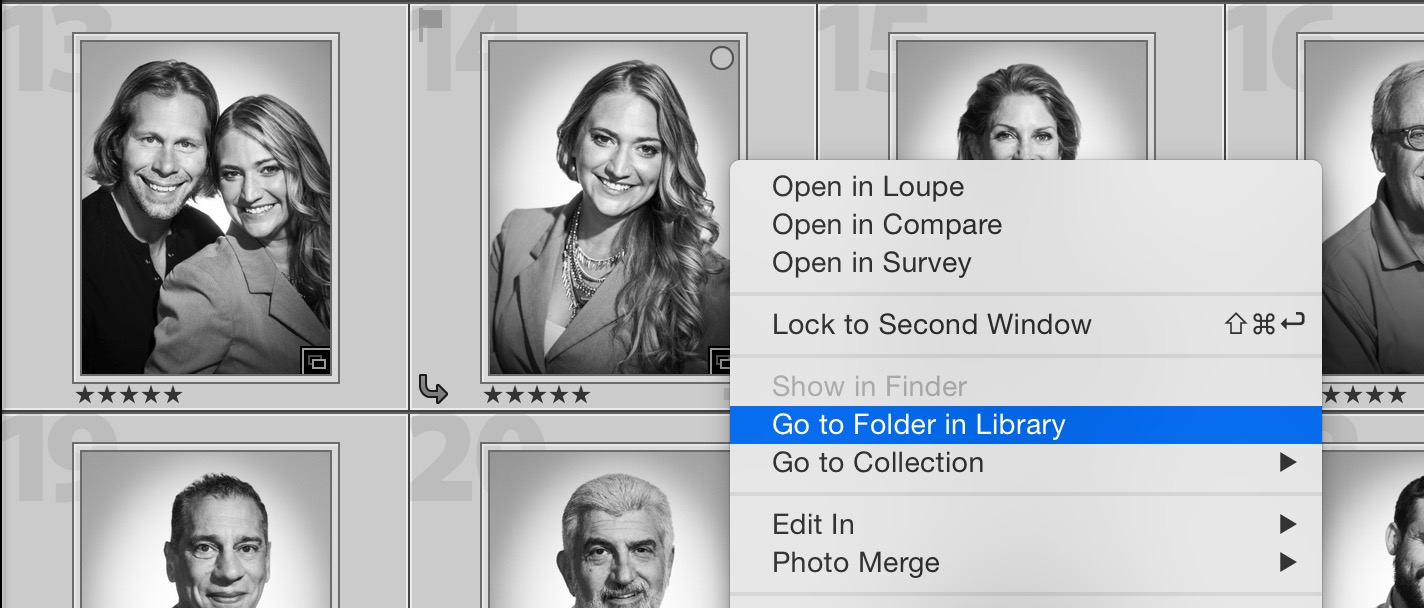 Selecting “Go to Folder in Library” will go there, and maintain the selection of these images, so you can act on them there
Below you see the same photos in the Folders view. Notice that we're looking at all 72 photos here, but more importantly, notice that the images I had selected in the previous step are still selected here (the lighter grey thumbs are selected; numbers 3, 4, 8, 13 and 17 in the partial screenshot below).
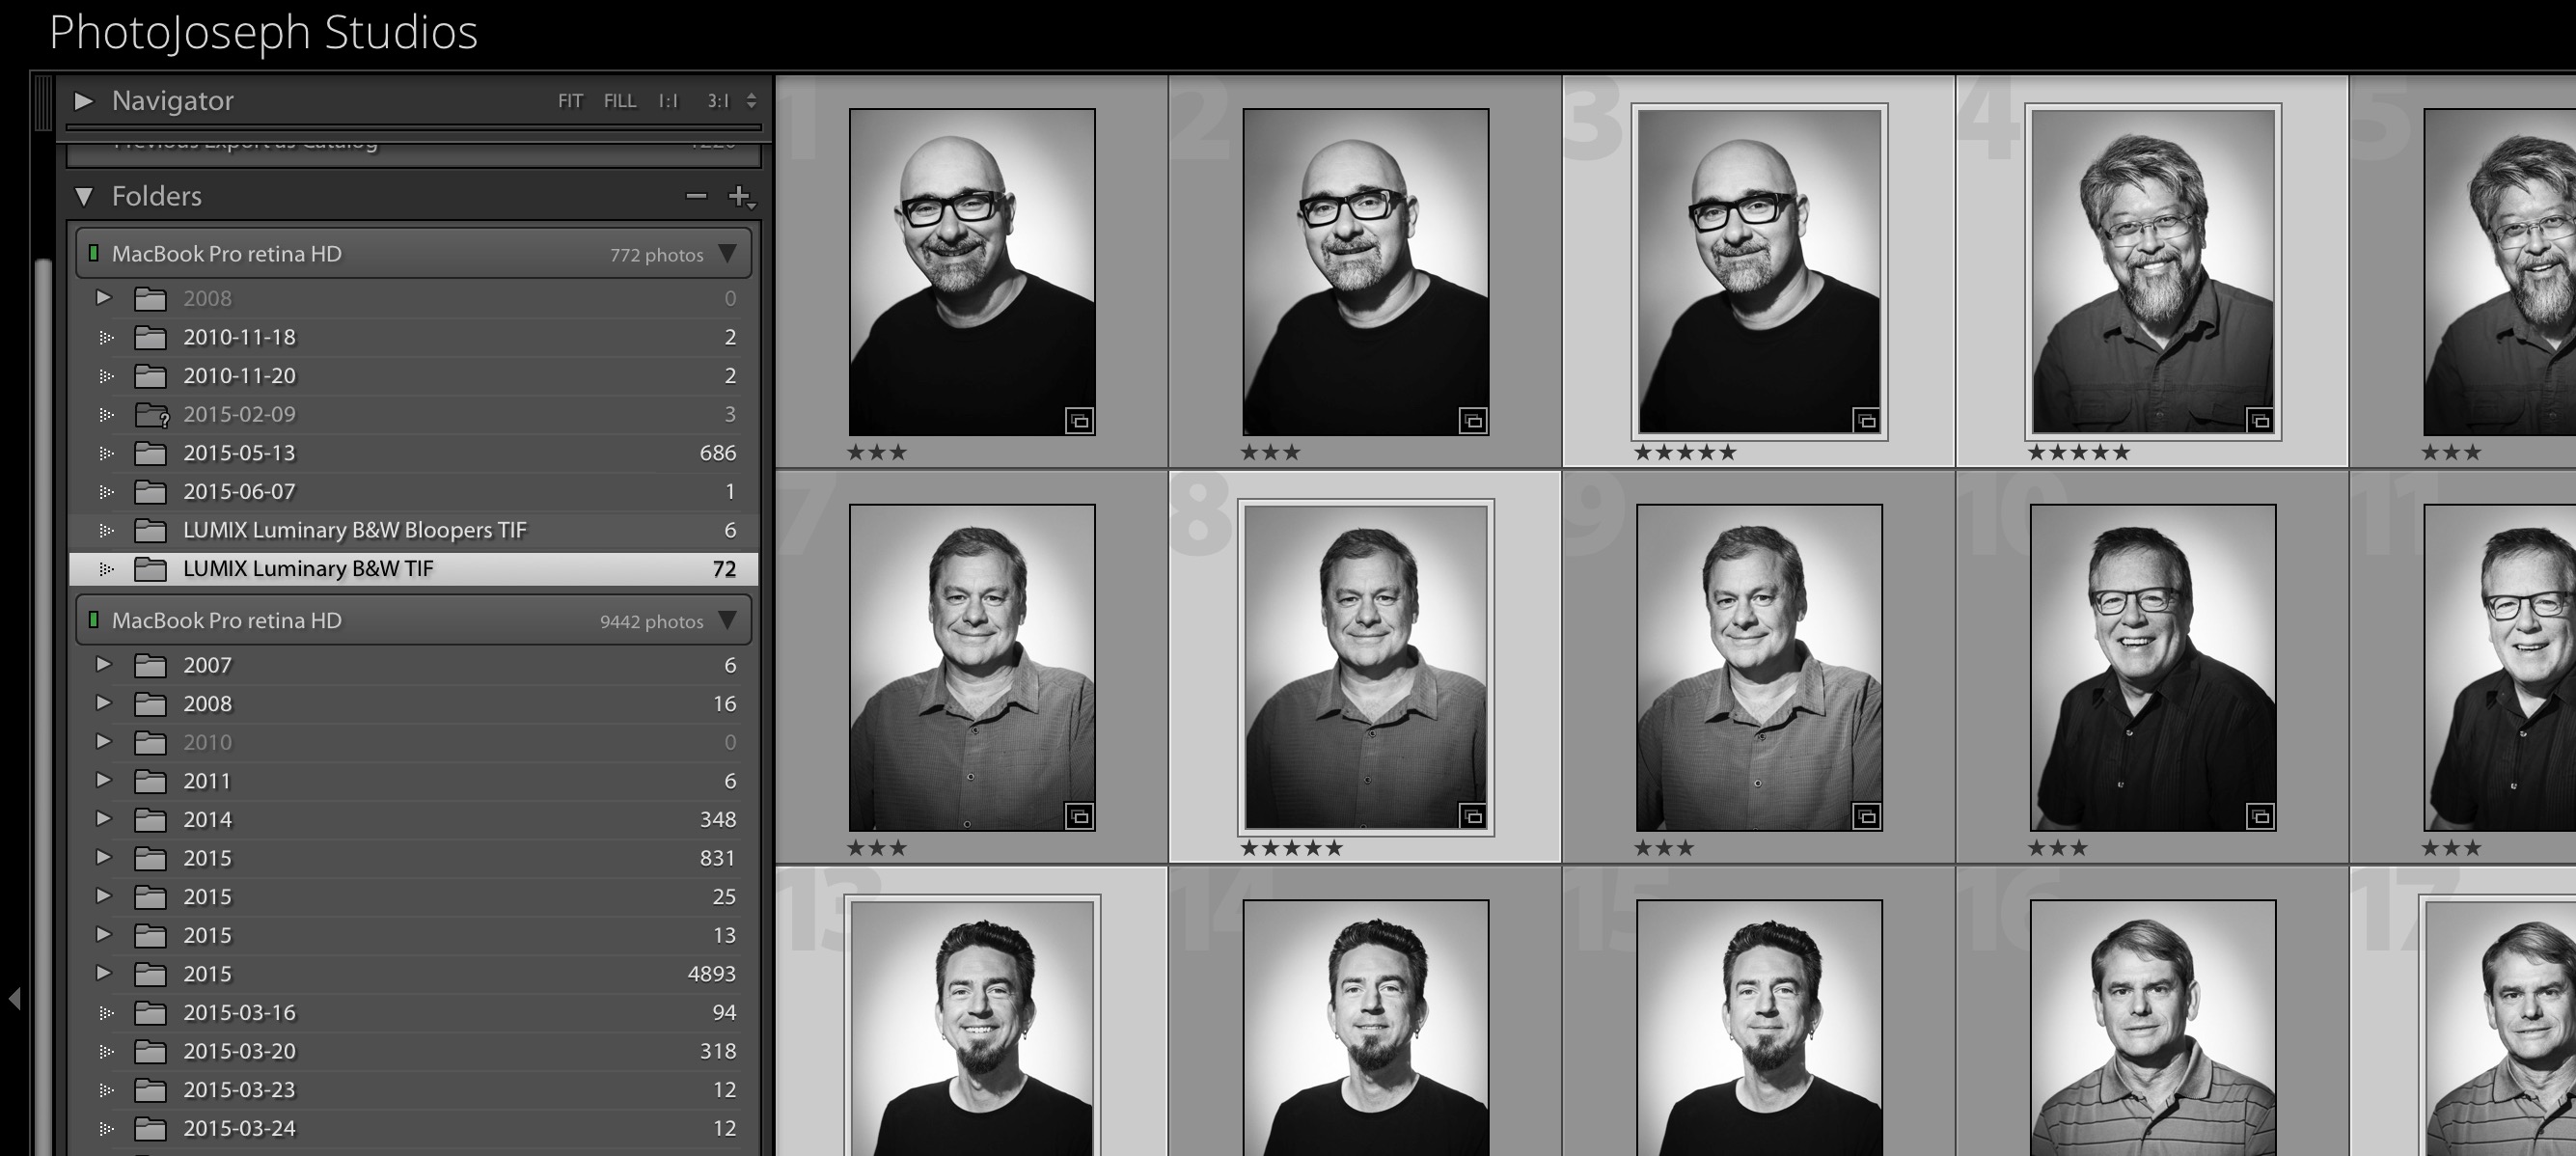 The images I had selected in the previous step are still selected here in the Folders view
Since those are still selected, this means that I can act on those. No re-selecting required. Of course in this example it'd be easy enough to do; I could just filter by five stars and select all of those, but the point here is that the selection was maintained across different views in Lightroom. This wasn't something that'd happen in Aperture. If you selected images in an Aperture Album, then jumped to the Project where they lived, the selection would not be maintained. There can certainly be arguments supporting both methods, but at this moment this methodology was really handy.
Next step is to move those images into their own folder in the Finder. To do that, you select Add Subfolder… (or Folder) from the (+) menu…
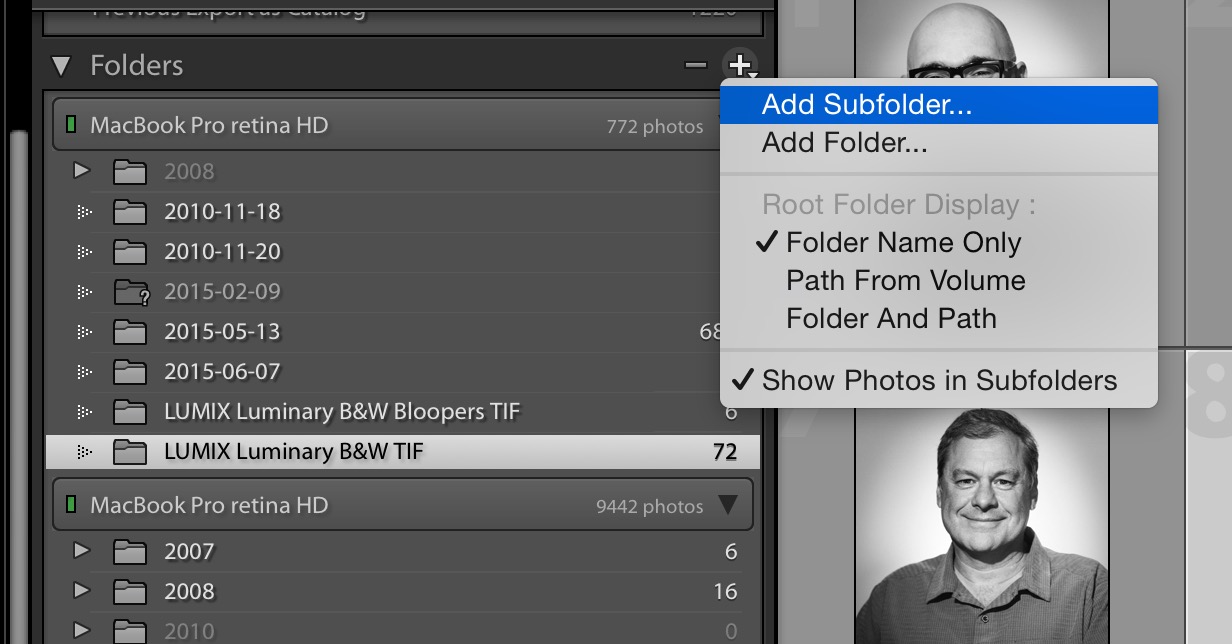 Adding a Subfolder (or Folder) in the Folders view actually creates that Folder in the Finder
…name the new folder, and choose “Include selected photos”, which will immediately move those photos in the Finder.
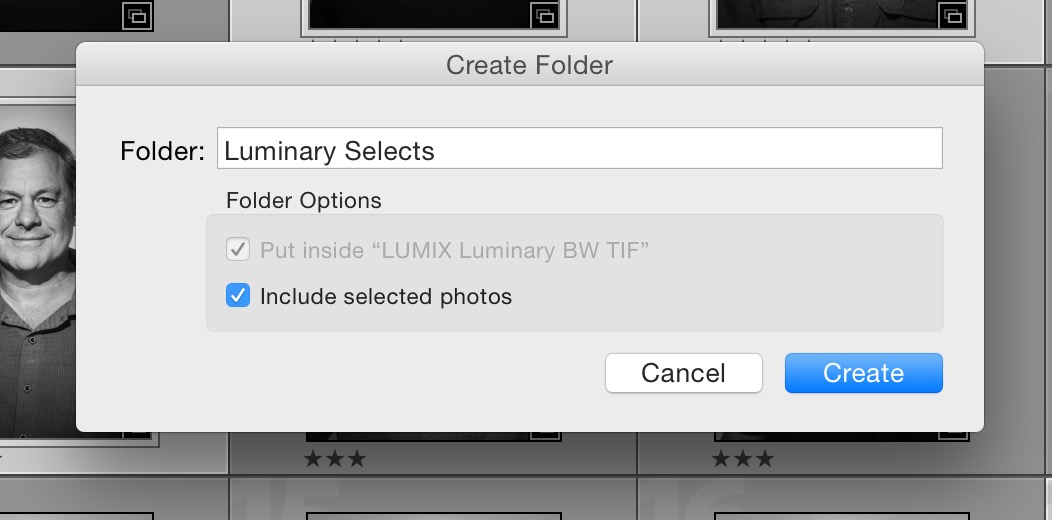 Name the folder and be sure to “Include selected photos”, which will move them in the Finder
To see them in the Finder, right click on the new Folder and choose “Show in Finder”.
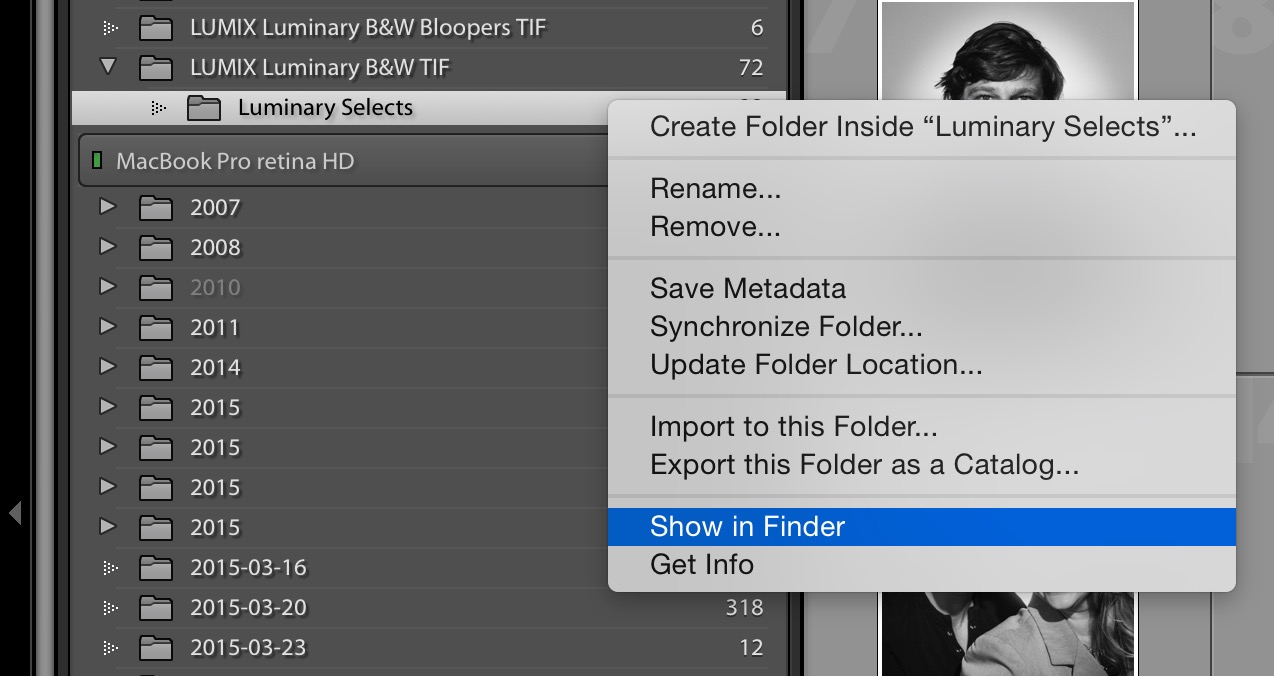 Right click and choose “Show in Finder” to reveal this Folder in the Finder
Here's what this looks like in the Finder now… exactly as it does in the Folders view in Lightroom. You can see the two “LUMIX Luminary…” folders, and the new “Luminary Selects” subfolder.
 Here’s the Finder view
Moving the photos to Dropbox for collaboration
In the Finder, now you can just move that folder like any other folder. In my case, I moved it into Dropbox, so I could share that folder with another Luminary. But once you do move that folder in the Finder, Lightroom will lose track of it, which is indicated by a question mark on the Folder, as you see below. To “reconnect” it (in Aperture parlance), right-click and choose Find Missing Folder… which will open a Finder window so you can point Lightroom to its new home.
 You’ll need to “Find Missing Folder…” in Lightroom once you’ve moved it in the Finder
Once the folder is in Dropbox, it's easily shared by right-clicking and choosing Share This Folder… and adding the email address of the person you're sharing with. Once they accept, the files will load on their computer where they can edit.
Collaborative editing
Since the person I sent this to is using Dropbox as well, they can have the folder of photos on their drive just like I do. As long as they edit the photos in that folder, I will see those changes sync back to my system, which Lightroom will see and automatically update. I'll know the file has been changed in the Finder because this little up arrow icon tells me that the metadata in the source file has changed:
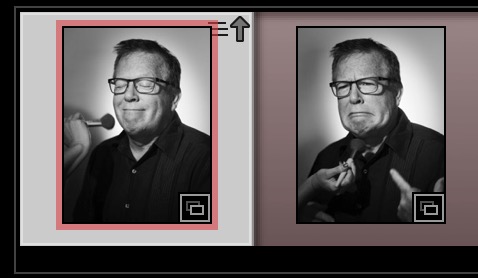 The up-arrow indicates that the metadata has changed by another application
Clicking that will prompt me to update the metadata in Lightroom, or to overwrite the metadata in the file with what was already in Lightroom. Notice this is metadata, not image data, so whatever retouching that was done will stay there regardless which way I choose to go.
Yes there's a risk…
There's certainly a risk or two here. The other user could erase or otherwise destroy these files, and *poof* there goes my copy. But since it's Dropbox, I can always roll that back and choose an earlier version. Or, I could just backup the folder on my end, which I did by zipping it. If we both tried to work on the photo at the same time, that could be a real problem too, but knowing that I've handed these off to someone else, I just need to keep my hands off of them, which is fine. So let's call this mitigated risk, shall we?
When done I can put things back
Once the collaboration is done, I'll move those images back from Dropbox to the location where I normally store my originals.
Summary
I'm still getting used to the Lightroom workflow, but little things like this are, I think, interesting. The fact that the selection was maintained across views is quite cool. And because Lightroom will see the changes made by another app and show them immediately in Lightroom, that makes collaboration like this possible using a service like Dropbox.
And no, it's not lost on me that if I were to do this in Aperture, all I'd have to do is select the images anywhere in Aperture, and choose Relocate Originals and put them in Dropbox. Look I didn't start this off saying this was a better solution… ;-)
More like this
- Tip
- Tip
- Tip
- Tip
- Tip

Comments
on August 12, 2015 - 12:24pm
Good post! Cant wait for your tutorials to learn how to use LR. From import to edit to export! so excited about it!