Add a Twilight Look to Your Photos Using Curves

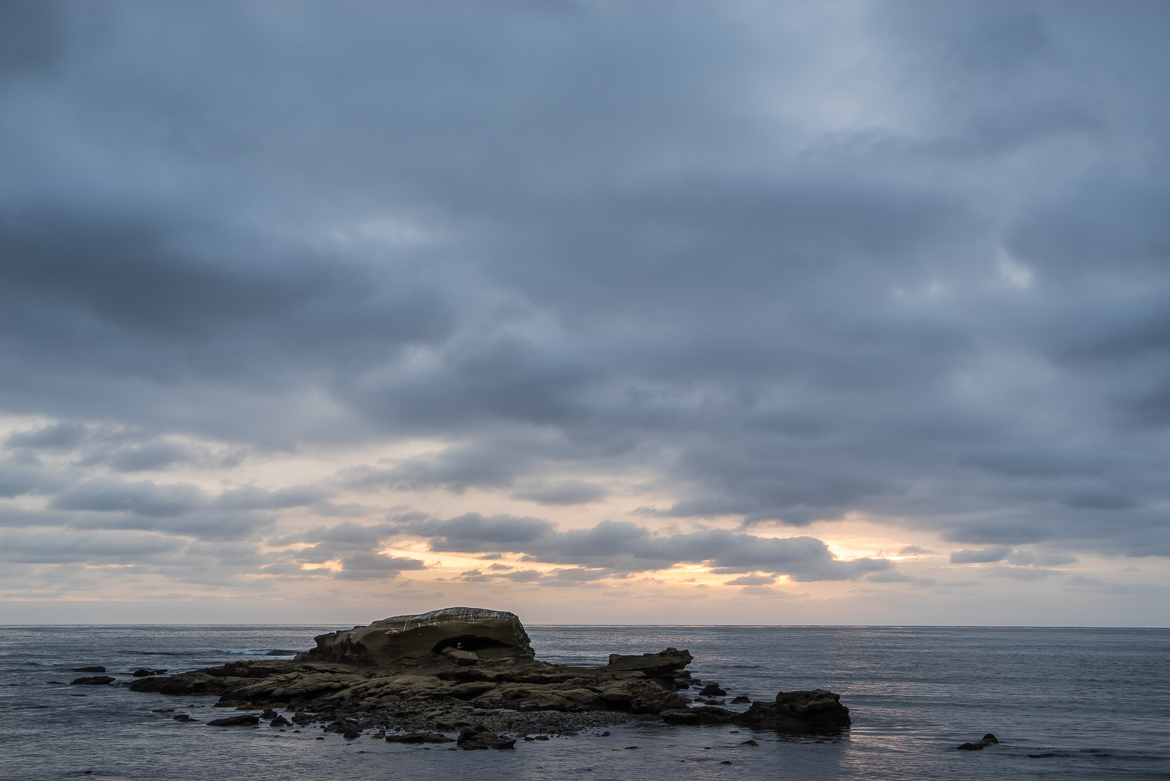
Most of my photos are taken at dawn or dusk… ah, the life of a landscape photographer. It's a natural fit that I like the twilight look in my imagery. Sometimes, the universe doesn't dish out glorious light and color. More than sometimes. Often, actually. With a little curves work in post processing, a twilight look can be coaxed out of your photos. The technique is very simple:
- Increase the highlights and midtones in the Red color channel
- Decrease the Green color channel at the midpoint
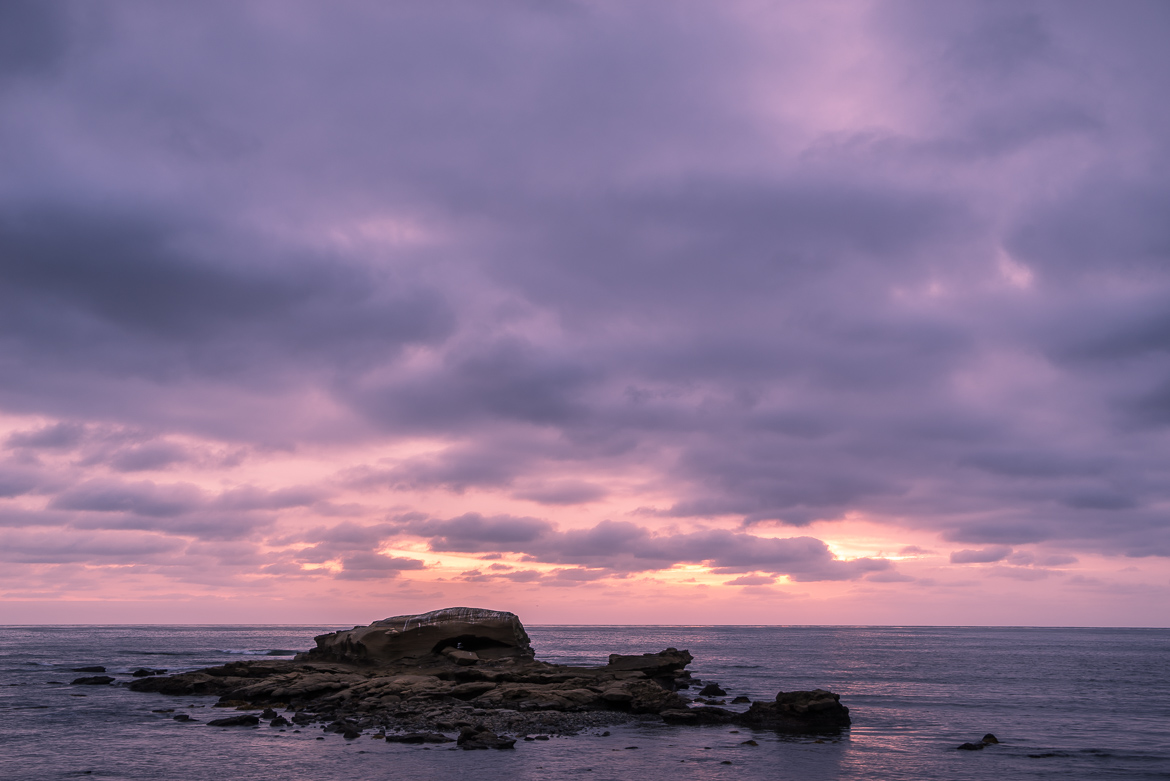
These two steps quickly and effectively give your photo a twilight look.
In this article I'll show the detailed steps using Lightroom's Develop module. However, Lightroom is not required for this effect. This technique also works in Aperture, Photoshop, ON1 Perfect Effects and many other software packages. As long as your processing software gives curves control for the individual red, green and blue color channels you are good to go.
Lightroom's Tone Curve
In Lightroom's Develop, open the Tone Curve panel just beneath the Basic panel.
 Lightroom’s Tone Curve Panel
In the bottom of the Tone Curve panel is the Point Curve section. At the very right is a small icon of a tone curve. Click that icon and the Channel control is revealed.
 Edit the Point Curve to access the red, green and blue channels of the Tone Curve
By default, the combined RGB curve is displayed. Clicking on the Channel pulldown, you can select the red, green or blue channel and make per channel adjustments.
Adjusting the Red Channel
Choose the Red channel in the Tone Curve panel. You can set a control point on the curve by clicking on the diagonal line. I usually start in the upper midtones and drag the curve upwards increasing the reds in the upper midtones and highlights. Next, I'll use a second control point to bring the center of the curve back to the nominal setting (close to if not dead center on curve).
 Increase the reds in the upper midtones and highlights
This is typically a good starting point. Don't worry too much at this stage if your image looks “funny”. You've only adjusted one of the color channels, so it will have a reddish tinge in the range you have boosted.
Adjusting the Green Channel
Next, switch to the green channel in the Tone Curve and decrease the amount of greens in the image. I'll start with a gentle tug downward on the curve.
 Decrease the greens using the Tone Curve
As the green decreases, the purplish hues of twilight will quickly appear.
Fine Tuning
It's common to revisit the red and green channels several times, tweaking the curves to get the exact look you want. Each photo is unique and the precise adjustments will vary from image to image. As with most curves adjustments, subtlety and finesse is key.
Aperture, Photoshop and ON1 Perfect Effects
Not using Lightroom? No worries. Aperture's Curves adjustment brick, Photoshop's curves adjustment and ON1 Perfect Effect's Tone Enhancer filter each offer curves controls for the red and green color channels. The same principles apply to these software packages as well.
 Aperture’s red channel curves adjustment Aperture’s red channel curves adjustment
|  Aperture’s green channel curves adjustment Aperture’s green channel curves adjustment
|
 Photoshop’s red channel curves adjustment Photoshop’s red channel curves adjustment
|  Photoshop’s green channel curves adjustment Photoshop’s green channel curves adjustment
|
 ON1’s Tone Enhancer red channel curves adjustment ON1’s Tone Enhancer red channel curves adjustment
|  ON1’s Tone Enhancer green channel curves adjustment ON1’s Tone Enhancer green channel curves adjustment
|
The shape of the curves will vary since Aperture, Photoshop and ON1. Different software uses different algorithms for post processing.
Comments
on October 5, 2015 - 8:57pm
Scott,
you can also effectively do the same thing in the OS X Photos app with the Levels tools because it has 8 control handles and allows you to edit the individual RGB channels. Those 8 control handles will allow you to do most of what you need the curves for. Check it out!!
http://pic.twitter.com/gMbWz4NPga
Robert Ke
twitter: rke21
also at:
instagram: rke21
facebook: outdoorphotographynow
on October 5, 2015 - 9:38pm
Very cool! I haven't done any work with OS X Photos yet. Thanks for sharing this!
Scott
http://scottdavenportphoto.com/
on October 6, 2015 - 3:56pm
@PhotoJoseph
— Have you signed up for the mailing list?
on October 11, 2015 - 9:51pm
Just to mention, this technique can also be done in Affinity Photo, Pixelmatr and Darktable. Faster to do i Darketable because its Tone Curve tool uses LAB colorspace.
Pixelmator’s curve effect bakes the changes into the layer so you need to make sure you duplicate the layer and never apply this to the background layer.
Affinity Photo is better because it is an adjustment layer which means you can go back later to make changes because changes are non-destructive. The best part is Affinity Photo adjustment layers can be made into special object filter by nesting it into a layer.
Darktable’s Tone Curve uses LAB color space instead of RGB so you cannot do it exactly like this. In my opinion, It’s faster with Darktable’s Tone Curve because you only need to adjust the B channel instead of doing both the Red and Green channel.
Robert Ke
twitter: rke21
also at:
instagram: rke21
facebook: outdoorphotographynow