Composite a Perfect Group Portrait with Lightroom and Photoshop

If you've ever tried to photograph a large group of people, you know that it's virtually impossible for everyone to look at the camera and smile at the same time. You'd think it wouldn't be… I mean, really, is it that hard to just look at the camera and smile? Apparently, it is. No matter the group, no matter who's in it, someone will always be looking the wrong way. Or picking their nose. Or blinking. So the solution is to build a composite and create that perfect portrait.
If you hold the camera in the same position (tripod is nice but certainly not necessary), and get several shots, you can layer them in Photoshop and brush between layers to make sure you have everyone looking their best. If they aren't moving (much) between shots, it'll be relatively easy to do.
What about a really big group?
Sometimes the group is so big (or your don't have a wide enough lens, or you can't step far enough away) that you can't even get the entire group in one shot. So, double the problem.
Here's how I solved this for my brother-in-law's wedding last summer.
- Shoot a panorama of the group. Just fire, pan a little, fire (make sure you have plenty of overlap), and repeat until you get the entire group.
- Repeat this. Several times. I panned left to right, shooting… paused a moment then repeated the opposite direction, paused, repeated. I think I shot four passes when I did this. You can see that in the first grouping of photos below.
- Stich each panorama together.
- Layer all the panoramas in Photoshop and build a composite.
Let's look at it step by step.
Shoot the panorama
In the screenshot below, you see all the images shot. You can see the pan from left to right, then a duplicate at the right as I started the pan over, moving left, etc. You can even see in the first one that the big guy in the white shirt on the right decided to change sides and ends up on the left after that. Not helpful! So, the first panorama got ditched.
 All the original photos
Stitch together your panorama photos
In Lightroom, it's easy to stitch together your panoramas. Below you see a selection of four images. If you need to make any exposure changes, do that now and be sure it's evenly done across all images. I would hold off on any localized adjustments for now though. Select all of those photos…
 These four best will be the basis of our composite
…then right-click and choose Photo Merge > Panorama.
 Crate a panorama of a series using Lightroom’s Photo Merge command
The end result in this case was pretty good. Not perfect (there's at least one stitching error you'll see below), and certainly not everyone is looking at the camera, but it's a start.
 This composite of the four best will make a good base layer
Build a composite
Once you've created a panorama out of each usable series, select all of those and stack them in Photoshop. Just select your panoramas and from the Photo menu, choose Edit In > Open as Layers in Photoshop.
 Open all the composites as layers in Photoshop
Choose a base photo and align the layers
Look at each of these layers and choose the best one. The one that has the least number of faces you need to fix or stitching problems you need to overcome. Once selected, I named it “BASE photo” and put it at the bottom of the stack.
 Choose a BASE layer
You may need to realign the layers if the camera moved between shots. I didn't grab a screenshot of it, but the best way to do this is to enable your BASE layer and one above it, then hide the others. Set the layer above to Difference mode, and nudge it around until it lines up with the image underneath as much as possible. It doesn't have to be precise and you'll be able to move individual layers as you go, but it's helpful to have a good starting point. Repeat this for each additional layer.
Name your alternate layers
I would then name each alternate layer as well; something like “ALT 1” and “ALT 2”. Before you use any layer you're going to duplicate it, so this ensures you know which are which.
Start looking for things to fix!
In the below before/after, you see a problem with the stitching and a brushed-in repair on the right.
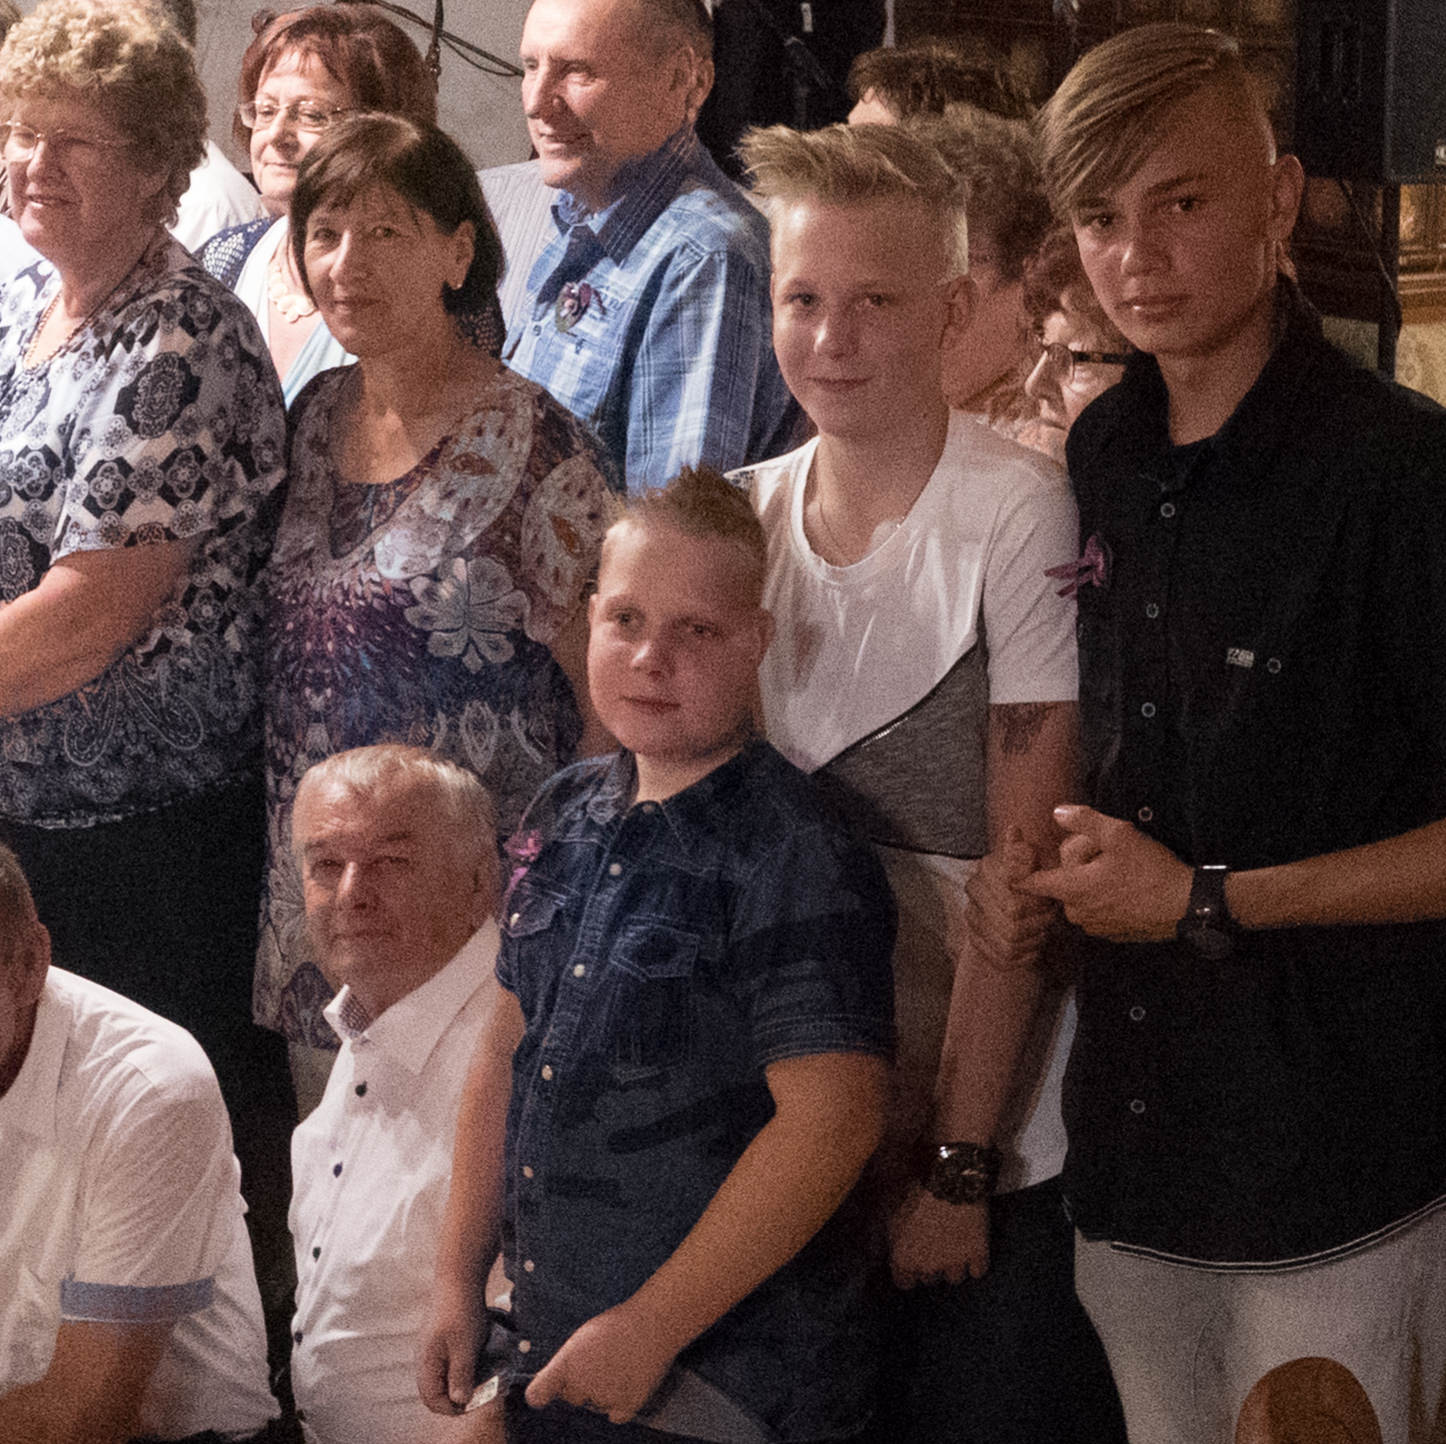
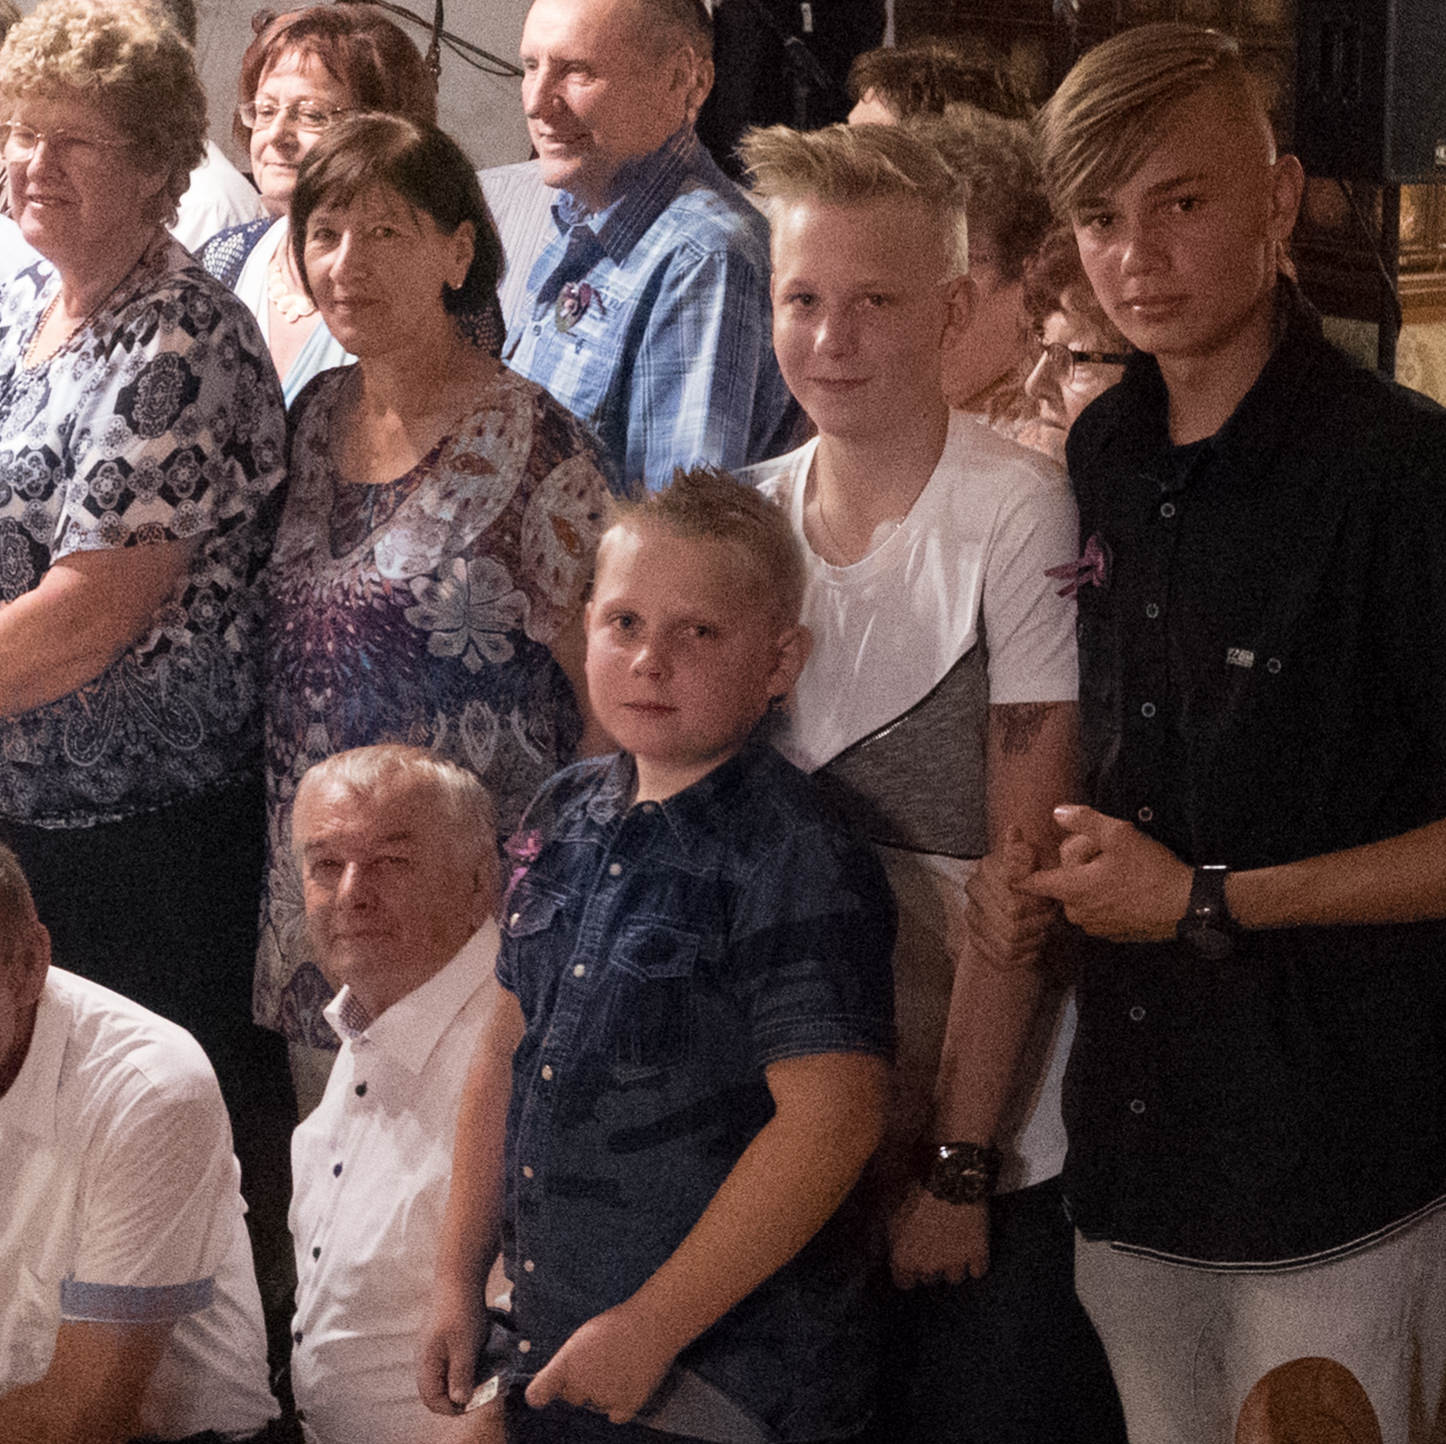
Start brushing in the alternate versions
The process from here is simple, but somewhat tedious and manual. Here are the steps.
- Identify an area on the BASE layer you need to fix (stitching artifact, turned head, whatever).
- Toggle ALT layers on and off while looking at that spot until you find the layer with the best version of that face.
- Duplicate that ALT layer, and name it something identifiable (person's name, a description of what they are wearing, etc.)
- Add a layer mask to that layer. When you first add it, it'll appear all white and nothing will change in the image.
- Invert the layer mask so it shows NONE of the new image, instead of ALL of it. To do this quickly, just click on the mask icon, and type Command-I. This will invert the layer from white to black, and the image will disappear.
- Select a brush tool, scale it to about the size of the face, set it to white, and paint over the face (your mask is still selected, so right now you're painting onto the mask itself). You will of course need to adjust softness on the brush as needed, and possibly brush the mask in and out to really make it blend. You are simply trying to make the new face blend over the old one believably. If there wasn't much movement, it will be easy. If there was a lot of movement, you may need to get quite creative in where you brush the new photo in.
Once you're satisfied, repeat this process over and over again. Remember, you can not only brush the individual face but also move it (the entire alternate layer) as needed. Since at this point all you're using that layer for is a single face, you can position it wherever you like. So if you need to nudge it to get it into the right place, go right ahead.
Once done, your layer stack may look something like this:
 The final comp may have many, many layers
It looks like I had some additional work on some characters. Perhaps I needed to composite a single person from multiple photos. It looks like I had to rebuild a shoulder in one case. Don't forget too that you can always bring a piece of the BASE layer back on top by duplicating that one and moving it up if needed. It can take some effort, but the results can be fantastic!
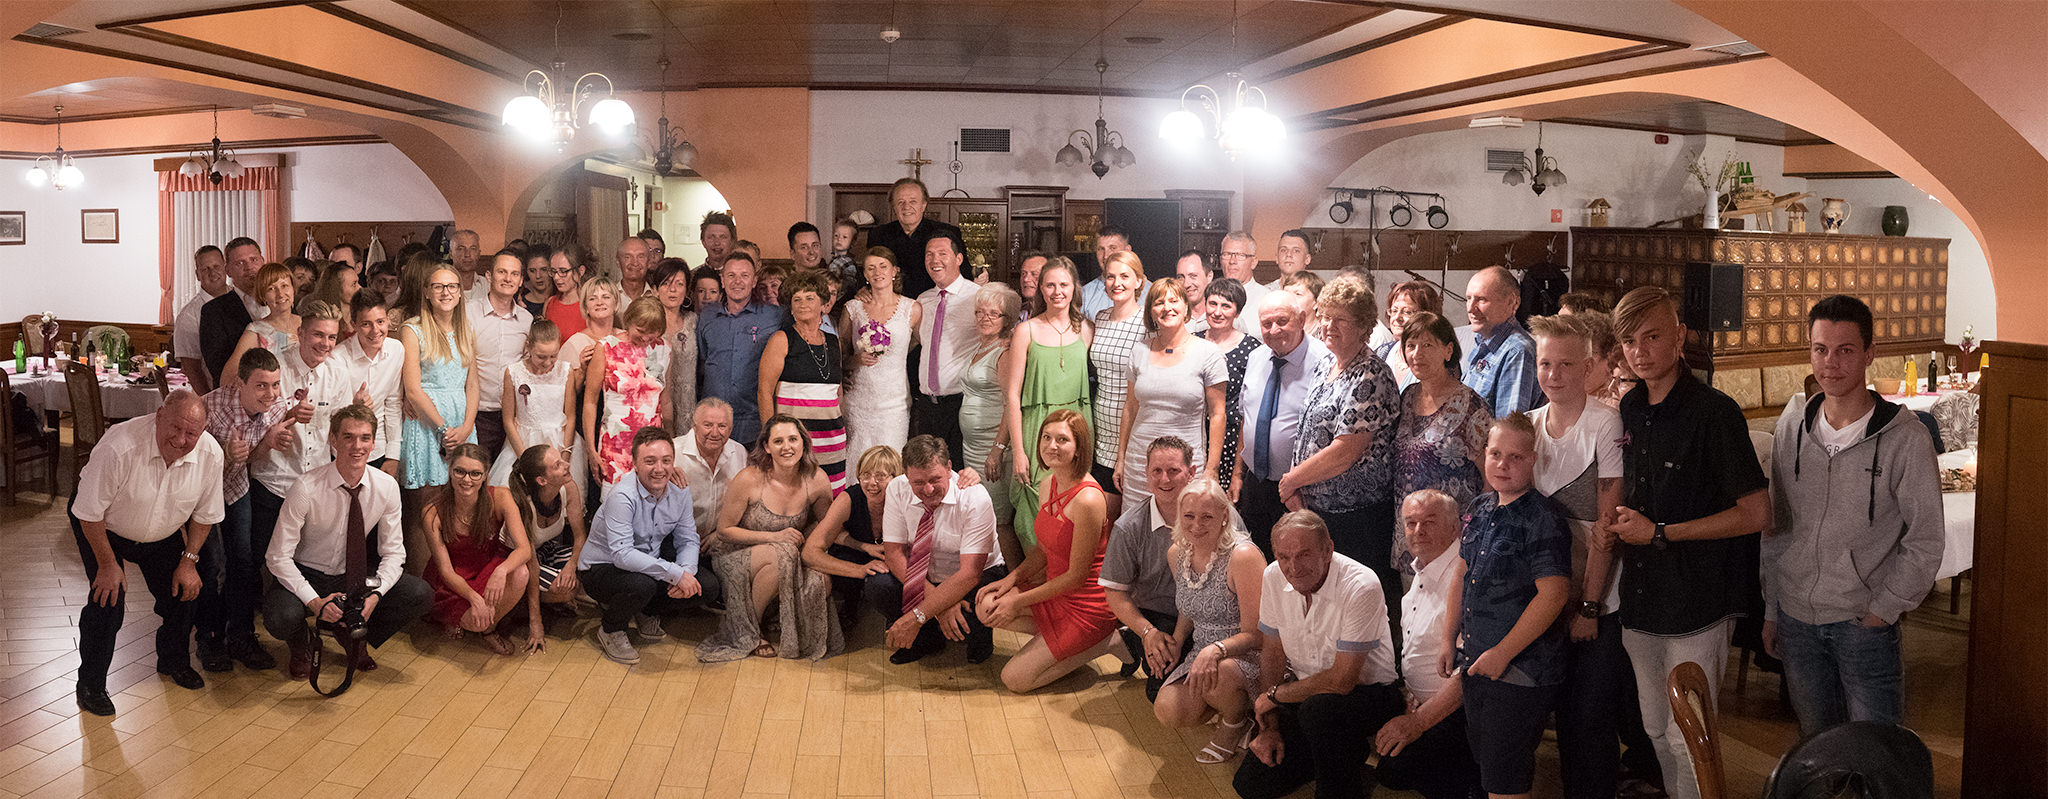
A final composite
Here's a final composite before and after. On the left, the original, and on the right, the reconstructed composite.

Once you're satisfied, save the Photoshop file and head back to Lightroom, where it will be waiting for you.
Now treat the image back in Lightroom
Now you can color, dodge and burn, etc. as needed (you can do that in Photoshop too if you prefer). Remember that I advised holding off on localized adjustments until later. Now's your time to do that. In this case I also applied a color look and cropped the image. Voilà, a group composite where (nearly) everyone is looking at the camera! (Some people NEVER looked… whatcha gonna do…)
 Once you’re done, don’t forget to treat the image and make it look its best!
More like this
- Tip
- Tip
- Tip
- Tip
- Tip