You are here

Tips

Teeth Whitening in Aperture 3

PhotoJoseph's picture
July 4, 2013 - 4:00am

Be sure to check out the video version of this tip at the end!

Reader Dane [@danebert on twitter, manfesto on flickr] suggested writing a tip on teeth whitening in Aperture. I asked what technique he used, and he replied “I actually use a saturation brush - cover the teeth and drag saturation down”. I tried it, but found it to be a bit heavy-handed, so started experimenting with using Curves, which is what’s described below. In the meantime, he went back and tried it with the Color adjustment, and reported that this worked even better: “I’m testing the color brick and eye dropper, looks more natural since only yellows get desat’ed and I can brighten too!”. This is one of the great things about Aperture, isn’t it… there are so many ways to achieve a similar goal, and by knowing as many tricks as you can, when one doesn’t work as expected, you can try something else (or even a combo of the two).

Below I’ll outline a few simple steps to doing this using Curves, but try it yourself as Dane described, using the Color adjustment. Maybe that’ll work better for you!

Using Curves to remove color tint on teeth

I’m cropping this photo slightly tighter than you might normally, out of respect for the subject :-) You can clearly see that the subject’s teeth could use a little whitening. It didn’t help that this guy is normally pale as a sheet, but came to the shoot sunburned. By the time I “fixed” that, the teeth were even worse.
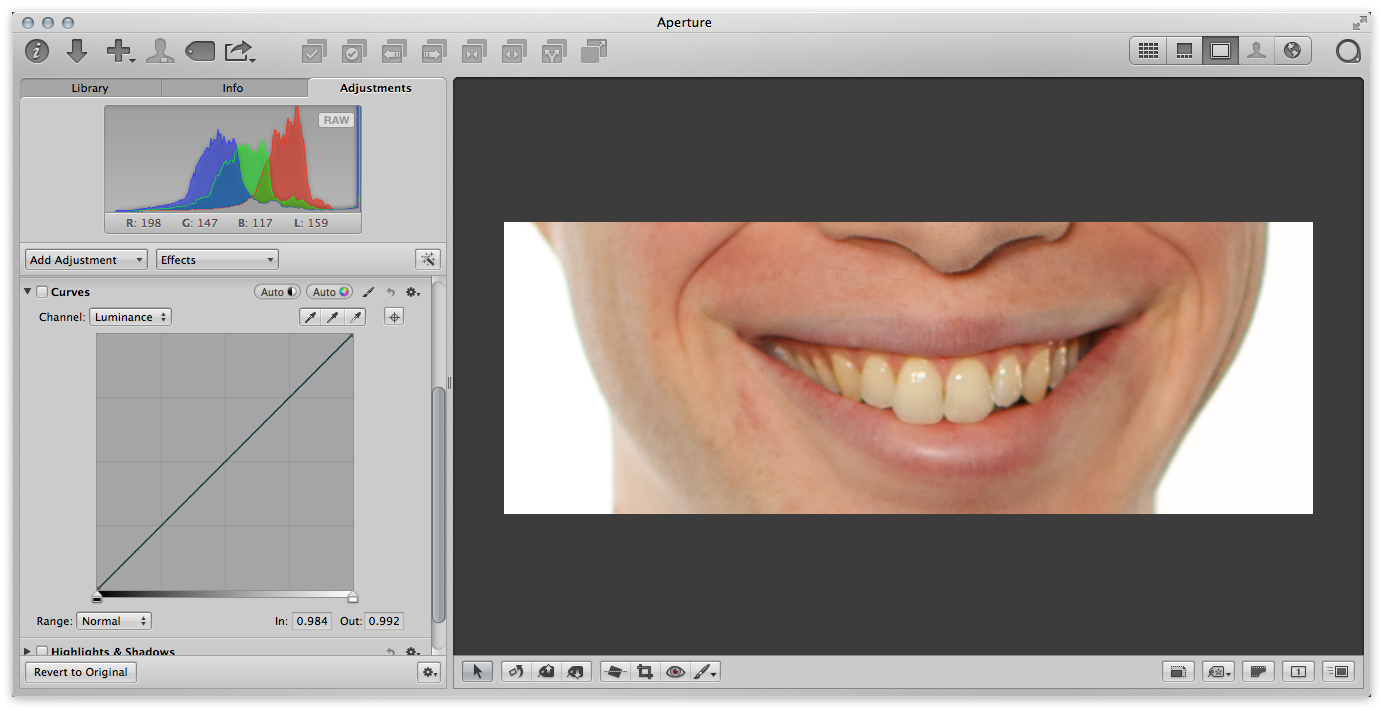
The starting point… notice that the teeth need a little help

The tool I want to use is Curves. Again this is just one way, but it worked out quite well.[more]

Share

Creating Split Tones in Aperture 3

PhotoJoseph's picture
July 2, 2013 - 4:00am

Check out the video version of this tip at the end!

Split toned images are those photos where the original color is gone, and the shadows shift to one tint while the highlights shift to another. If a monochromatic image has only one tint added to it, such as a brownish tint making a sepia image, that’s simply a color tint. But when you split the shadows to one direction and the highlights to another, you have a split tone.

I released a preset pack called “ApertureExpert’s Preset Pack Split Tone” quite a while ago, and while of course you can reverse engineer those to see how it’s done, I thought I’d share the process here. It’s quite simple, and this way you can make hundreds of your own presets, too.

The starting point

Like any effect, there are images where this treatment works very well, and images where it simply doesn’t. Here’s the photo I’ll be starting with. It’s largely monochromatic to begin with, but that’s actually not terribly important. What’s more important is that it has good range from shadows to highlights. In this shot the sky is blown out (it was a terribly overcast day) but the statues themselves have good range from dark to light, and that’s the part of the image we’ll be focusing on.

The original image shows good tonal range in the statues, making a great candidate for the split tone effectUndoubtedly you’ll want to experiment, and you’ll find that some photos look awful with this treatment, while others look great.[more]

Share

Custom Info (Metadata) Views in Aperture 3

PhotoJoseph's picture
June 25, 2013 - 4:00am

(There is a video version of this tip at the end)

Metadata is the data about our photos, including EXIF, IPTC and some custom Aperture metadata. In Aperture’s interface, there are three tabs where we have access to, read metadata on, and make changes to our images. The middle tab is called “Info” (formerly known as Metadata), and that’s the one we’re looking at here.

Customizing the default view

The default view is called “General” and contains some critical info, but not a huge amount of it. There’s a lot more info about your photos you’re not seeing here.

The default, “General” metadata view

There are other preset views as well, but the key is that you can edit these views to show whatever you want. Start by going to the bottom of the preset menu and choosing Edit…[more]

Share

A Photography and Workflow Interview in the Russian Travel Magazine "Voyage"

PhotoJoseph's picture
June 22, 2013 - 4:00am

Yesterday I posted an article on my photography blog that I thought some of you here might be interested in. I was interviewed (via email) for a Russian travel magazine called “Voyage”, about my experiences and tips on photography, editing on mobile and desktop, and more. It’s funny; I got seven “big” questions (one of which I discarded because I’d already addressed it), and wrote about five pages of response. All of that got compressed to just one page in Russian!

Share

What Additional Tools Are Essential to Your Aperture Workflow?

PhotoJoseph's picture
June 20, 2013 - 4:00am

Aperture is the center of our photo managing and editing workflow, but we all have extra tools, plug-ins, tricks and techniques up our sleeves. What completes your Aperture workflow?

Here are the essentials that I have on my system revolving around Aperture and my photography. What do you use? Let us know in the comments!

Share

Aperture SDK Updated to 3.4

PhotoJoseph's picture
June 15, 2013 - 4:00am

This should help silence the naysayers…

Aperture’s SDK (Software Development Kit), which are the guidelines and tools that developers need to create plugins for Aperture, was recently updated (2013-06-05) to version 3.4. The update is very minor, but exceptionally signficant. Here’s what the developer page has to say about it.

The Aperture 3.4 SDK provides the same functionality as the Aperture 2.1 SDK, but in addition, provides templates and samples that build with Xcode 4.4 and later, and on either OS X 10.7.5 or 10.8.3 and later.

Why is this significant?[more]

Share

iOS 7 Photos… the Reason for Aperture 4 Delay?

PhotoJoseph's picture
June 11, 2013 - 4:06am

I just finished watching the WWDC 2013 keynote presentation, and I gotta say that iOS 7 looks pretty sweet. One of the big things that caught my eye of course was the new Photos app, and its showing of “Collections” and “Moments”. This is notably similar to the service Everpix.com, where your photos are automatically collected into, well, collections and moments, making it easy to find and a pleasure to browse your photos.

Share

Pages

You may login with either your assigned username or your e-mail address.
Passwords are case-sensitive - Forgot your password?
randomness