Photo Storage Management

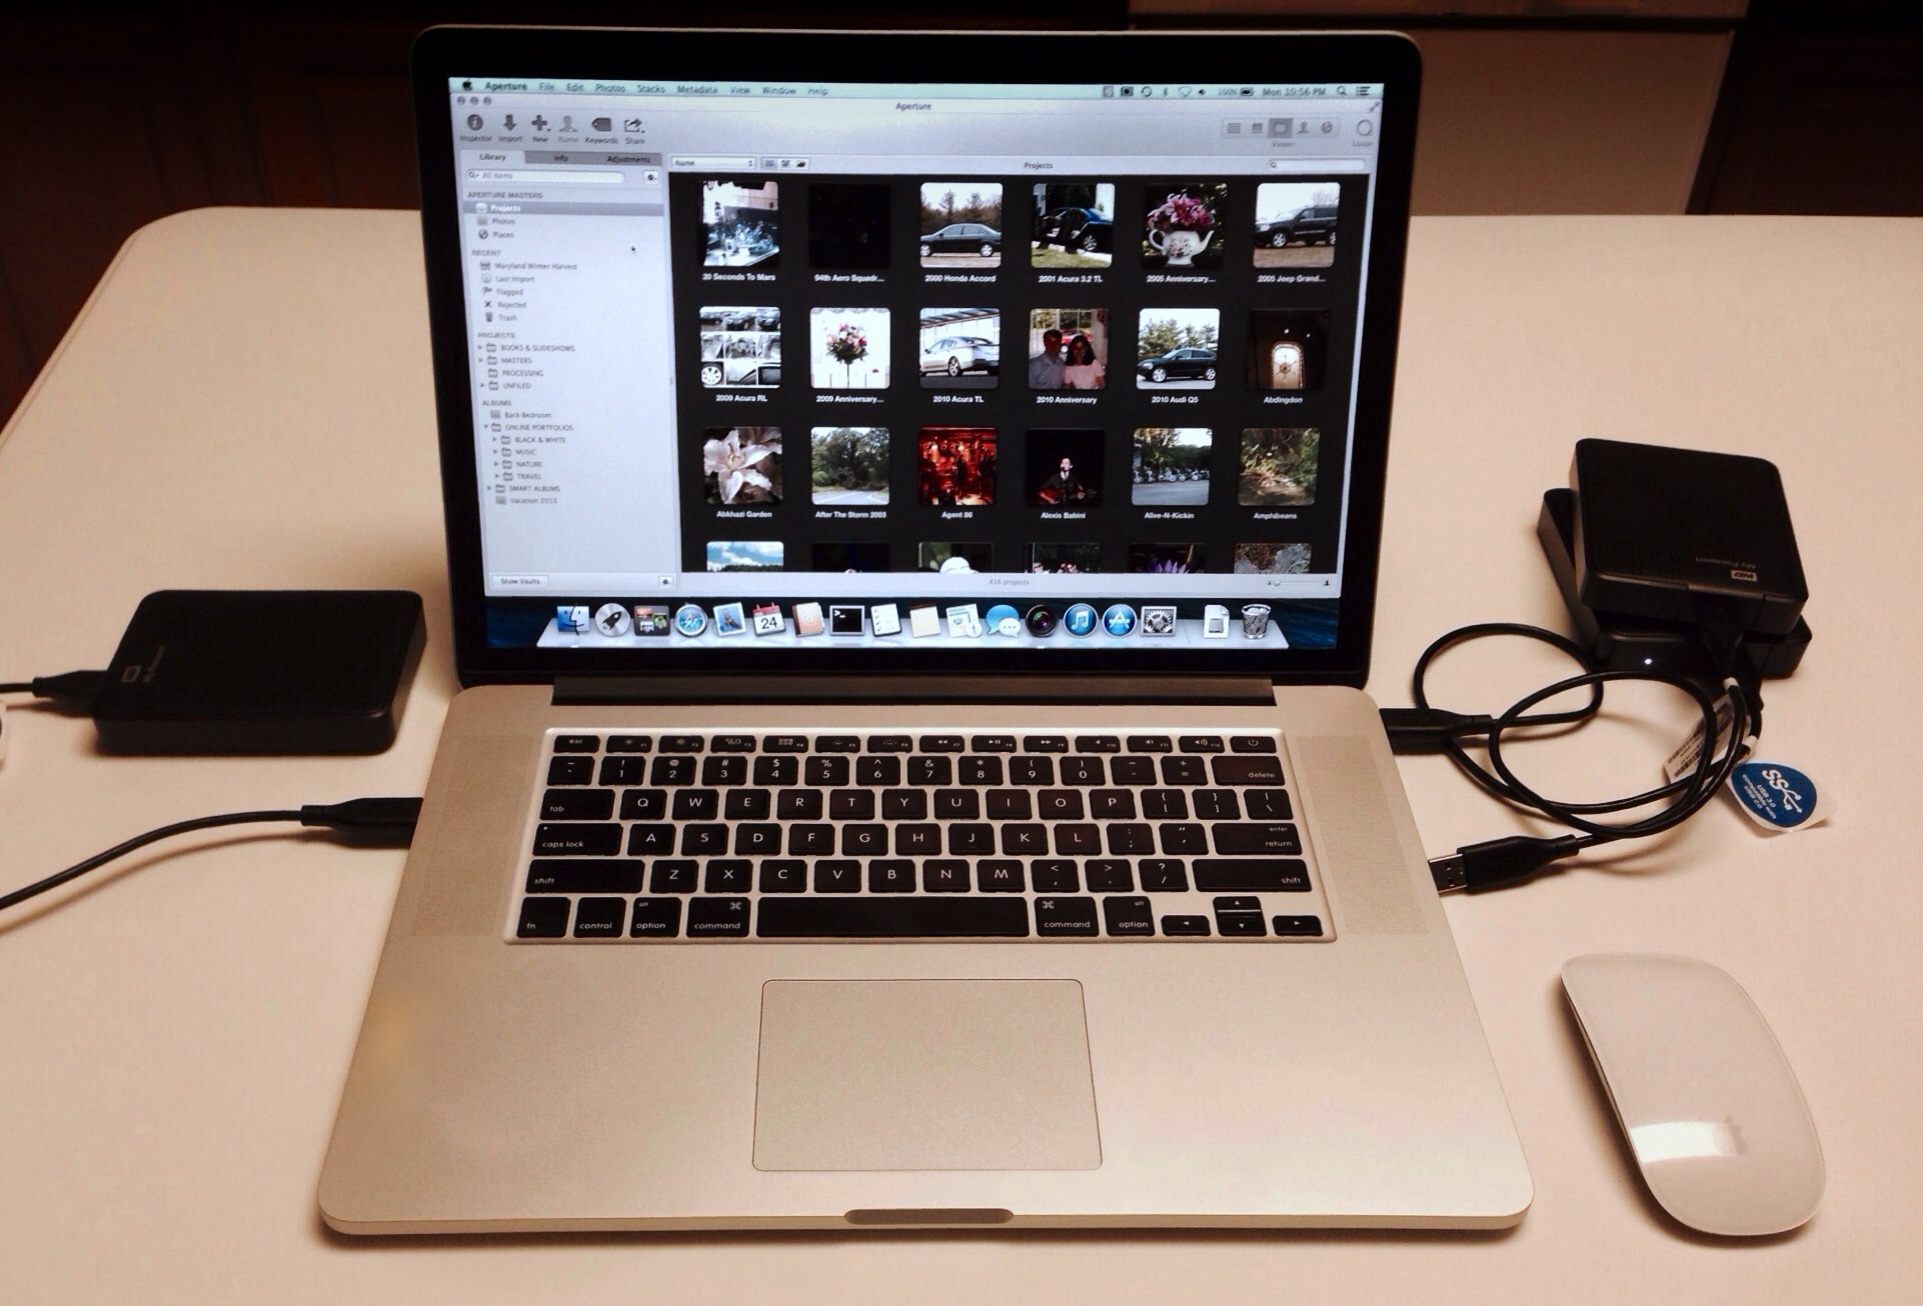
Photo storage management is a topic that comes up often. I have participated in numerous discussions on this topic here on ApertureExpert.com and on other photographer community sites. Regardless of what photo management software you use to edit, catalog and manage your photographs and videos, you need a good strategy for physically storing and preserving these valuable digital assets. While photo storage management is only a part of the larger subject of Digital Asset Management, it is of such importance that it deserves dedicated attention. In this article I share my method for photo storage management.
There are two components to my photo storage management solution: the physical storage media, and a disciplined process for keeping backup copies of my Libraries in sync with my master Libraries. I don't take tens of thousands of photographs a year, I don't shoot thousands of images at a given location, and I don't shoot a lot of video footage that consumes large amounts of high performance storage. My photo storage management solution is driven by convenience and peace of mind. If you require large capacity (many terabytes) and/or high performance storage (7200 rpm+ drives), this may not be the solution for you. I believe this solution will work for the vast majority of photographers who will read this article.
Physical Storage Media
My physical storage media of choice is 2TB, USB-powered, portable, USB disk drives. I have four of them. I prefer these drives precisely because they are USB-powered, compact and portable, and cheap and easy to replace.
- These drives don't require external power. They get their power from the USB cable that connects them to my laptop. I can sit in any airport or at any cafe, turn on my laptop, connect my USB drive, and I have access to my entire photo collection.
- These drives are compact and portable. I can put two drives in my laptop bag along with my laptop and it's power chord, and I am ready to travel anywhere. I don't need space in my bag for disk drive power chords, I don't need power outlets to use my disk drives, and I don't need power converters for them in foreign countries.
- These drives are cheap and easy to replace. They are commodity items stocked in most electronics stores. For about $100 USD, I can purchase a new 2TB Western Digital MyPassport USB3 drive almost anywhere on the globe. I carry two with me. I keep them in sync as I travel. If one fails, I can replace it on the spot, populate it from the second drive I have with me, and I am off and running again.
As I said, I do not require large capacity, high speed storage. These drives typically have 5400 rpm disks inside them. That speed is sufficient for most of my work. I don't do the majority of my editing and metadata tagging in my master library. The master library is primarily for searching and archiving.
Disciplined Storage Management
I use a disciplined storage management process for maintaining backups of my Libraries and files. This process encompasses ingesting new images from the camera, making selections, applying adjustments and metadata, merging the new images into my master Aperture Library on my master disk, and finally synchronizing that master Library disk to all my backup disks.
When I am ready to import photographs from my camera, I create a new temporary Aperture Library on my laptop's internal HD. I import all my new photographs into this temporary Library. This temporary Library is where I make my selections, delete all of the unwanted images, apply all of my adjustments and metadata (contact info, keywords, location info, captions, descriptions), and apply star ratings and color labels to my liking. The bulk of my work on new images takes place in this temporary Library. Once I am finished processing these new images, I am ready to merge them into my master Library.
To merge new photographs into my master Library, I open the master Library on my master disk in Aperture, then use the menu item File > Import > Library… to import the internal HD temporary Library into my master Library. After this import completes, I then move the new photographs into their permanent locations in the organization structure of my master Library. At this point my master Library is up-to-date so I exit Aperture. Exiting Aperture insures that all of the information in my Library is safely written to my master disk and nothing is going to change it. My master disk is now ready for synchronization to my backup disks.
There are many tools available for synchronizing data between Mac OS X disk drives. I am an old school techie who is comfortable working with Apple OS X Terminal so I use “rsync”. The basic premise of this command is “rsync <source drive> <target drive>”. So one-by-one, I connect my backup drives to my laptop, execute one “rsync” command per drive, and disconnect the backup drive. This gets all of my backup drives in sync with my master drive. Any changes in my Master Library are now reflected on all of my backup drives. For those that prefer to use the multiple-library photo management, my method still applies provided all of your Libraries are on the same master disk.
 This is what rsync looks like on my system
Some may find these products more comfortable: ChronoSync, SuperDuper! and Acronis. If you use one of these products, you will select your master disk as the source and one of your backup disks as the target, press a few buttons, and off it goes.
With rsync or any of the other tools I mentioned, the major benefit is that they look at individual file dates, sizes and disk blocks to determine what has changed, and they only copy over the changed bits. This is a very efficient and speedy process for keeping the backup disks in sync with the master disk.
Aperture provides the Vault process for maintaining backups of your Library(s). That works, but can be slow and inefficient. In addition, if you use a Referenced Library, it doesn't include backing up your actual photographs, so you still need a disciplined process for maintaining backups of your referenced files. I use a Managed Library on my master disk as my Master Library. All photographs and their metadata are in my Master Library on my master drive. My disciplined storage management process insures I always have everything on a single, easy-to-use disk, and that my backup disks are also wholly complete and ready to use should my master drive fail.
Benefits of Disk Synchronization vs Aperture Vault
One of the key benefits of my disk synchronization method over using Aperture Vaults is that everything on the master disk is synchronized to the backup disks in a single command per disk. With Aperture Vaults, you have to update the Vault for each Library individually and one at a time. Another key benefit if the disk synchronization method is that I can use a Library on any one of my backup drives at any time without having to restore an entire Vault. This is key for two reasons.
First, if my master drive fails, I have a ready-made backup drive I can begin to use immediately as my new master drive. You may recall I said above that I put two disk drives in my laptop bag when I travel. Because these are commodity disk drives, they do fail from time to time. For me, maybe once a year. Usage pattern dictates “mean time between failure” as it is known in the technology industry so your mileage may vary from mine. Since these drives can fail, I always keep a second drive with me. When I import images into my master drive catalog, I immediately synchronize the master drive to the second drive I have with me. This insures that I have two copies of all the new images I added to my master catalog while traveling. If my master or backup drive fail while traveling, I can pop into any electronics store and pick up another one. After an initial sync from the remaining good drive to the newly purchased drive, I am ready again.
Second, if I happen to delete something from a Library on my master drive and decide I want it back, I can open the same Library on a backup drive, export it to a temporary Library, and merge that temporary Library back into the master drive Library. Of course this only applies if I have not synchronized my master drive to my backup drives. Once synchronization takes place, accidental deletes are lost forever.
So what about those third and fourth disks I mentioned? One stays at my home and one stays at my office. When I return from traveling, I synchronize my master drive to the backup copy I keep at home. When I next go into the office, I synchronize my master drive to the backup disk I keep there. This process insures that I always have backups in three locations. I keep a master and a backup with me, and I maintain a backup at home and a backup at the office.
Conclusion
My choice of USB-powered, portable disk drives addresses the convenience portion of the drivers behind my photo storage management process. The disciplined storage management process I use addresses the peace of mind portion.
Some will ask why don't I use cloud based services like BackBlaze or Carbonite for offsite backups. I don't use them because I am inpatient. It would take too long to seed them with an initial backup (days or weeks), and it would take too long to restore from them should I ever need to do so. I also don't want to be dependent upon internet access to retrieve them. With my solution, I can populate a new disk from an existing disk in a matter of hours, I have immediate access to a backup should I need it, and I require nothing I do not have at hand. And by keeping two drives with me when I travel I have multiple copies of all new work.
This is my solution. It works for me. That doesn't mean it is the right solution for you. I want to hear in the comments below what others do for photo storage management. What do you use as your primary storage media? What do you use for backups? How do you maintain them? How often do you update your backups from your primary storage? Do you keep copies in multiple locations? Do you use cloud services for offsite backups? Have you ever had to recover from a backup disk or cloud backup provider? What was your experience in doing so?
Originally published as “Photo Storage Management” on Travel Photographers Network.
More like this
- Tip
- Tip
- Tip
- Tip
- Tip
Comments
on March 1, 2014 - 3:20am
Walter, Thanks & congrats for the article. I’ve never really thought about a back up system like yours. I have a 2T Time capsule and a 2T external HD (G tech). On the external HD I have folders (by year using Joseph’s y-m-d system and matching my project names) containing a copy of all of my RAW files from my CF cards. Thanks to you and Joseph, I know I can now do it instantly whenever I upload my photos to a project. I also have some Aperture referenced files on there. I needed to do that to make room on my MBP laptop (4+ years old now). I have a vault to my MBP Aperture library manged files also on the external HD and two other portable external HDs; a 1TB that stays at home and an older 500GB that stays at my office. I have copied some of my critical and personal documents onto my 2T external HD. In additional to all of this, I have an off site backup (similar to carbonate but from a different company). I am intrigued by your set up. I am waiting until the end of the year to see what Apple will come out with in their line of MBPs. I will probably get a new MBP laptop with a big enough HD to keep my present and future Aperture managed files and will definitely use at least one new portable HD as a bootable backup like you do and may very well convert my existing 2T external HD to one as well.
I found your article very informative and useful and I want to thank you for all of the help you have provided here on these forums.
Florian
Florian Cortese
www.fotosbyflorian.com
on March 1, 2014 - 1:24pm
Nice idea! I use a NAS and the HiDrive-Backup-App of Synology to backup my Aperture Library first of all from my local disk to the NAS at home and every night, it performs a backup (by rsync) to my cloud storage at Strato in Germany. On the road, I use the Cloudstation feature of my NAS to send new photos to my home NAS.
on March 1, 2014 - 3:54pm
well, I wonder if this year we are going to get Mbps with bigger than 500GB SSDs… My new MBP (250GB SSD) forced me to move my library off my main HD onto external storage (1TB WD Elements USB 3.0). I am keeping all my images in one main library (managed), because trying out referenced showed I’d not gain enough space to keep a referenced library on my disk with all my images. The idea to keep new shots on an active library and merge it (and clone it) is a nice one though. Since I am working with analog – scanned files, only, I am facing file size between 20MB and 40MB per image… don’t know how well that should go.
I got me a new MBP following a failure of my older MBP (500GB internal HD) my backup was not up to date (ouch) so I lost some processing (no masters itself). That got me thinking about backup solutions. I do keep a bootable backup – but can keep no Aperture library on it any more due to size retrains. I partitioned that drive and keep a backup copy of my main library on it.
I regularly copy my main library to other external HDs via Chronosynch (two of them). I have started to use Crashplan, both to an external HD and to the cloud. The latter is not yet finished but will and then I hopefully will be able to keep the current library on copy offsite.
I am bit in a quandary, even though the drives you mentioned are somewhat cheap, I still have not been able to buy more than two and will have to keep that going next month (with new money).
R.
http://rlfsoso.tumblr.com/
on March 2, 2014 - 6:06am
do you need to download rsync?
on March 6, 2014 - 8:14pm
Anyone trying this must read and understand:
https://developer.apple.com/library/mac/documentation/Darwin/Reference/M…
We shall not cease from exploration.
And the end of all our exploring
Will be to arrive where we started
And know the place for the first time. --TS Elliot
on March 2, 2014 - 10:54am
Thank you Walter for this brilliant article very helpful.
I bet a few readers might not be very familiar and daring to use the Terminal (like me). Is there any chance you might provide us a basic tuition on “how to” process rsync from start to end? Or a link where to get it?
Many thanks
Frederic
FreddyNoel
on March 2, 2014 - 1:38pm
Thanks! Mac OS X comes with rsync, but it is a dated version. The manner in which it works is a bit slow. I researched this and came across an article someone else wrote that shows how to get the latest version, and how to use it so I won’t re-invent the wheel by writing it up again.
First you will need to install Homebrew, a package management tool for OS X ..
Open a Terminal window (Applications > Utilities > Terminal)
# ruby -e “$(curl -fsSL https://raw.github.com/Homebrew/homebrew/go/install)”
Then go here to see how to download rsync using the “brew” command ..
http://blog.brettalton.com/2013/08/05/how-to-speed-up-rsync-on-your-mac-…
I used method A in the linked article (Homebrew) to install the latest “rsync”.
From there you can follow the instructions in the linked article to run the command.
Photographer | https://www.walterrowe.com | https://instagram.com/walter.rowe.photo
on March 2, 2014 - 1:37pm
Great article, Walter; thanks a lot for pointing out the faults in Vaults and the rsync option. I second FreddyNoel’s request for a brief rsync tutorial, and I have this question: must one sync everything on one’s master disc (all apps, docs, etc.), or can one specify exactly which files to be synced, such as Aperture libraries?
Thanks
Tom Thomson
on March 2, 2014 - 1:44pm
Walter, our posts crossed in the ether. What do we do with the line beginning # ruby? I cut and pasted it in my terminal window at the cursor, but nothing happened. I’m a novice at using Terminal, obviously.
Thanks
Tom Thomson
on March 2, 2014 - 6:15pm
The # sign represents the Terminal window command prompt. Don’t copy-n-paste that. Just start with the ‘ruby’ command and use the rest of the line.
Photographer | https://www.walterrowe.com | https://instagram.com/walter.rowe.photo
on March 3, 2014 - 2:14pm
Also, you can rsync any source to any target, be it a single file, a folder, or an entire disk. In fact in the rsync command I use, rsync basically thinks the source disk is a folder. It doesn’t treat that any different than it would a source folder in your home directory.
When a source is specified with a slash (‘/’) at the end, that tells rsync to treat it like a folder and sync the entire folder tree from there down. Note that my source and target disk specifications end with a slash. That insures that the entire contents of the source volume folder tree starting with the top of the disk volume are synchronized to the target volume.
rsync -a –delete –info=progress2 /Volumes/Photo\ Masters/ /Volumes/Photo\ Backup\ 1/
rsync -a –delete –info=progress2 /Volumes/Photo\ Masters/ /Volumes/Photo\ Backup\ 2/
rsync -a –delete –info=progress2 /Volumes/Photo\ Masters/ /Volumes/Photo\ Backup\ 3/
Photographer | https://www.walterrowe.com | https://instagram.com/walter.rowe.photo
on March 5, 2014 - 10:00pm
Thanks for the great article. I’ve always backed up my Aperture library to 3 separate remote drives by using the Vault feature in Aperture. I took your advice to disk sync to my 3 drives using ChronoSync. Upon doing so, I noticed that instead of keeping the Aperture library intact, it split up the library into 10 folders. Is this what I was to expect or am I doing something wrong?
Jim Searing
on March 6, 2014 - 2:56am
Thanks Jim. Glad the article was helpful. It sounds like you tried to sync an individual Library and left a trailing slash on name of the source library so it synced the contents of the Library folder and not the library folder name itself. Leave off the trailing slash when you specify a library as the source. When you specify a source with a slash at the end of its name, ChronoSync may think you only want the contents of the source and not the source name itself. I know rsync works that way.
This web page may help.
http://www.econtechnologies.com/pages/cs/chrono_tips34.html
From what I gather on that page, it looks like ChronoSync will only sync the contents of a folder you name. Since Aperture libraries are really just folders, naming a library as the source will only copy over the contents as you witnessed. Move that library into its own folder and specify that folder as the source and you should get the desired affect. For example, create a folder called MySync and place your library inside there, then specify MySync as your ChronoSync source. Then I bet you will see your library show up in your sync destination. Make sense?
Photographer | https://www.walterrowe.com | https://instagram.com/walter.rowe.photo
on March 6, 2014 - 11:37pm
Grrr, Used the Homebrew procedure: installed Homebrew; “success”, but…
upon running the script I get an error, looks like Homebrew didn’t install rsync 3.0?
rsync: –info=progress2: unknown option
rsync error: syntax or usage error (code 1) at /SourceCache/rsync/rsync-42/rsync/main.c(1333) [client=2.6.9]
Any ideas?
We shall not cease from exploration.
And the end of all our exploring
Will be to arrive where we started
And know the place for the first time. --TS Elliot
on March 6, 2014 - 11:50pm
If you have truecrypt installed see:
https://gist.github.com/trinitronx/5437061
We shall not cease from exploration.
And the end of all our exploring
Will be to arrive where we started
And know the place for the first time. --TS Elliot
on March 7, 2014 - 12:47am
Andy .. did this let you get rsync installed? That –info option only works with rsync 3.x. The version of rsync that comes with OS X is rsync 2.x.
Photographer | https://www.walterrowe.com | https://instagram.com/walter.rowe.photo
on March 7, 2014 - 1:11am
I did get it to work. After installing Homebrew there is a note to run ‘brew doctor’, and they mean it! I found that some crypto tech on my machine needed adjusting and the /usr/local/bin needed to be moved to the top of the list. I had other warnings, python and unwritable man files but the script worked and is currently doing it’s magic.
What is the difference in the two scripts where you have sudo rsync… and he has ./rsync…
Using ./rsync didn’t work for me?
We shall not cease from exploration.
And the end of all our exploring
Will be to arrive where we started
And know the place for the first time. --TS Elliot
on March 7, 2014 - 1:13am
The “./” says look for the rsync command in your current directory. Leave that off. Yes, you should edit /etc/paths and /etc/manpaths to put /usr/local first.
Photographer | https://www.walterrowe.com | https://instagram.com/walter.rowe.photo
on March 7, 2014 - 1:21am
Maybe we need a separate article here for how to get rsync 3.x installed properly?
Photographer | https://www.walterrowe.com | https://instagram.com/walter.rowe.photo
on March 7, 2014 - 1:32am
I feel it would be. I’m not a geek, just pretend to be one on the internet, but folks who know how to take instructions for the command line would benefit from understanding some of the nuances and possible detours. I don’t think the ladies would like to be ‘chown’d by a stranger or have to wrestle a python by themselves. Next thing you know they’ll be kidnapped by the Mysql tribe and held for random.
We shall not cease from exploration.
And the end of all our exploring
Will be to arrive where we started
And know the place for the first time. --TS Elliot
on March 7, 2014 - 1:35am
Ha! That made me laugh. I’ll see what I can work up. That TrueCrypt snafu was definitely not something I would have known about.
Photographer | https://www.walterrowe.com | https://instagram.com/walter.rowe.photo
on May 14, 2014 - 5:44pm
Perhaps once rsync 3.1.1 is released we can revisit this?
We shall not cease from exploration.
And the end of all our exploring
Will be to arrive where we started
And know the place for the first time. --TS Elliot
on March 23, 2014 - 8:16am
Good Article Walter, but just a little advice please, if my Aperture Library is in path /Users/TattooedMac/Pictures/Aperture Library.aplibrary and I want to Sync to a Ext HDD called Backup 1, how would I go about writing the path and being a sudo command, I know not to mess with it, so to be sure and double sure I want to be.
Appreciate any help mate Cheers
EDIT : **I have downloaded rsync via HomeBrew and is all good to go
__ __ __ __ __ __ __ __
Arguing with a zealot is only slightly easier than tunnelling through a mountain with your forehead.
"Can't innovate any more, my ass" Phil Schiller
on March 23, 2014 - 8:20pm
First I will show you how I would do it using my external HDs if I wanted to only sync a single library like you want to do. My external HDs are called “Photo Masters”, “Photo Backup 1”, ”Photo Backup 2”, ”Photo Backup 3”. The path to all externals HDs is “/Volumes/<HD name>”. My master library is called “Aperture Masters”. I put quotes around all the names because they have spaces in them. That is important to note because command lines interpret spaces as the end of one argument and the start of the next. When you place quotes around strings with spaces, it treats the entire quoted string as one argument.
The general format of an rsync command is rsync -a –delete source target
In case your font doesn’t show it, there is one dash in front of “a” and two dashes in front of “delete”.
I would run the following command to rsync a single library from one disk to another:
sudo rsync -a –delete “/Volumes/Photo Masters/Aperture Masters.aplibrary” “/Volumes/Photo Backup 1/”
sudo rsync -a –delete “/Volumes/Photo Masters/Aperture Masters.aplibrary” “/Volumes/Photo Backup 2/”
sudo rsync -a –delete “/Volumes/Photo Masters/Aperture Masters.aplibrary” “/Volumes/Photo Backup 3/”
Notice that I did NOT use a trailing “/” on the source. I want the library folder itself in addition to its contents. If I added a trailing “/” to the source, I would only get the contents of the library folder and not the actual Library folder itself. That would not produce the desired results. I DID use a trailing “/” on the target name because I want the library folder to be inside that target folder.
Now let’s look at your requirements. You need to know the name of your external disk, “Backup 1”. The path to that disk will be “/Volumes/<diskname>”. Using the source info you provided, your rsync command would look like this.
sudo rsync -a –delete “/Users/TatooedMac/Pictures/Aperture Library.aplibrary” “/Volumes/Backup 1/”
As with my commands above, notice I left off the trailing “/” on your source library name to insure that actual “Aperture Library.aplibrary” folder name itself is rsync’d across, and that I left it on your target “Backup 1” to make sure it is under that folder name.
Hope that helps!
Photographer | https://www.walterrowe.com | https://instagram.com/walter.rowe.photo
on March 24, 2014 - 12:12am
Thanks Walter that has helped a lot. I thought as much with the Paths, but wanted to make sure. I didn’t pick up on the -a –delete part of it, but yea again it has helped.
Im panning on doing as you are doing, and using my iMac or MBP as Aperture to make a Temp Library and do what ever adjustments I need to do, then sync to a master and then Master to Backup 1.
Just for clarification, using sudo rsync -a –delete is that deleting the (in my case) “/Volumes/Backup 1/” before the sync is done ?? haha sorry mate, just need to know if you know what I mean, when I’m playing with sudo :D Appreciate the help.
__ __ __ __ __ __ __ __
Arguing with a zealot is only slightly easier than tunnelling through a mountain with your forehead.
"Can't innovate any more, my ass" Phil Schiller
on March 24, 2014 - 12:17am
The –delete means delete in the target any files that don’t exist in the source. The -a alone would not do that. If Aperture deletes any files in the source library folder, you want to make sure your backup copy reflects that.
Photographer | https://www.walterrowe.com | https://instagram.com/walter.rowe.photo
on March 26, 2014 - 3:42am
Disregard I had a brain freeze Doh !!
__ __ __ __ __ __ __ __
Arguing with a zealot is only slightly easier than tunnelling through a mountain with your forehead.
"Can't innovate any more, my ass" Phil Schiller
on March 25, 2014 - 12:03pm
I think something is amiss in your command line. Notice that the “link_stat failed: no such file or directory” error is on the “delete” argument with some funny characters in front of it. That says to me that you don’t have normal “dashes” in front of the word “delete” and so rsync interpreted that “delete” with the funny preceding characters as the “source” and not as an “rsync” command line option.
I recommend you not copy-and-paste those commands from the website here. Type them in manually, character or character. Maybe a copy-n-paste from the website into a Terminal window created that problem? Just a wild guess.
Photographer | https://www.walterrowe.com | https://instagram.com/walter.rowe.photo
on March 26, 2014 - 12:50pm
Thanks Walter, appreciate your help, but I had a brain freeze, as I’m in the middle of python lessons and this just didn’t click that early.
Ive gone ahead and just used rsync 2.6.9 that is in Mavericks at the moment, and for others this is a easy way of doing it without using sudo.
First if you want to go down this route in Terminal type $ rsync -a -delete (if the $ is already there start from rsync) and hit space bar so there is 1 space after ”Delete” then drag the Aperture Library (Master or whatever your wanting to sync from) into the Terminal window, then hit space bar again, and then drag the destination or where you are wanting to sync too into the Terminal Window a hit return.
This is quite quick in my reckoning, as it synced a 35GB Library in seconds ..
this is my complete command $ rsync -a –delete /Users/TattooedMac/Pictures/Aperture\ Library.aplibrary /Volumes/Aperture\ Master
Doing the drag and drop method closes what it needs to and you know you won’t make any mistakes, and not messing with sudo things can’t get stuffed up, and you won’t mess with your system at root level.
Not trying to take away from a excellent post from Walter, but once my brain cleared, I found this the easiest way.
__ __ __ __ __ __ __ __
Arguing with a zealot is only slightly easier than tunnelling through a mountain with your forehead.
"Can't innovate any more, my ass" Phil Schiller
on March 26, 2014 - 12:01pm
Yes, that works well too. I still think you need two dashes in front of “delete”. You don’t necessarily need to ”sudo” the rsync command. I switch between different computers that have different login accounts on them. I “sudo” the rsync to insure I have no permission issues later. Glad you got something that works. That’s the most important point.
Photographer | https://www.walterrowe.com | https://instagram.com/walter.rowe.photo
on April 28, 2014 - 11:22pm
FYI:
The script below was running fine until I reinstalled Mavericks, after a serious crash, (adware removal catastrophe):
sudo rsync -a –info=progress2 /Volumes/petras/ /Volumes/Backup\ 1/
But now I get:
rsync: –info=progress2: unknown option
rsync error: syntax or usage error (code 1) at /SourceCache/rsync/rsync-42/rsync/main.c(1333) [client=2.6.9]
I had already installed homebrew and rsync 3.1.0.
Also, read that Apple has “banned?” rsync 3.1.0 support because of licensing issues?
ADDENDUM: rsync 3.1.0 broken, http://selfsuperinit.com/?s=rsync
We shall not cease from exploration.
And the end of all our exploring
Will be to arrive where we started
And know the place for the first time. --TS Elliot
on April 28, 2014 - 5:39pm
Check your /etc/paths and /etc/manpath?
Photographer | https://www.walterrowe.com | https://instagram.com/walter.rowe.photo