MacPhun’s Snapheal Pro Released Today — First Look
MacPhun is one of those companies that you may have never heard of, but I promise you’re going to like what you see here. The Ukrainian-born company with a shiny new US headquarters in sunny Del Mar, California, today announced an updated and upgraded version of one of their most popular products, Snapheal Pro.
Snapheal (the original) was named by Apple as one of the best Mac App Store apps in 2012. Now a year later, MacPhun has improved and added onto the app, branding it Snapheal Pro. I’d only taken a cursory look at the original, so this isn’t going to be a comparison article. This is however a first-look at the app’s namesake feature; it’s ability to heal — in a snap — just about any blemish, flaw, or unwanted object in your scene.
Aperture’s healing tools are good, but not great. They work fine for sensor spot removal, minor blemishes, stray hairs and the like. The ability to lift and stamp a series of retouching spots to remove sensor dust across 1,000 images can’t be beat. However when it comes to heavy retouching, Aperture doesn’t compare to Photoshop’s latest crop of repair and healing tools, and frankly it’s one of the very few things I regularly go to Photoshop to do. Of course Photoshop CC is a very expensive way to get a good healing brush.
But now… enter Snapheal Pro. For just $40, you can get your hands on Photoshop-class (or better?!) healing and repair tools, and use it as a stand-alone app, or as a plugin for Aperture (or Lightroom or Photoshop or Photoshop Elements for that matter).
So, let’s dive in and see how this works.
Preamble
Just to get this out of the way… I have been working with a pre-release of the software. As I note oddities or bugs in here, realize that they may be fixed by the time you download the software, or likely soon after.
And as always, remember that ApertureExpert has zero advertising and accepts no compensation for writing these articles. However, the links to the product pages are affiliate links. I don’t write reviews of software I don’t like, which keeps this thing simple. If I like it, I’ll tell you, and if you buy it, the site will earn a buck or two. If I don’t like something, I just won’t tell you about it. Easy enough.
And finally, there’s a short-lived discount code at the end. If you can’t wait to buy, scroll down to grab it quick!
First launch
The app comes with no installer; it’s just drag-and-drop into your Applications folder. At which point you might be wondering what’s next… are you supposed to set Snapheal Pro as an external editor? I wasn’t sure (and perhaps the shipping installation package will tell you what to do), but since to install I dragged it into the Applications folder, I figured launching it from there was a good place to start. Good choice — I immediately was presented with the option to install whichever plugins I needed. Once the app itself is launched you can just drag images in to open them, but I quickly quit and jumped over to Aperture so I could open photos from there.
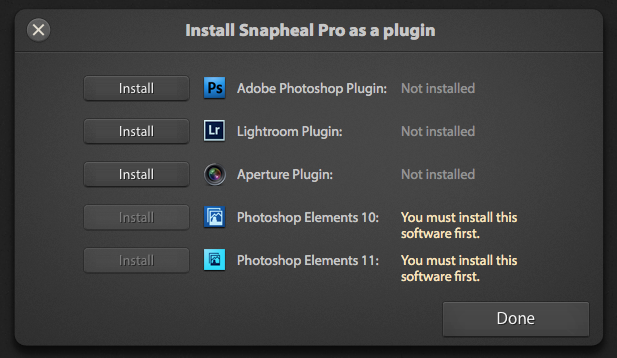 When you first launch Snapheal Pro, you’ll have the option to install the Aperture plugin
Accessing Snapheal Pro from Aperture 3
Even though Snapheal is an application, it can be run as a plugin, which is very, very cool. This means you can use the same tool from Aperture without having to set it as an external editor (an annoying limitation in Aperture where you can only choose one external editor at a time), and simply send your photo there from the plugin list — or if for any reason you want to, just launch Snapheal Pro from the Finder and edit an image on your desktop. I don’t know that I’d ever do that, but having options is rarely a bad thing.
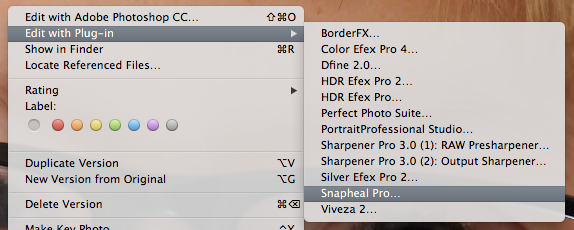 Snapheal Pro as a plugin to Aperture 3
Let’s fix something…
I captured most of the following screenshots on my very first jump into Snapheal Pro. I wanted to share my first-time experience, bumps and all. Here’s the photo I sent to retouch. As you can see, the little guy has a big owie under his lip, plus some little marks on his nose, and finally scratches on his glasses. Those are the things I wanted to try to heal.
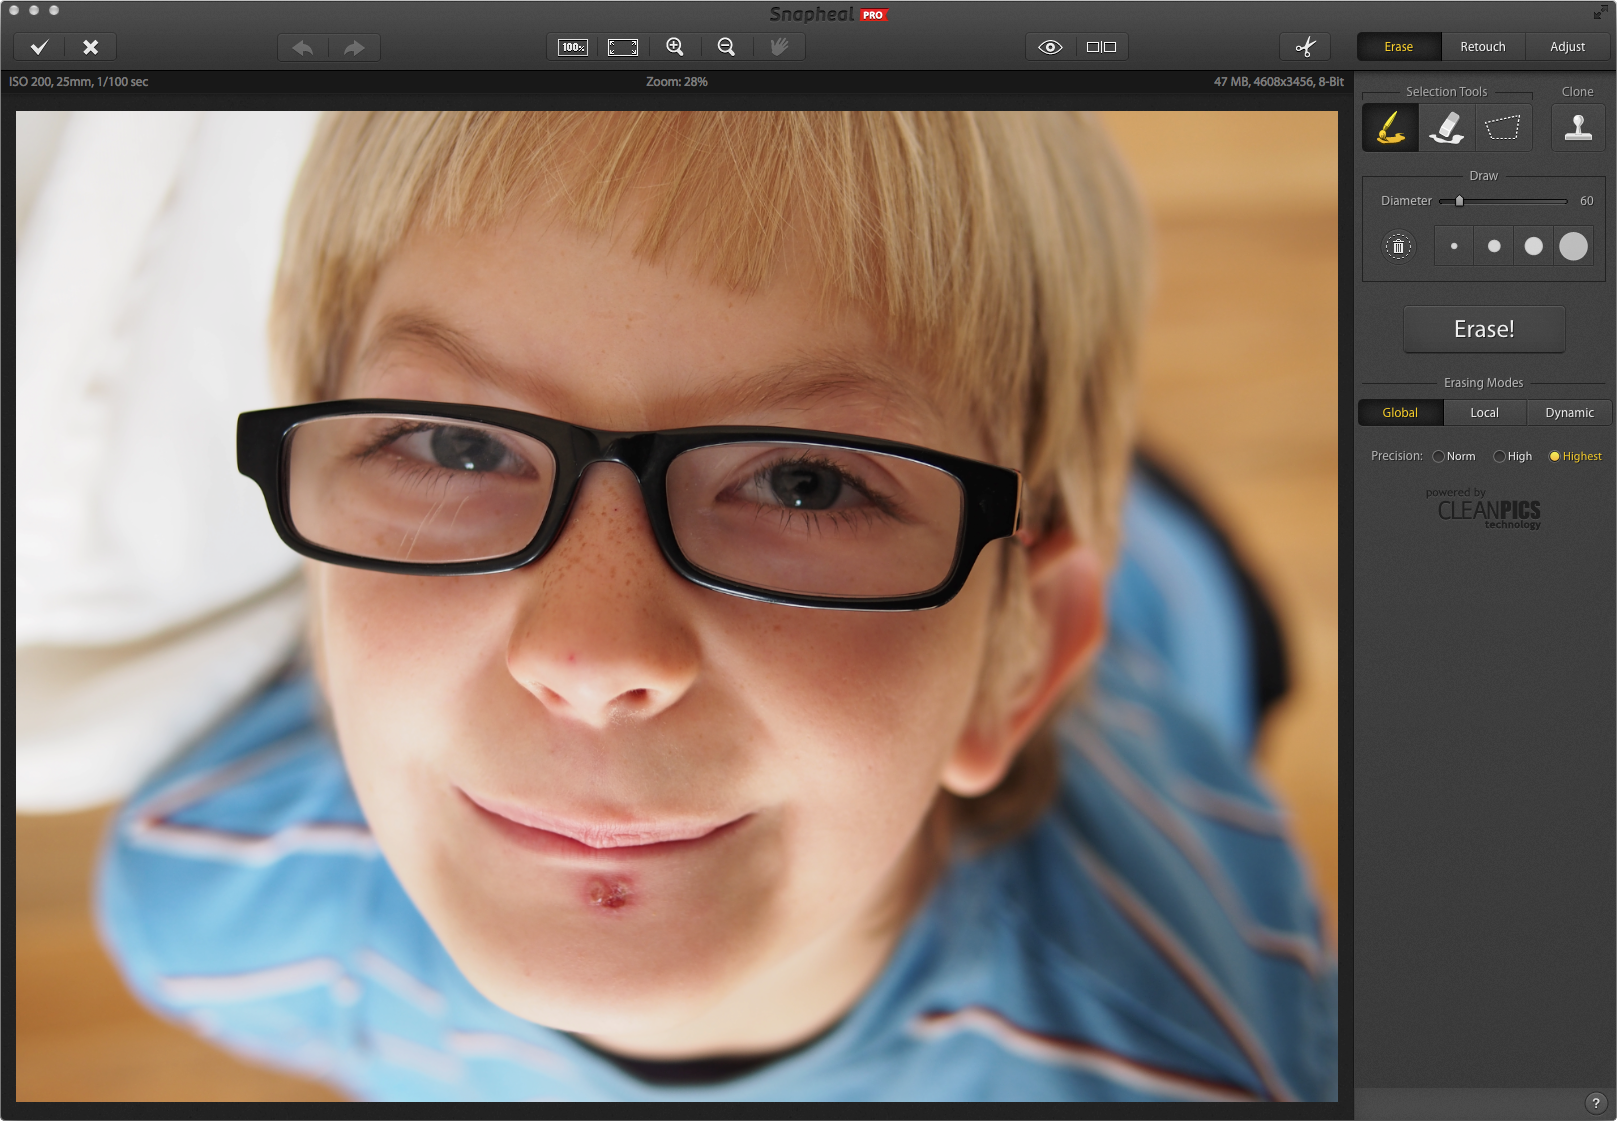 This little guy has a big owie that needs to be fixed
As you can see the interface is uncluttered and simple. Not a ton of buttons, and there’s a bit of guidance when you first go in, suggesting what you do. Here’s an example of one of the suggestions it made while I was first erasing an object.
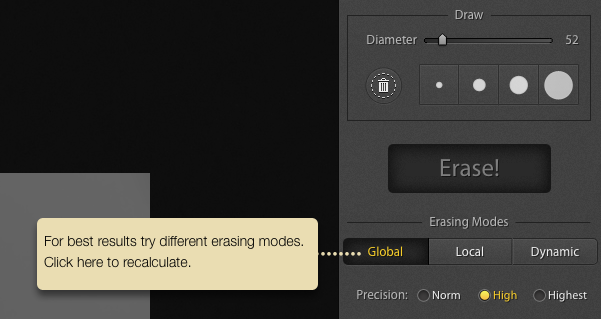 Snapheal Pro will make suggestions when you first use it, training you how to use the tool
But I’m getting ahead of myself. When the app first launches, the brush tool is automatically selected. It’s clear that you need to paint over whatever you want to fix, and my first instinct was to zoom in 1:1. I hit Command-1, which is the Photoshop shortcut for zooming in, and that took me to 100%. Nice.
My brush size was a bit small for the area I needed to paint over, and you can choose from preset brush sizes or simply drag the diameter slider as needed. What you can’t do however is scroll your Magic Mouse or Trackpad to adjust brush size, which is something I’ve come to love in Aperture. Hopefully this is a feature we’ll see added.
In better news though, the brush size does change size on varying pressure on a Wacom tablet. (The eraser isn’t selected when you flip the pen though, another feature I’m sure we’ll see addressed).
But enough nitpicking… let’s get to work!
I drew with my mediumish sized brush over the blemish, and very quickly figured out how this works. You paint a mask, which you can add to and erase, and once done you click the big Erase! button.
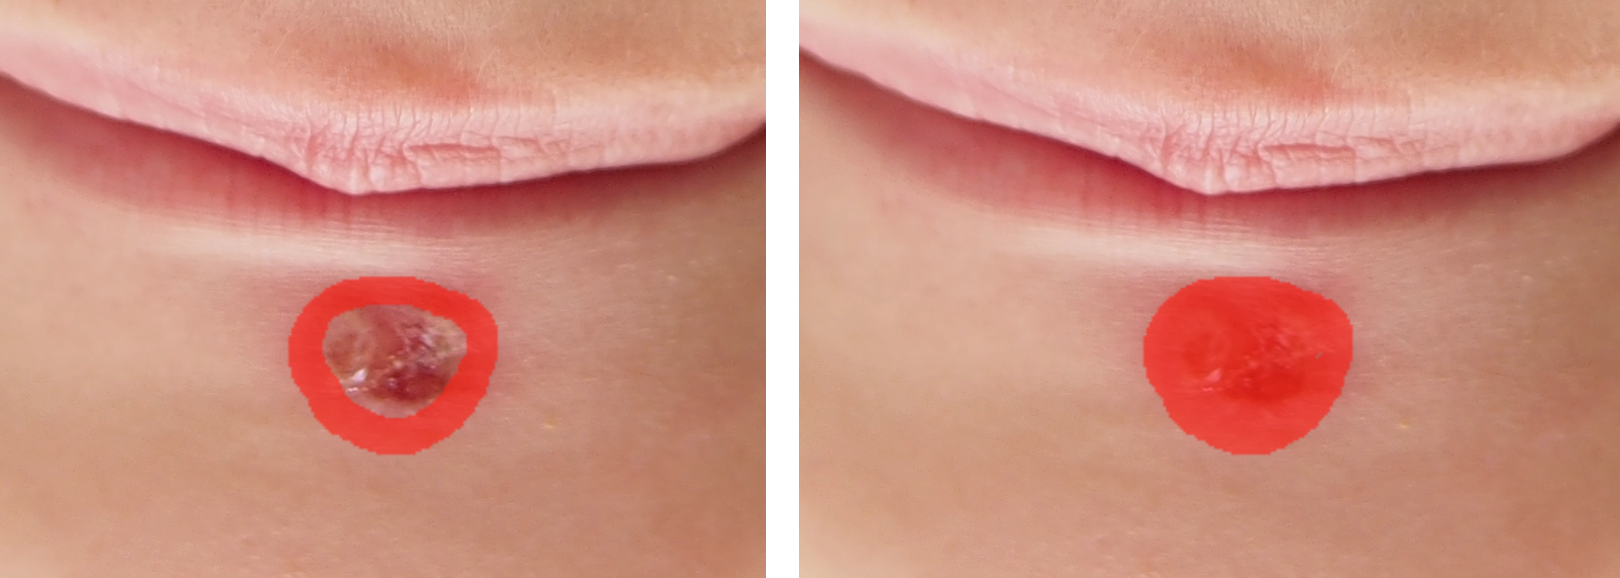 You have to brush a mask over the area you want to heal, and you can add to or remove from that mask as needed
Erase!
Once you’ve masked out an area (or areas — I’ll come to that) just click the big Erase! button. The first heal didn’t look so great, but the default Erasing Mode is “Global”, which turns out to be the exact wrong mode for skin. As you saw in an earlier screenshot, you’re guided to try different modes, and that’s very important. As you hover your mouse over each one, you’ll see a pop-up describing what each mode does, like this.
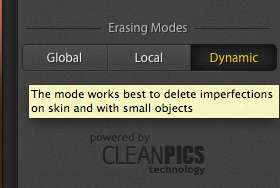 Each mode has a description that includes when to use it
Here are the three modes:
- Global: Works best when you want to erase big objects
- Local: Use it for images, depicting sky, clouds, multiple small objects, etc.
- Dynamic: The mode works best to delete imperfections on skin and with small objects
I know, they don’t all make sense to me either. I think there’s a little “lost in translation” happening, between engineering and marketing as well as Ukrainian to English. But hey… just try them. And what’s especially cool is that once you try a mode, which the app takes a little time to process, you can swap between results instantly. Very nice.
Incidentally, while processing, you’re presented with one of the more useful dialogs I’ve ever seen in 20 years of dealing with software… “Facts, Hints & Quotes”! This is neat, and makes long dialogs much more bearable!
 Did you know this? I didn’t…
There are also three Precision options; Normal, High and Highest. The lower the setting the faster it processes, and of course the less accurate it’ll be. I’ve played with all the settings and as far as I can tell, the best reason to go with a lower option is to quickly pick a mode, and then increase the precision on that mode for the final process. I think it’ll come down to the speed of your computer, the size of your repairs, and your overall patience. If you paint a large area, trying each mode can take several minutes to process at the Highest precision. So dropping to Normal, comparing all three, then upgrading to Highest might be a good way to go. You’ll have to experiment to see what works for you.
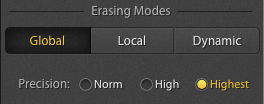 Precision choices are Normal, High and Highest
Results
Here’s a somewhat final result on this particular blemish. To be fair this wasn’t a single application; I saw that I hadn’t made my original selection quite large enough, and went over some funky edges with a new mask, and processed again. This isn’t perfect yet (I can still see a little “stitching” line), but it’s very good.
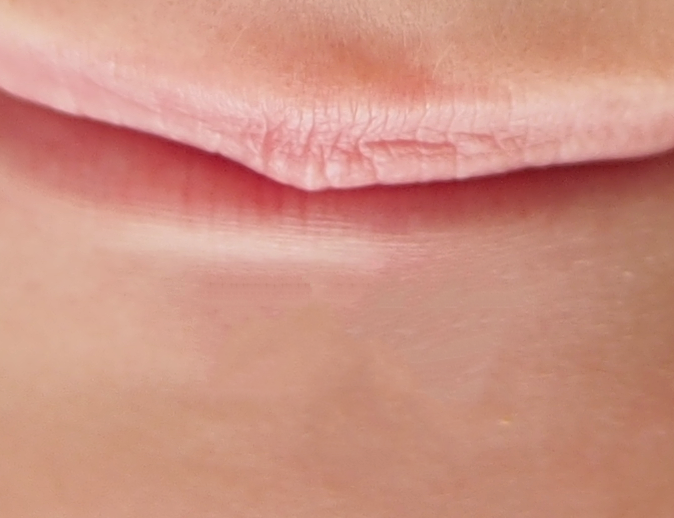 A pretty good result after a little clean-up
Cleaning up multiple spots at once
One of the cool ways you can work is to paint over multiple blemishes at once, creating masks for each one, without having to wait for one to finish processing before moving on to another. So for example on the scratched glasses here, I was able to paint lines over each scratch, and remove them all at once.
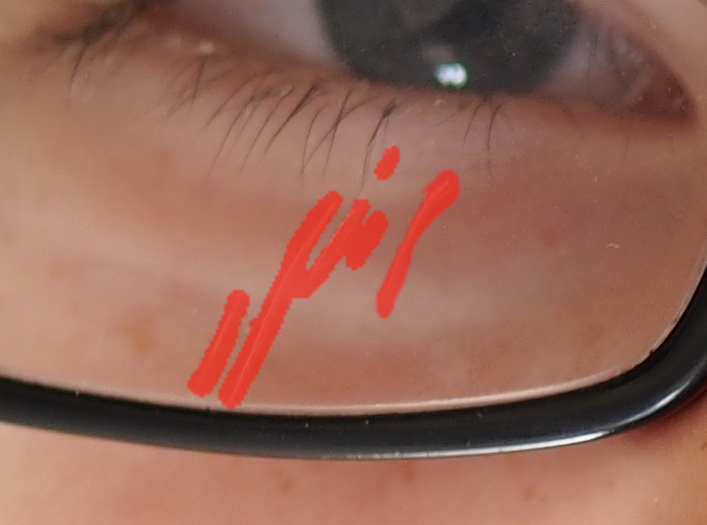 You can paint masks over multiple blemishes at once
This can be a real time saver. In this case after hitting Erase!, the mode that handled it best was Local.
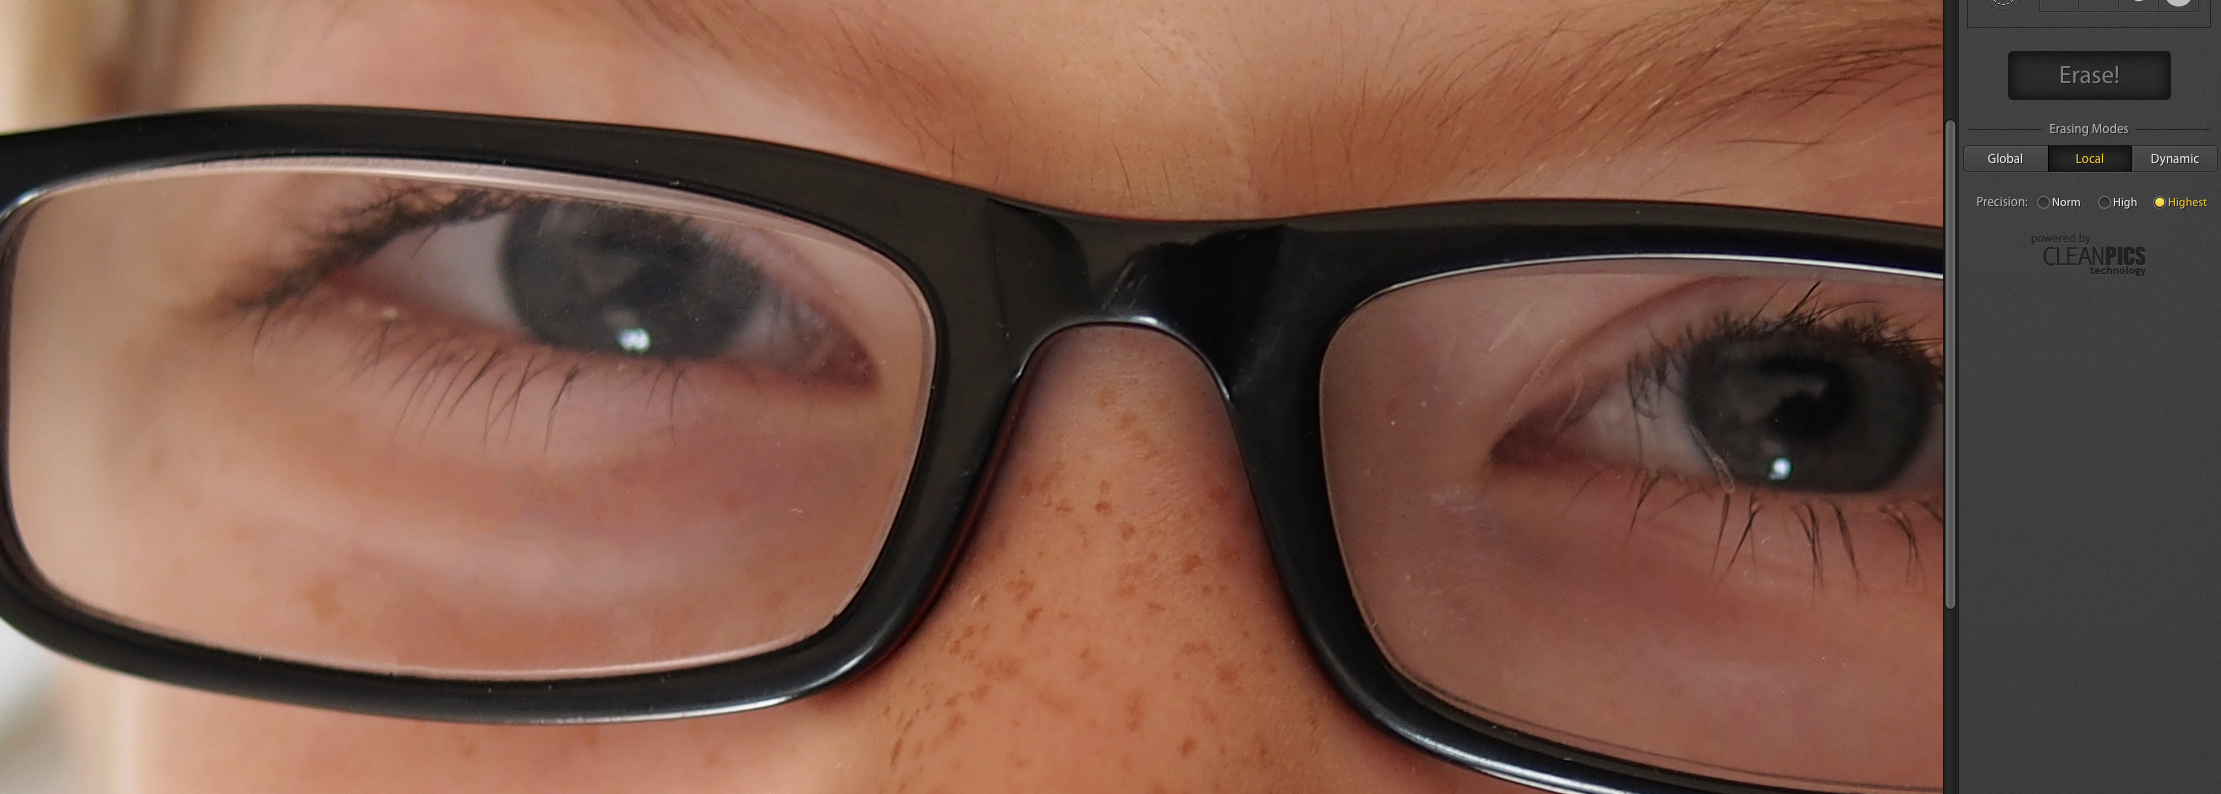 Local was the mode to use here, and the scratches are completely gone
I would suggest however that if you’re going to paint multiple areas at once, make sure they are the same kind of object to remove, for multiple reasons. First and most obviously, if you need a different mode in different areas (such as the chin scab vs the eyeglasses scratch), you have to apply a single mode to the entire selection. So mask one type of problem, fix it, then move on to another. And secondly, if you zoom in and out of your image painting loads of masks in, then run the repair, chances are some heals won’t look so perfect… but if it’s panned off screen you may miss it. So just focus on one type of problem, and one part of your image, at a time.
That said, if you do attack the entire photo at once, be sure to use the before/after toggle as you scroll around the image. This will allow you to instantly see the original objects back in the scene, so you can quickly judge if the removal was successful, or overly obvious.
 The eye lets you see the original
Object Removal
If you look at the sample images from MacPhun, you’d think that the app is completely magic. Point at a person and make them disappear, like your mouse is a wand from Diagon Alley. And while I don’t dispute that the level of clean-up in the sample photos can’t be done, between a few carefully made selections and some cloning added in as well, it’s not point-and-poof removal. Here’s an image I threw at it to see what would happen.
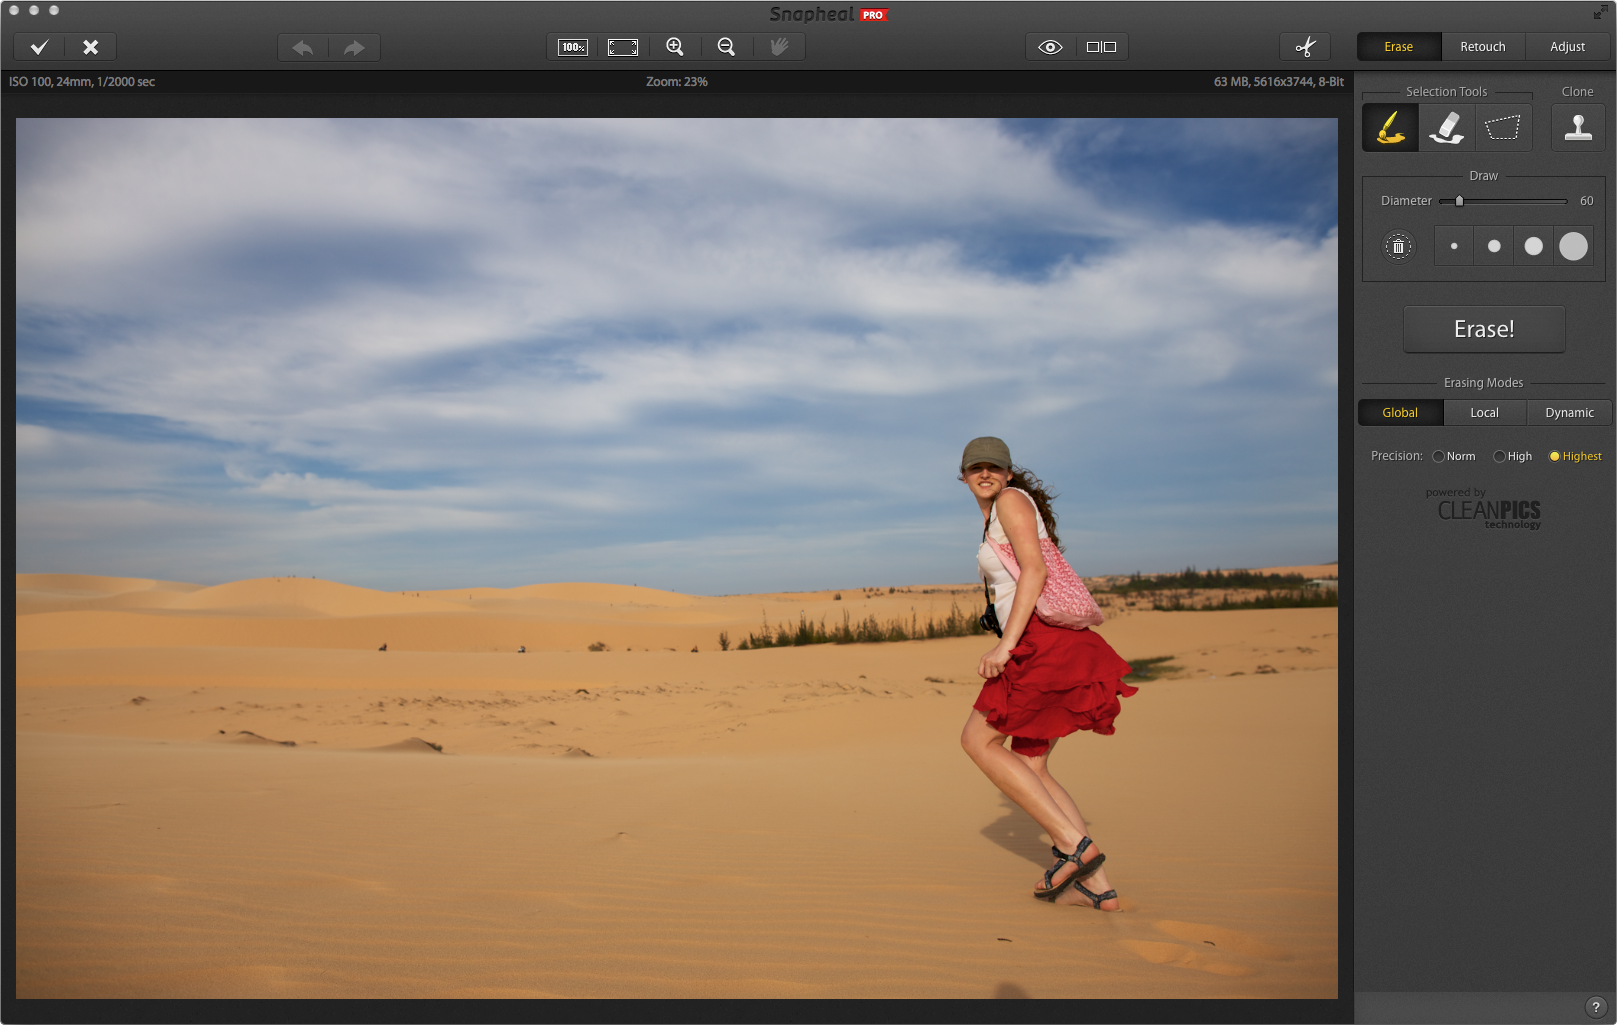 I don’t know why, but we’re going to try to remove her from the scene
You don’t have to paint over the object to remove, by the way. You can use the polygon tool, which works like any other — just drag around it, and when you let go of the mouse, the selection fills in.
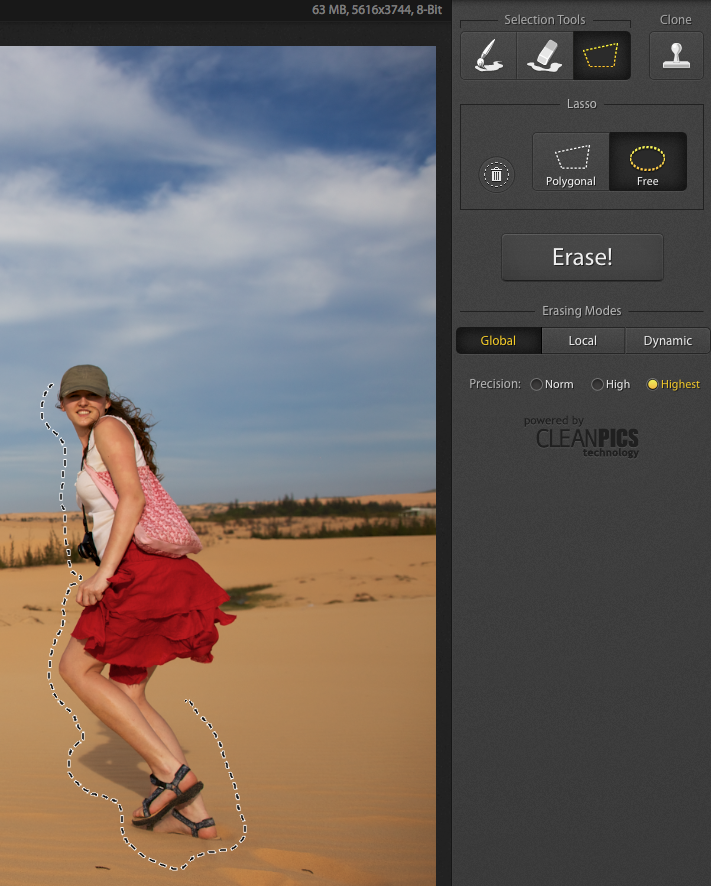 Drag around your object to remove if you prefer
Once the person was selected, I tried each of the three Erasing Modes. They are below, in order of the buttons — Global, Local, then Dynamic.
 The original selection, and all three removal modes
The middle one, Local, is the best here — but it’s far from complete.
There is also a cloning tool, so I think it’s fair to say that the marketing sample images are further retouched, but it’s also fair to say that this is a good start. When it comes to object removal of this caliber, that Local mode is off to a good start for sure.
Here’s another example of a much simpler object removal. This is very typical of what I’d do (the complete person removal, on the other hand, is not). In this scene there was a ton of trash on the sand dune. As you can see in the triptych below, there’s the original, the masked, and the retouched. This worked extremely well, and was very quick to do.
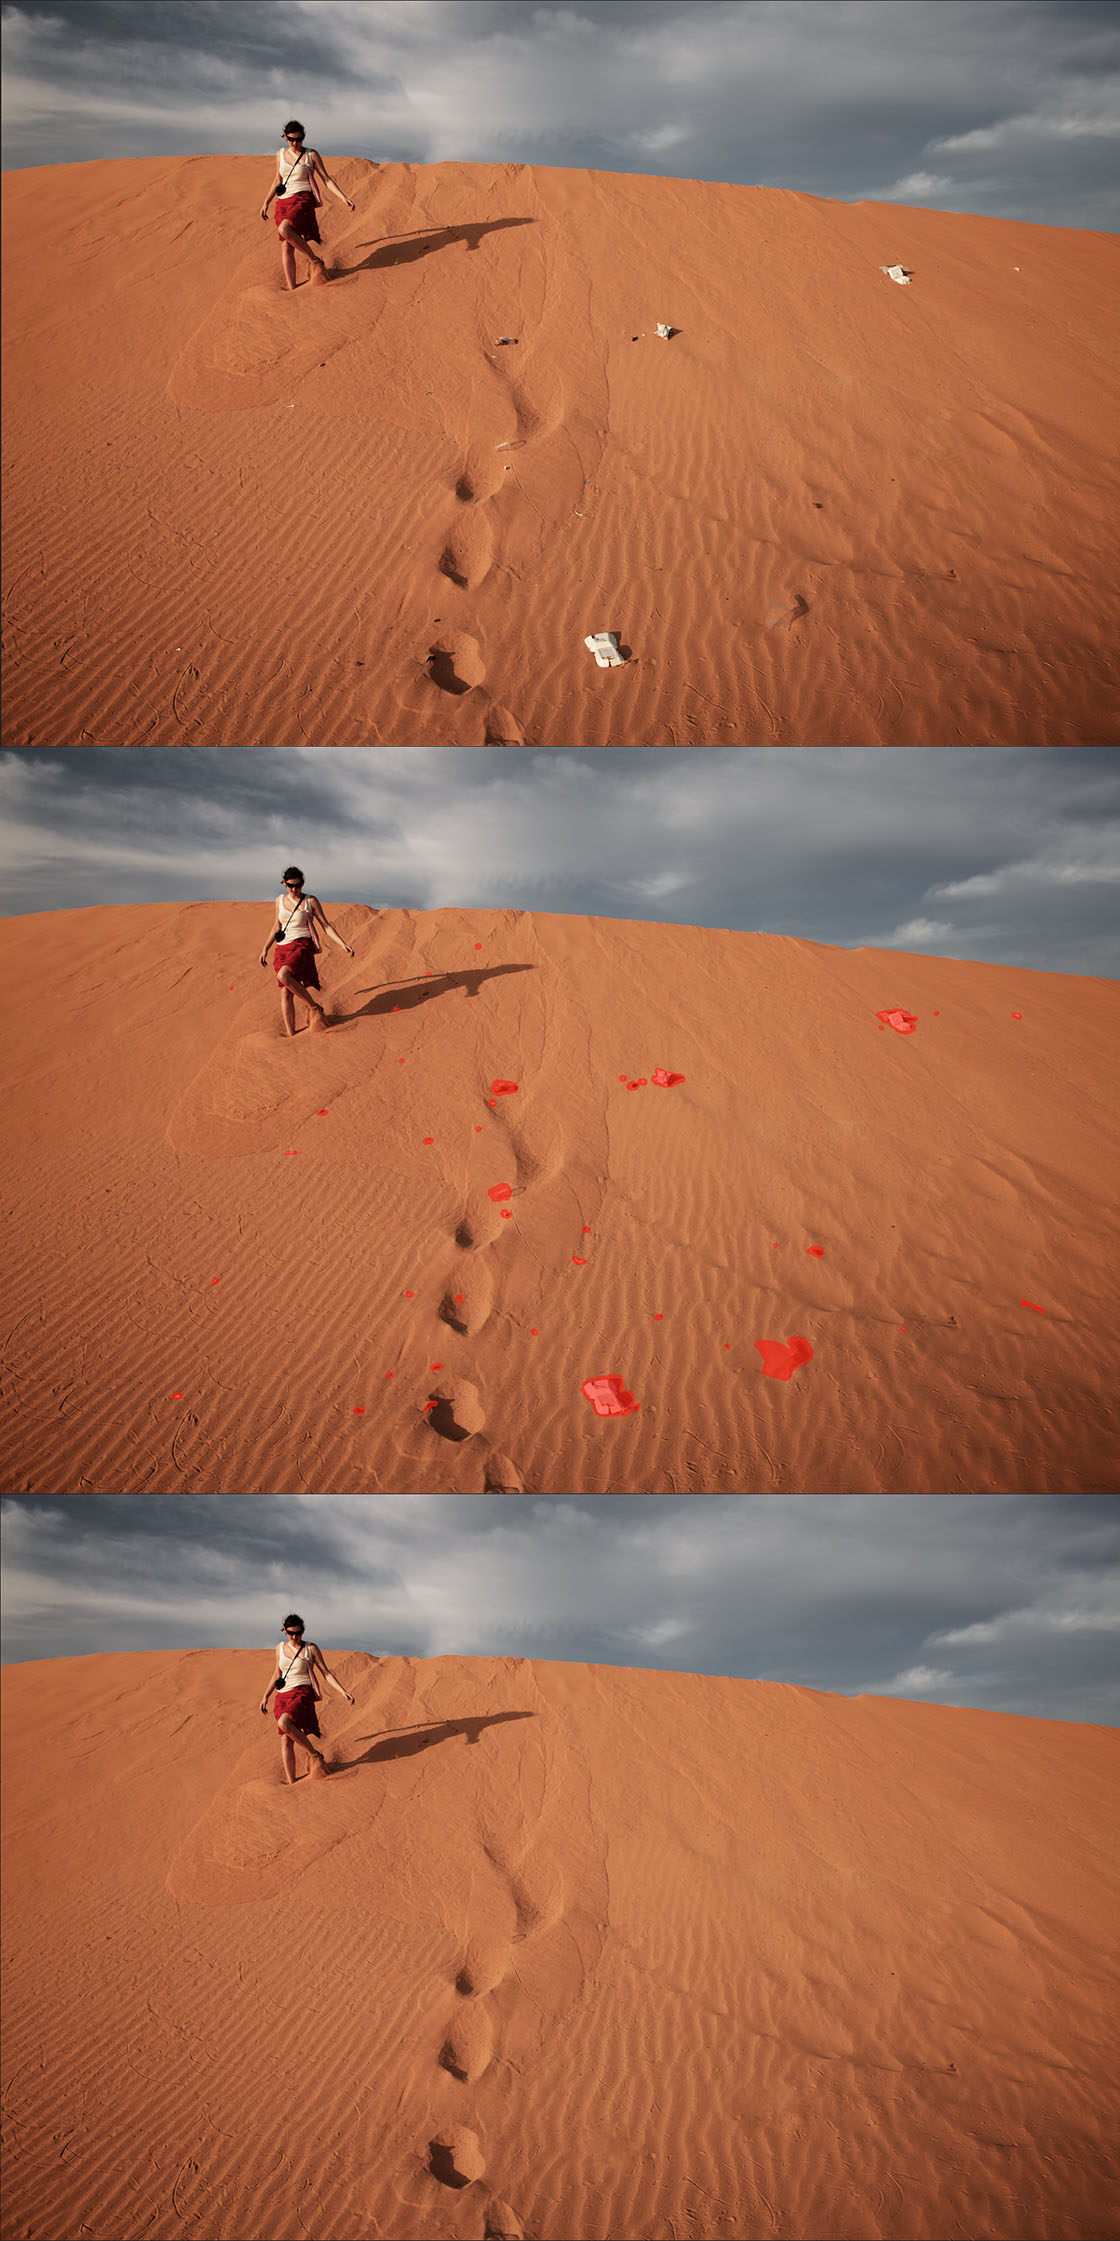 Original, masked and retouched. Very quick, very easy, very accurate.
Compared to Photoshop or Aperture
How does that compare to Photoshop? Too soon to tell, but I will dig into this deeper and do a more accurate comparison. For now I’m very impressed though, especially given the simplicity. Here’s one thing that comes to mind when doing clean-up like this however. I actually like that in Photoshop (or even in Aperture), I’m cleaning one thing at a time, and seeing the result instantly. Often I’ll try a variety of tools on a single blemish before I find what works best, then move on to the next one and probably repeat the removal using the same tool, moving along until the blemish type changes. But the point is that I don’t move off of a problem until I’m 100% satisfied. That’s not to say you can’t work that way in Snapheal Pro, but that’s not how it’s designed, and so if you want to go one at a time, you’ll be moving a bit more slowly here.
An image oddity on preview
Here’s something I noticed when using the compare button (the eye icon). The overall image — even areas that hadn’t been touched — were slightly softer. This concerned me at first, because I thought maybe the entire image was getting hit when it shouldn’t have been. This turns out to be just a preview issue; once you render back to Aperture, the original untouched pixels are still untouched. I only mention it because if you see it, don’t be concerned — it’s not real.
Snapheal Pro does a lot more, actually
Healing is what interests me the most here, but Snapheal Pro does more than that. There are two additional tabs; Retouch and Adjust. Retouch may not be the best name as it’s about adjusting colors, dodging and burning, etc. using their brush brushes. If you were buying this as a stand-alone image editor, these are probably great tools. Same for Adjust, which is a global exposure, highlights & shadows, etc. type of tool. But if you’re sending images from Aperture, you’ll be wanting to do all that natively on the RAW image, not here on the TIF or PSD file. Maybe there’s more to it than that; I honestly haven’t looked yet, given that the healing aspect was the key feature I was interested in here. But it’s good to know that these features are there as well.
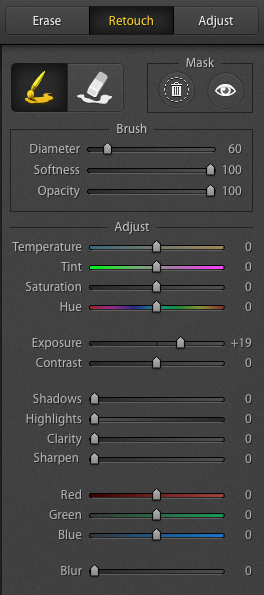 There’s more to Snapheal Pro than just healing
Summary
Keep in mind this is a first-look, and not a comprehensive analysis. I will definitely be looking at Snapheal Pro more closely, and adding it to my workflow while I experiment. I already own (er, subscribe to) Photoshop CC so I don’t necessarily need this, however if you’re an Aperture user without Photoshop and have a desire to do better retouching than you can do now, you’d be hard pressed to find an easier or more affordable solution.
At the end of the day, this is a $40 app that does something very, very well that you could pay hundreds of even thousands of dollars for in other apps. If you don’t have Photoshop, I recommend Snapheal Pro as a must-have. If you subscribe to Photoshop CC and primarily only use it for retouching, you should give this a serious consideration.
Price and discount code on Snapheal Pro
As promised, there’s a slight and very brief discount on offer right now for Snapheal Pro. Using the code ApertureExpert on checkout, you can get an additional 10% off. This discount expires midnight GMT on Sept. 06, 2013, so if that 10% helps to make the decision, make it quickly :)


Comments
on September 5, 2013 - 3:27pm
I have Snapheal 2.4, I do not see what would make it worth upgrading to Snapheal Pro. Can someone tell me what Pro’s got that makes it worth buying?
thx.
on September 5, 2013 - 6:13pm
I have Snapheal 2.4,bought from App store.
will update version on App Store?
on September 5, 2013 - 11:43pm
Joel,
If I understand this correctly after researching this product Snapheal 2.4 is a standalone program. Snapheal PRO works as a standalone application or as a plug-in for Adobe Photoshop CS5-CS6; Photoshop Elements 10 or later; Photoshop Lightroom 4.0 or later; Apple Aperture 3.3 or later.
With either version I think you get the same results. I do like the idea where you can use Snapheal as a plugin. To me that is a real advantage.
Stu
Stuart
Website: http://www.stuartonline.com
Google+: https://plus.google.com/+StuartSchaefer/
on September 6, 2013 - 12:17am
Purchased yesterday at sale price using PayPal. Everything confirmed by company, but have yet received an email that will direct me to the download. Sent them an email this AM.
Don Boys
on September 6, 2013 - 12:17am
Does Snapheal Pro work in 16 bit?
Geoff Gammon
on September 6, 2013 - 12:34am
Just received this note
Hi there,
We are really sorry for the inconveniences you experience.
There have been so many orders since Snapheal PRO launch day on Sep 4,
that we’ve been having some issues with the codes delivery delays.
However we do our best to send you the app and activation code within the next 24 hours.
Thanks for your understanding, our sincere apologies.
We will also appreciate if you can notify us when you get your app copy.
Thank you!
Oksana
Macphun Support Team
Don Boys
on September 6, 2013 - 1:49am
Hi folks - As Donald’s re-post of Oksana’s email mentioned, we’re working on getting all the keys out. Should be fixed very shortly and then we’ll email all purchasers. In the meantime, you can easily use the free trial version found at www.macphun.com/snaphealpro. Just a few other quick replies:
@power hua - Snapheal Pro is currently only being sold direct from MacPhun. The App Store doesn’t support plug-in sales.
@stuart - great answer. Product runs as a plug-in to those hosts.
@geoffrey gammon - not sure on that, will check.
Cheers, Kevin (from MacPhun)
Kevin La Rue, Skylum
on September 6, 2013 - 2:37am
Insofar I have not been able to run the trial version successfully on my system.
Every selection, no matter how small it is, is evaluated as too big and not processed.
I am in touch with MacPhun awaiting for their replay.
Ario
on January 21, 2014 - 3:56pm
Hi Ario, I suppose you have OS X 10.9, that’s why the app didn’t work in September, as there was no update for Mavericks. Now both Snapheal and Snapheal Pro work fine on Mavericks. If you still have some issues, you can contact Macphun support guys at support@macphun.com.
on September 6, 2013 - 6:01am
The site does not accept the ApertureExpert discount code. Has it already expired? I thought it was through Sept. 6th.
on September 6, 2013 - 7:51am
Brooke,
I just now ordered at 5:43pm CT using the code and received the discount. Now I will say when I typed in the code in, it would not take it. However I cut and pasted it and it worked like a charm and paid $34.99. Received my conformation and activation key in about 60 seconds.
Stu
Stuart
Website: http://www.stuartonline.com
Google+: https://plus.google.com/+StuartSchaefer/
on September 6, 2013 - 8:24am
Well, I just downloaded and installed Snapheal Pro and the plugin showed up in Aperture 3.4.5, LR 5.2RC and Photoshop CC. Tested it in all programs and I must say I was impressed. I think Snapheal pro works as well as contain aware fill or maybe even better. It is pretty fast also. Using this as a plugin is so much better then having to a roundtrip into Photoshop or other programs.
Stu
Stuart
Website: http://www.stuartonline.com
Google+: https://plus.google.com/+StuartSchaefer/
on September 19, 2013 - 5:30am
I purchased Snapheal 2.4 from Apple’s App Store last year, hoping that it would deliver on the Content Aware Fill that it promised for less than $20. It was nothing but frustration for me. The content aware fill never worked as well as I wanted it to, is buggy, and when it works it is slow. I also have FX Photo Studio Pro. Similar story.
I won’t be buying any more Macphun software until I see some updates on their existing software that greatly increases stability and performance.
Bill Montgomery
www.montgomeryweddingphotography.com/
on January 21, 2014 - 4:01pm
Hi Bill, could you send some of your photos to oksana@macphun.com? I’ll be happy to work on them and show you the results. Btw, Macphun released Snapheal 2.5, so it should work faster.
on September 24, 2013 - 10:34am
This post was where I first heard about this software, and now I’m considering buying a $50 bundle that includes it.
deals.macupdate.com
If you need a couple things in there, it could be a good buy.